HubSpot Ticket AI Action and Contact Sync
This guide explains how to connect LiveChatAI to HubSpot, create support tickets based on conversation conditions, and sync LiveChatAI contacts with HubSpot.
When the HubSpot Ticket action is triggered, LiveChatAI creates a ticket and associates it with the relevant HubSpot contact.
What this integration does
The HubSpot integration provides two main capabilities:
- Creates HubSpot tickets when a visitor requests human assistance or meets another condition you define.
- Syncs visitor information collected by LiveChatAI with HubSpot contacts.
You can also extract details from conversations, add them to ticket descriptions, map contact fields to HubSpot properties, and access HubSpot records from the LiveChatAI Chat Inbox.
The HubSpot Ticket action creates a ticket for follow-up. It does not transfer the ongoing conversation to a live HubSpot agent. For real-time conversations, use the Live Chat action.
Prerequisites
Before connecting HubSpot, make sure you have:
- A HubSpot account.
- Permission to connect applications and manage contacts and tickets.
- A LiveChatAI chatbot where you can manage AI Actions.
Step 1: Add the HubSpot Ticket action
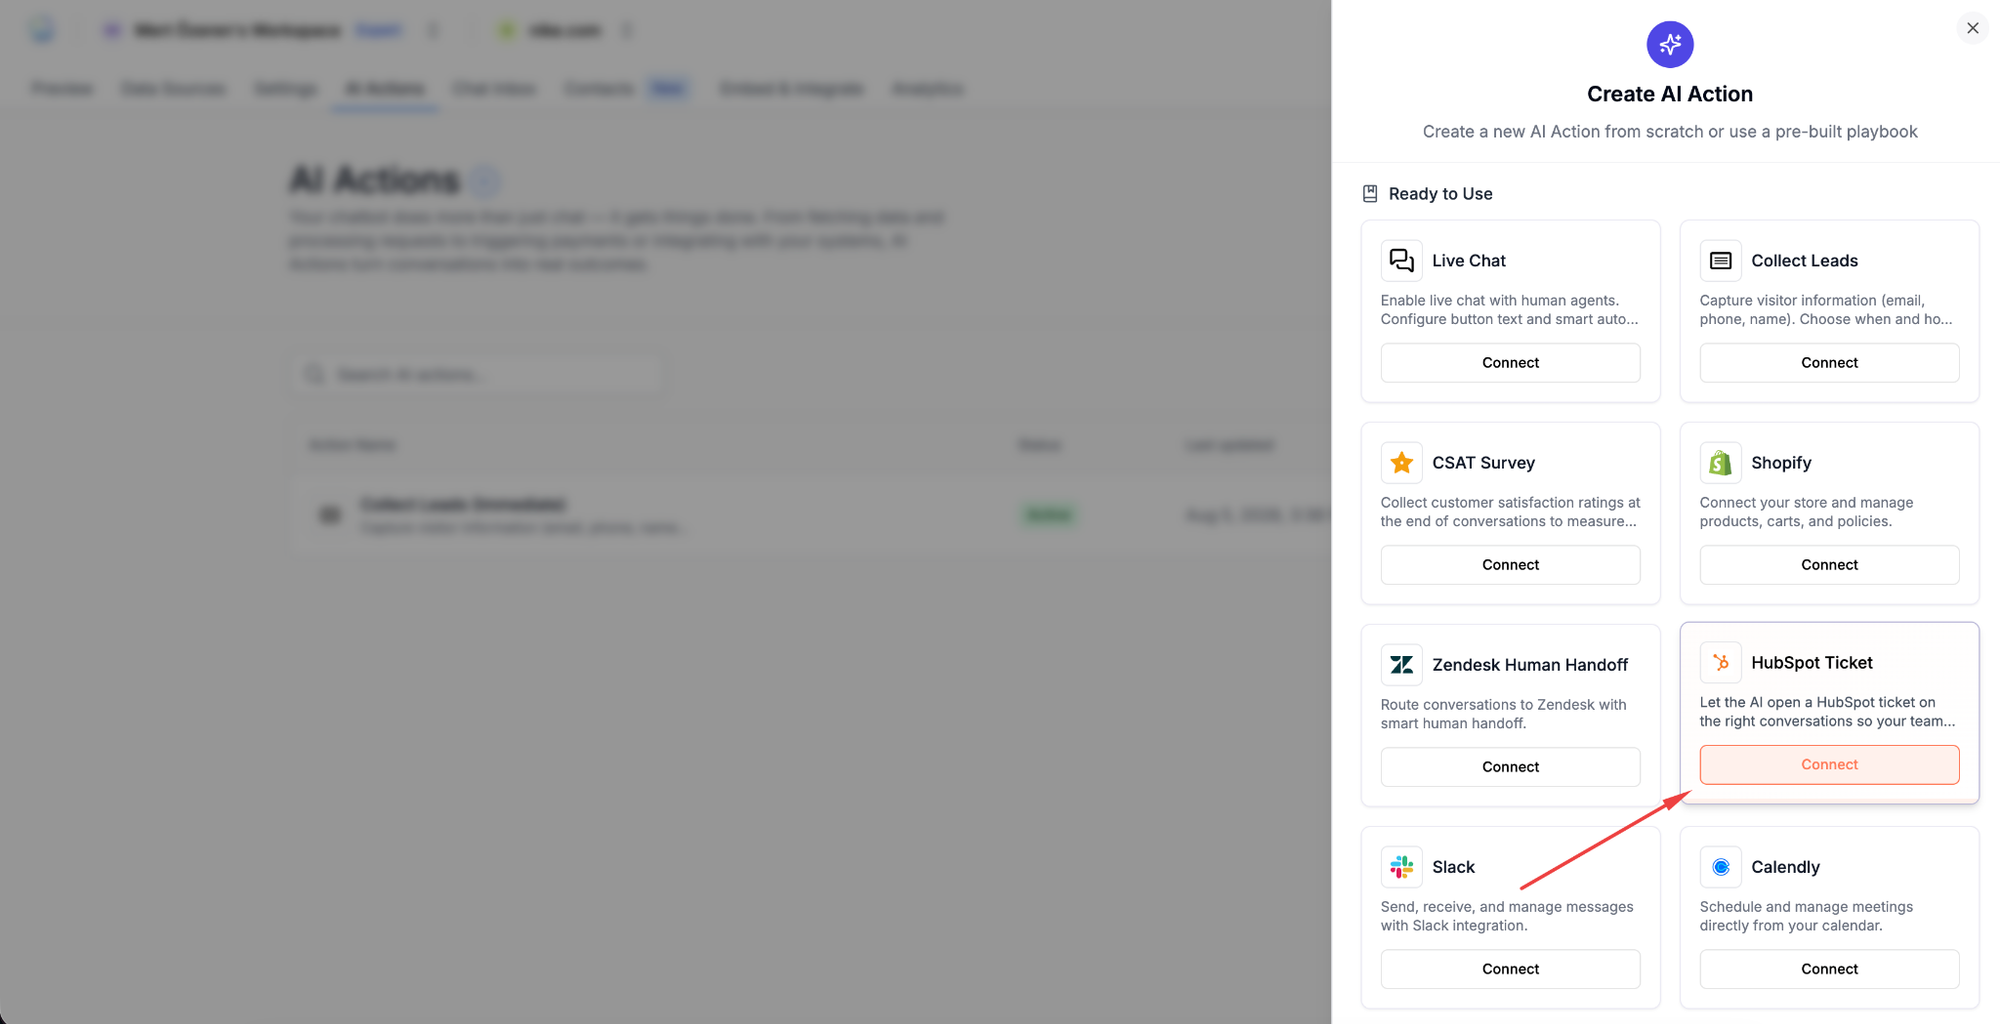
Open your chatbot in LiveChatAI and go to AI Actions.
- Click Create AI Action.
- Find HubSpot Ticket under the ready-to-use actions.
- Click Connect.
Step 2: Connect your HubSpot account
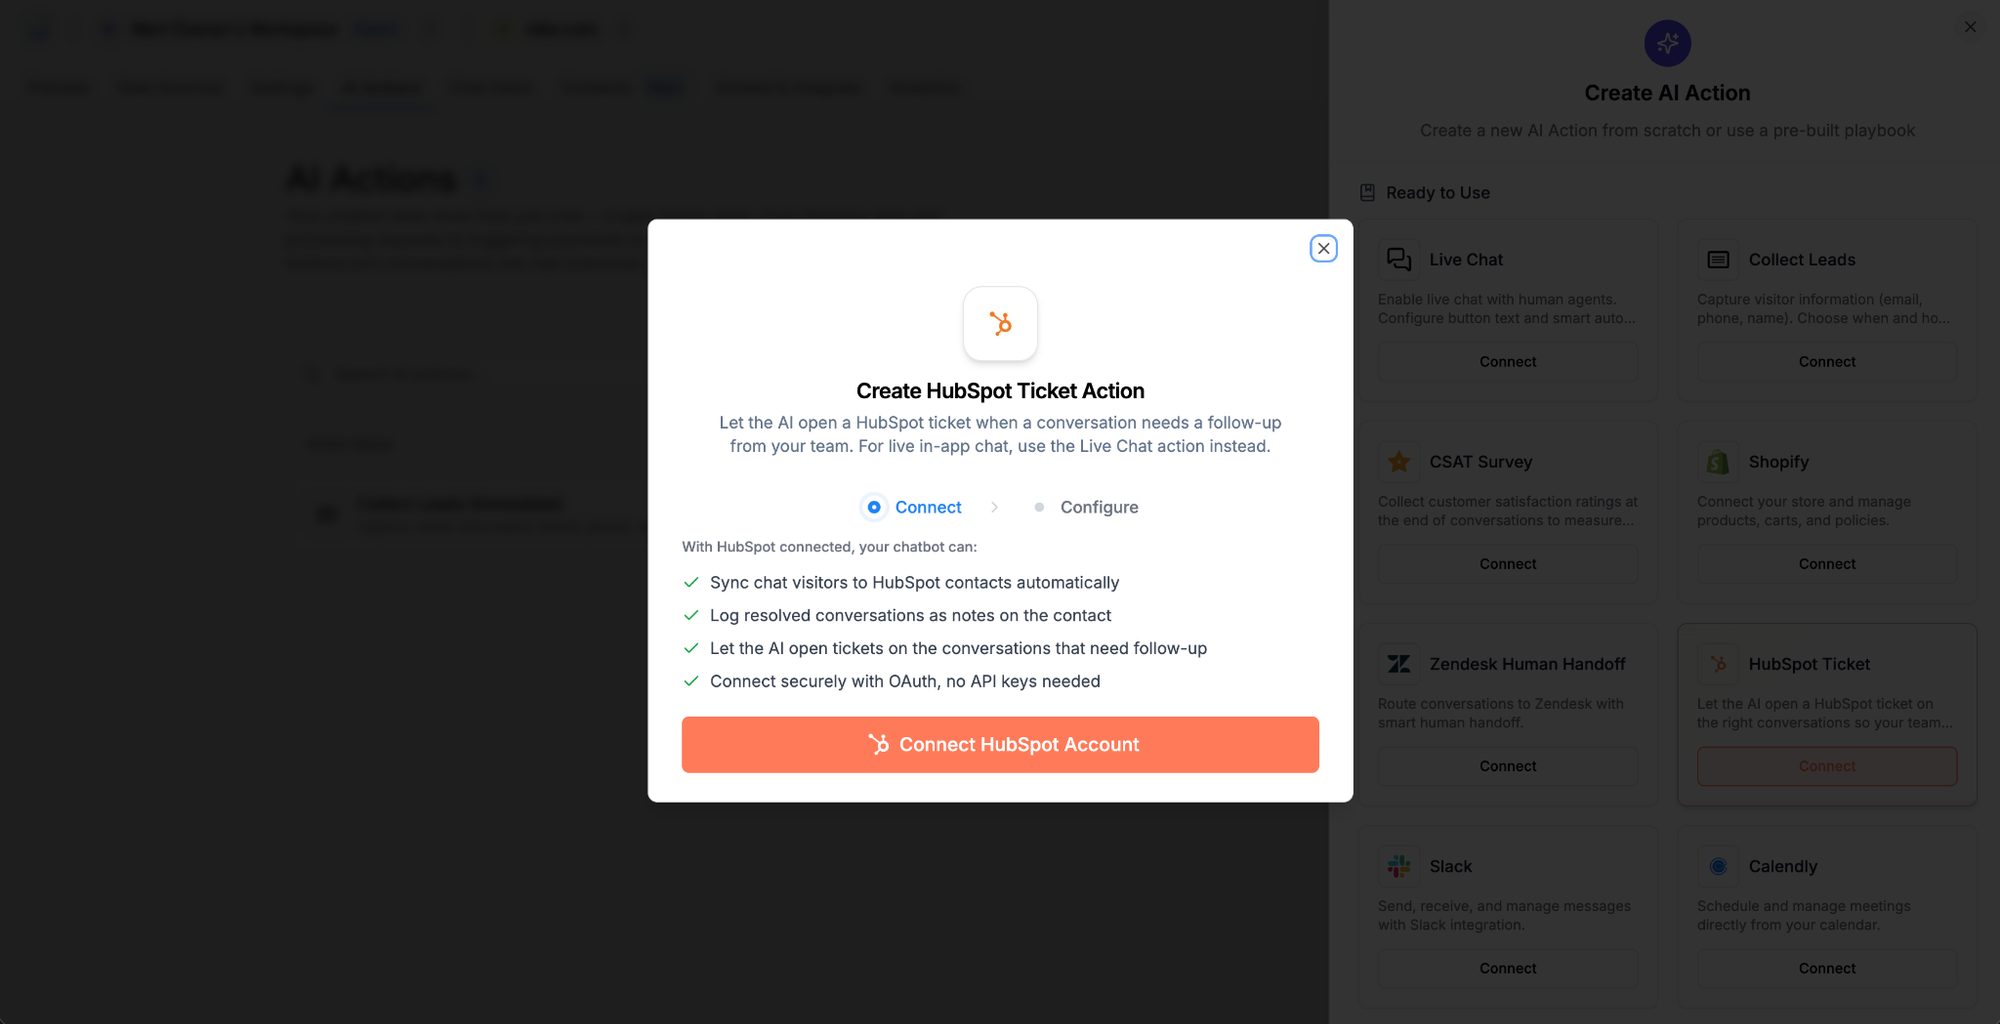
Click Connect HubSpot Account to begin the authorization process.
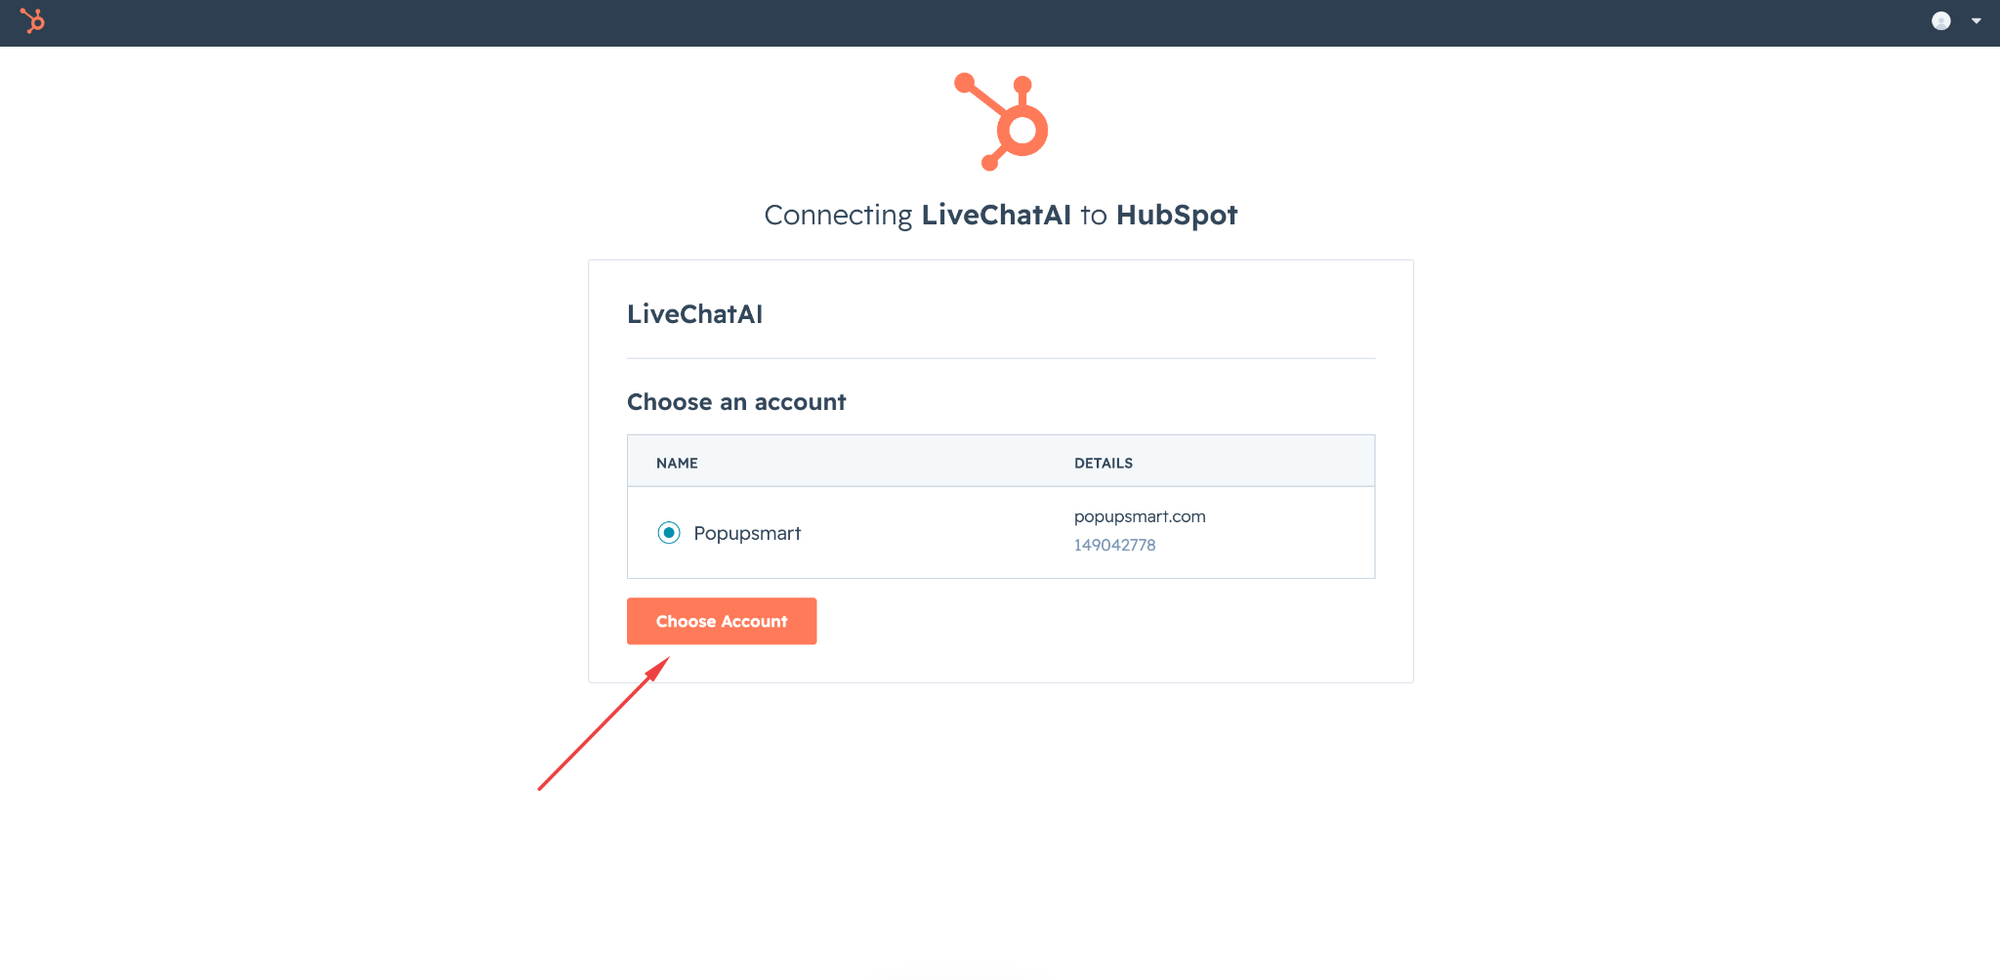
You will be redirected to HubSpot.
- Select the HubSpot account you want to connect.
- Click Choose Account.
- Review the requested permissions.
- Click Connect app.
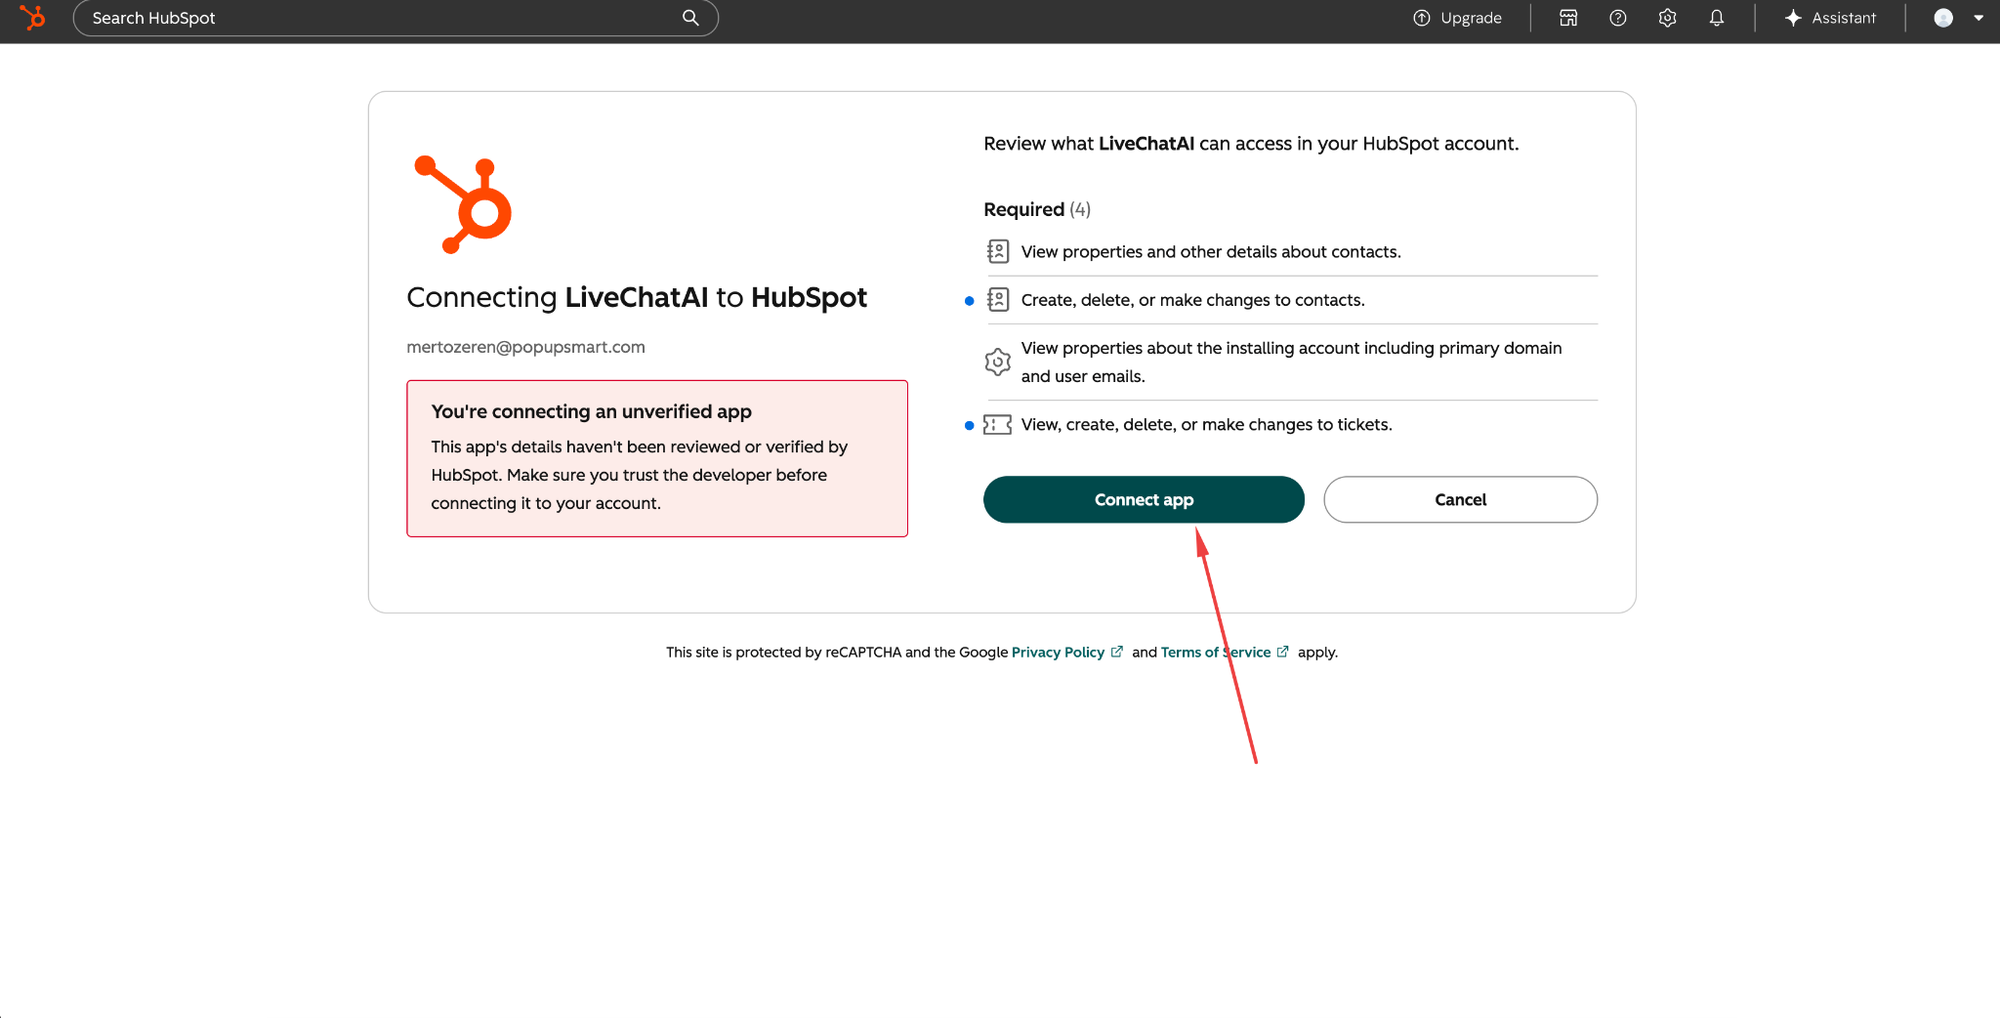
The requested permissions allow LiveChatAI to manage contact information, access account details, and create and manage tickets.
After authorization, you will be redirected to LiveChatAI and see a confirmation that your HubSpot portal is connected.
Step 3: Configure when a ticket should be created
In the Configure step, define the condition that should trigger the action.
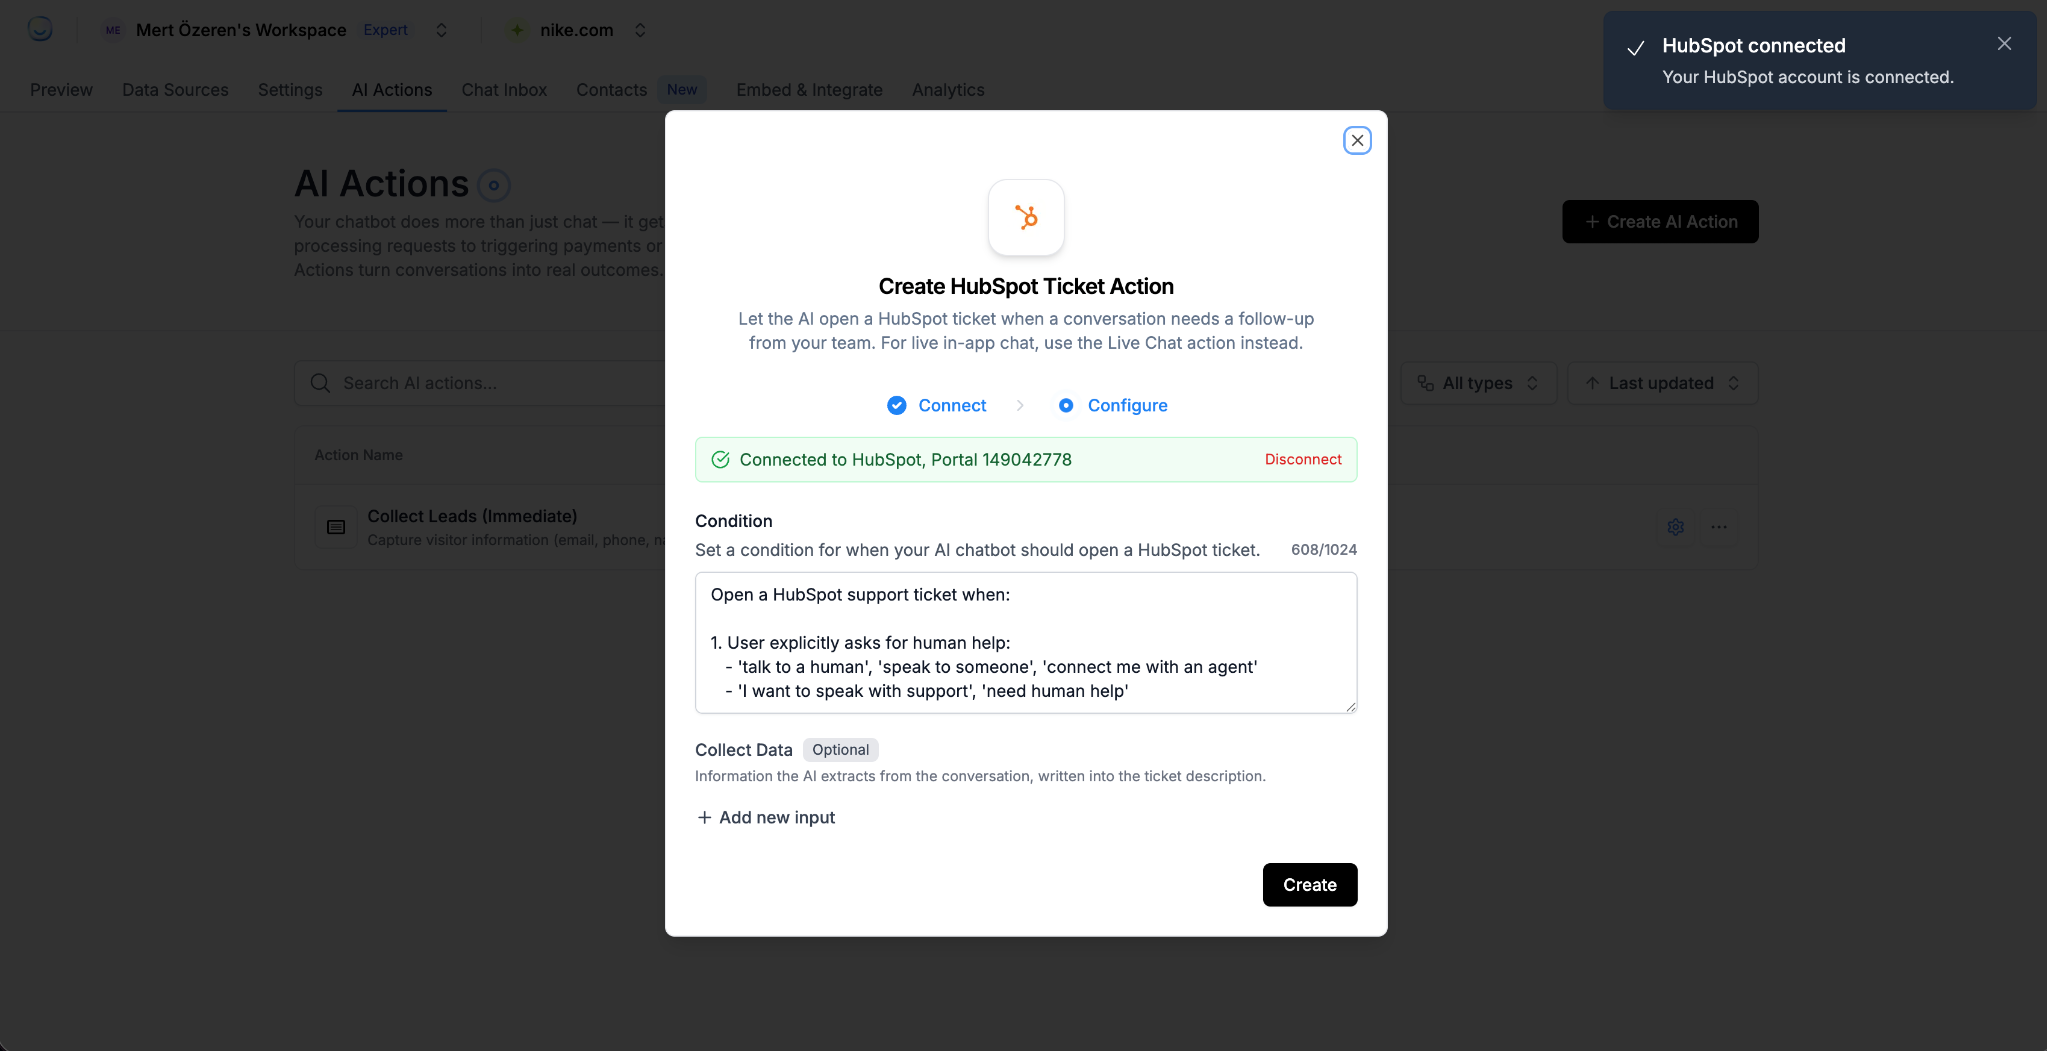
Example condition:
Open a HubSpot support ticket when:
1. The user explicitly asks for human help:
- "talk to a human"
- "speak to someone"
- "connect me with an agent"
- "I want to speak with support"
- "I need human help"
You can also create tickets when:
- The visitor reports an unresolved technical issue.
- A customer requests a refund or cancellation.
- An order is missing, delayed, or damaged.
- A qualified lead requests a follow-up.
- The conversation requires internal review.
Use clear and specific conditions to avoid unnecessary tickets or missed requests.
Optional: Collect information from the conversation
Use Collect Data to define information LiveChatAI should extract before creating the ticket.
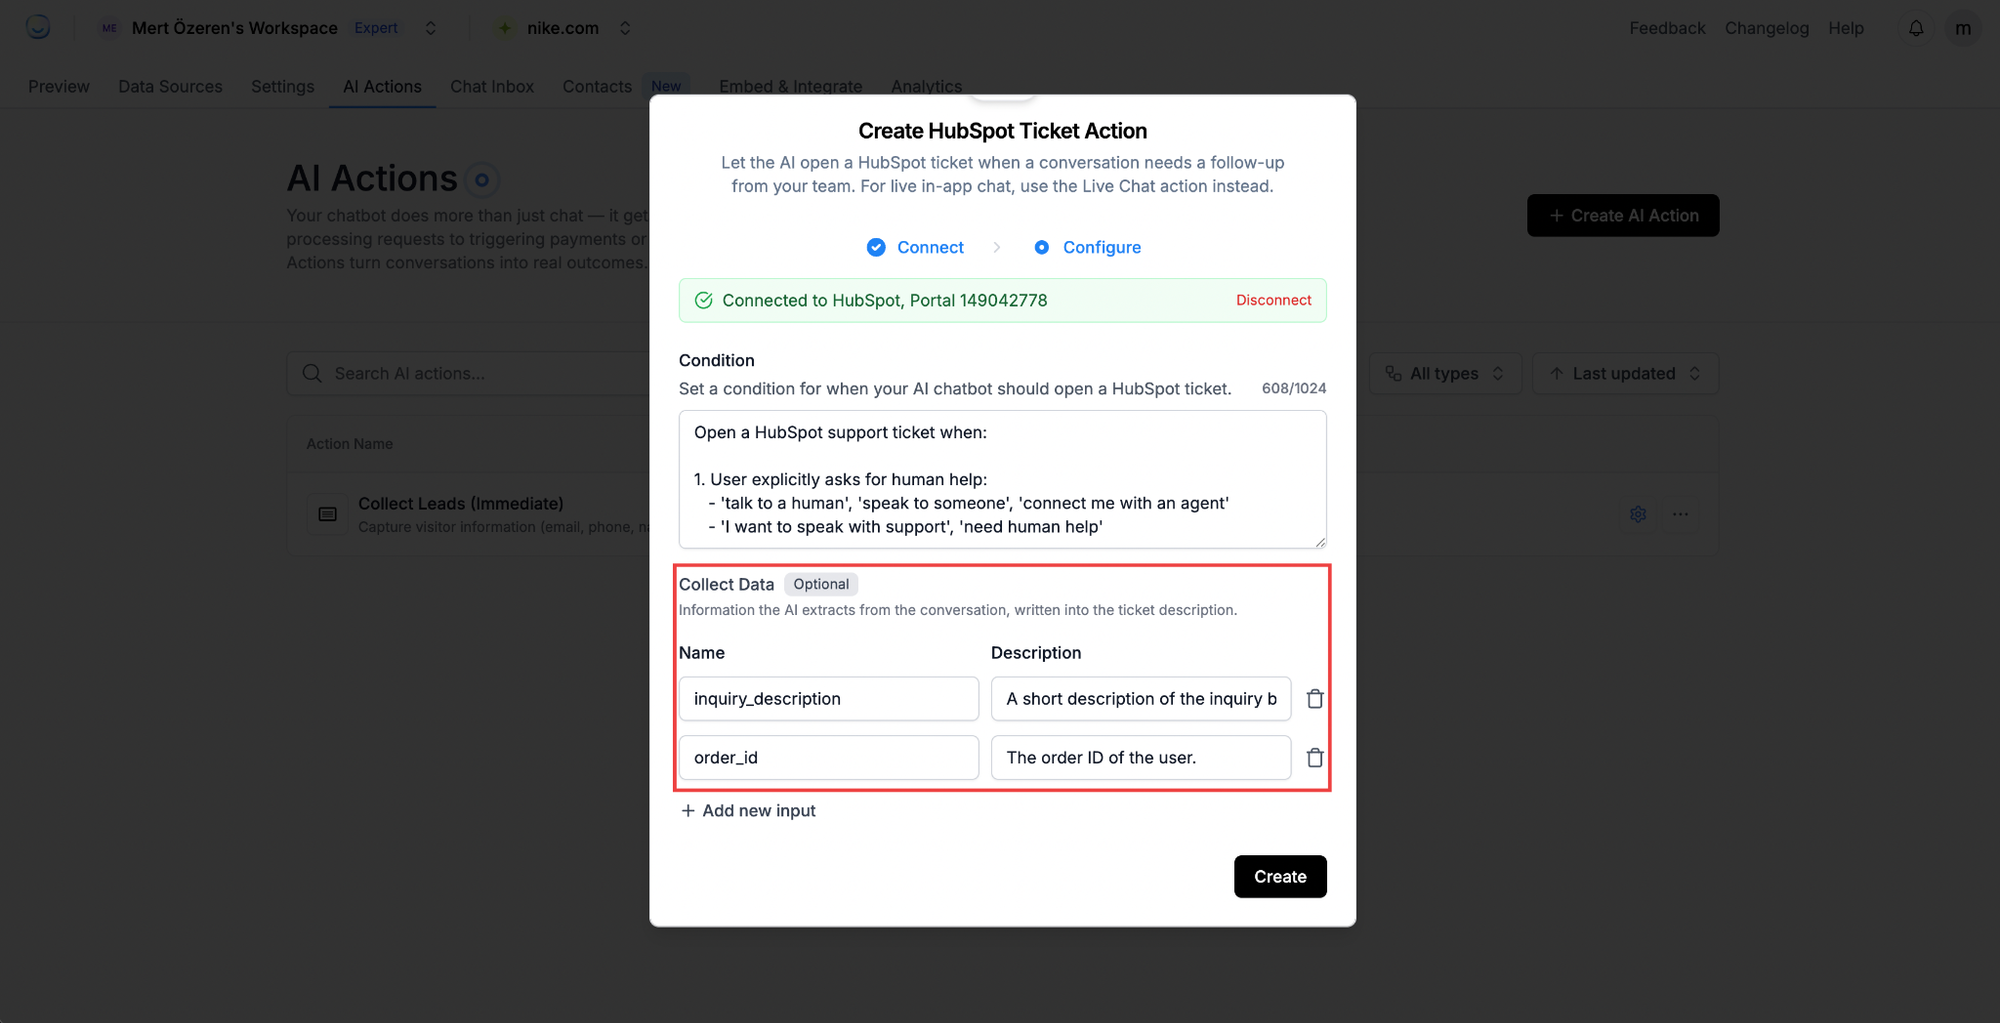
Each input contains:
- Name: The internal identifier of the value.
- Description: Instructions explaining what the AI should extract.
Example inputs:
The extracted values are added to the HubSpot ticket description.
Click Add new input to collect more information, then click Create.
Step 4: Map contact data to HubSpot properties
Open the HubSpot Ticket action settings and find Map to HubSpot properties.
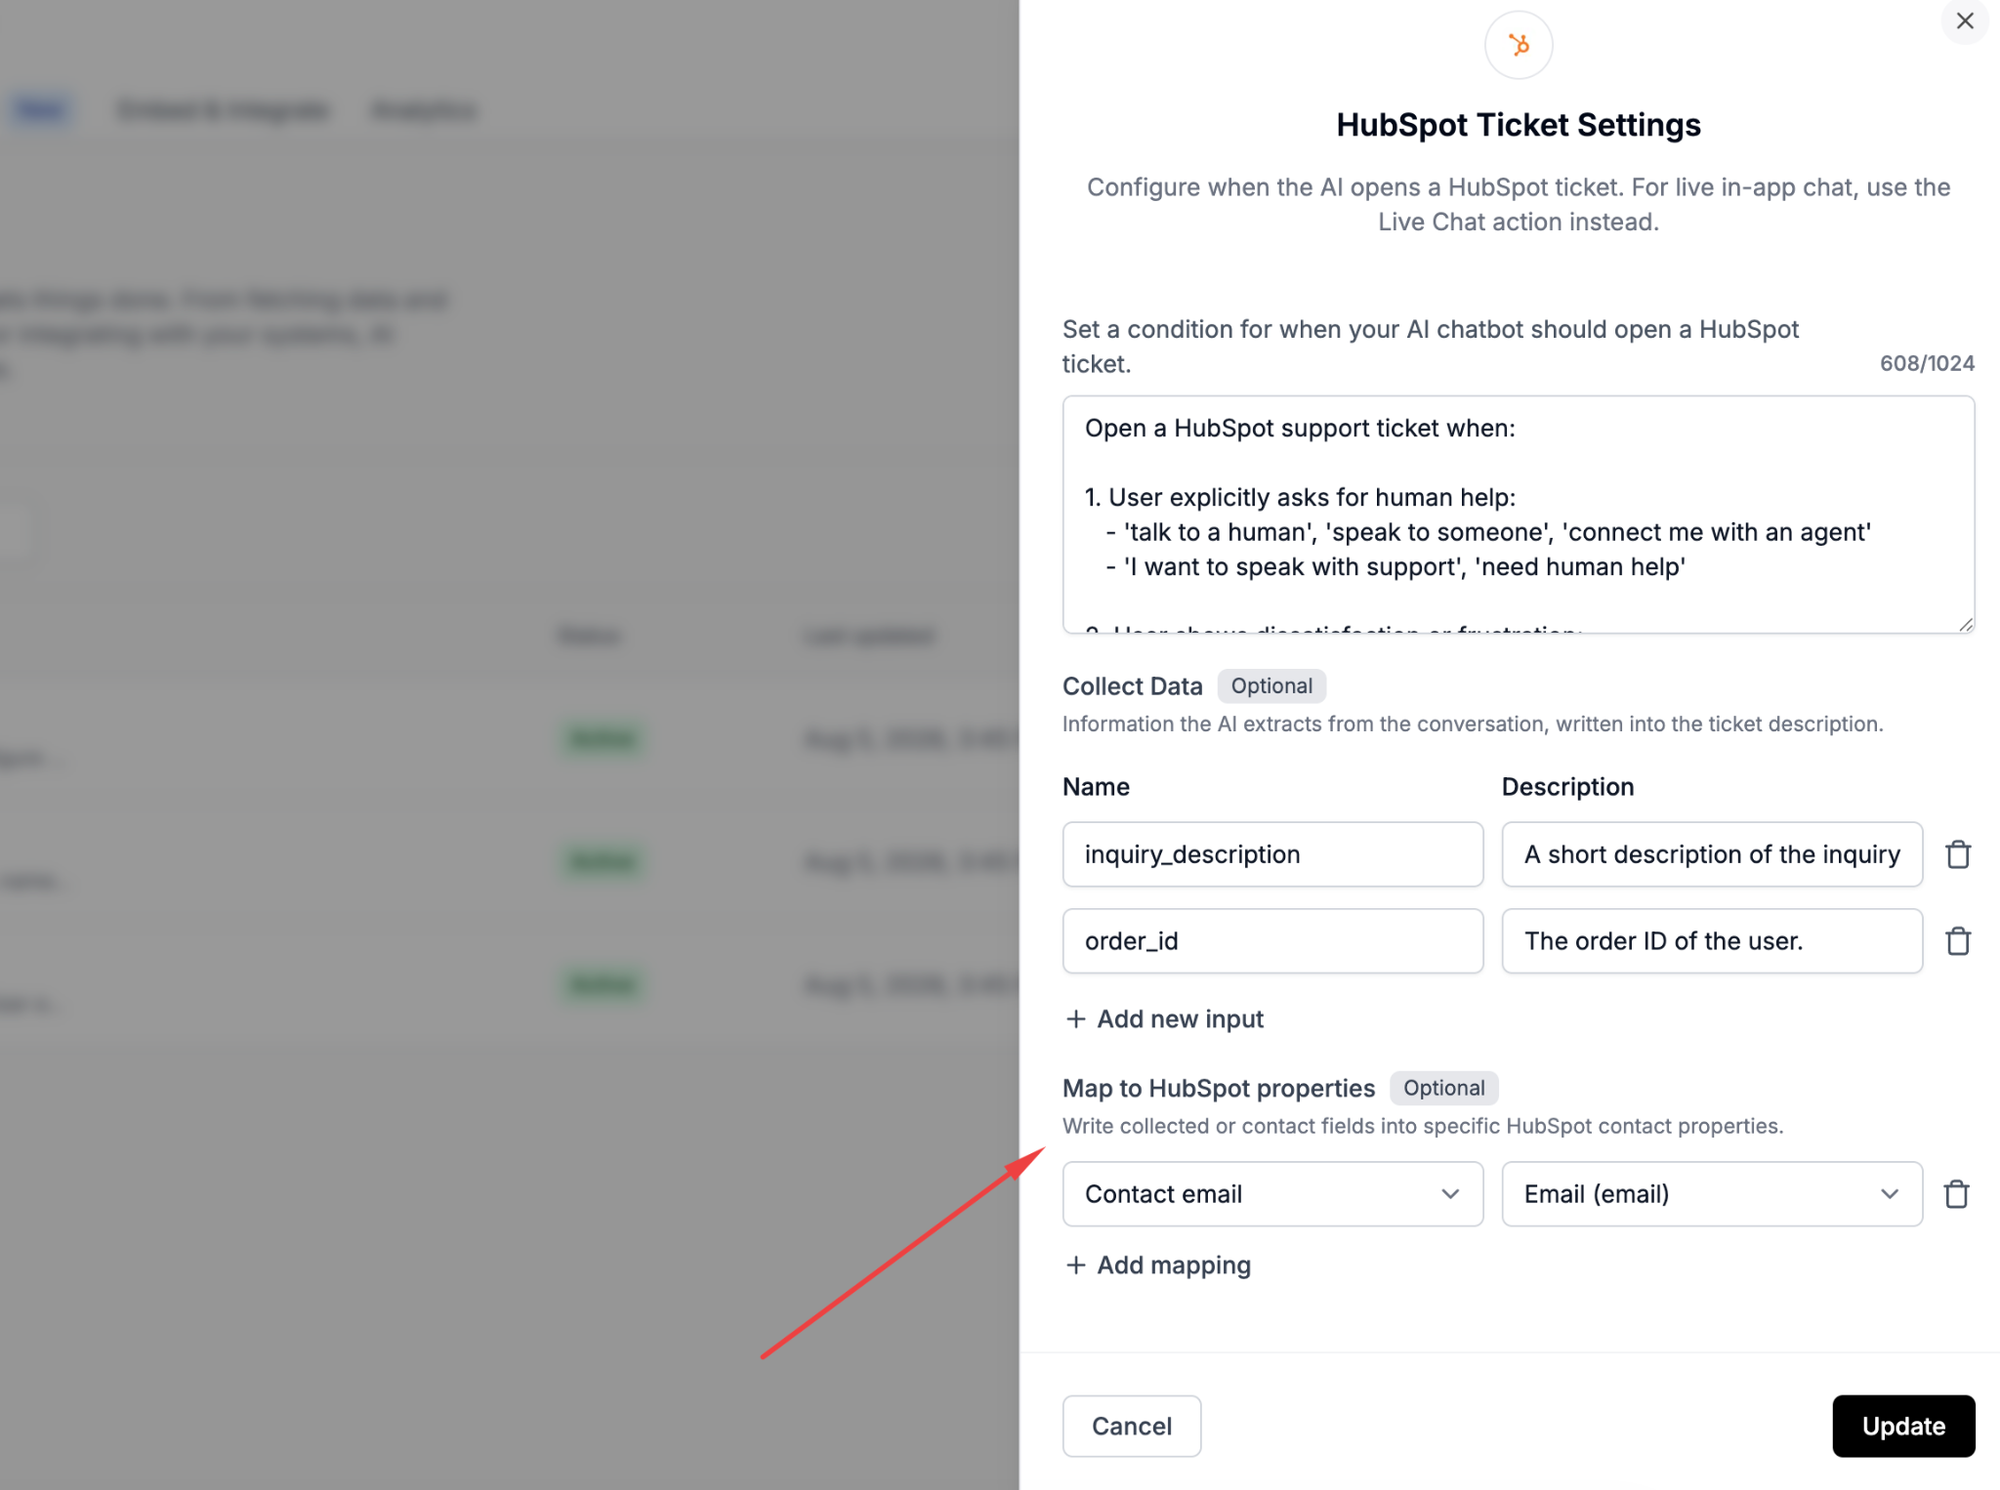
To create a mapping:
- Select a LiveChatAI contact field.
- Select the corresponding HubSpot contact property.
- Click Add mapping to add more fields.
- Click Update.
Example:
LiveChatAI field: Contact email
HubSpot property: Email
Other mappings may include name, phone number, company, country, customer ID, or custom contact attributes.
How contact synchronization works
LiveChatAI sends available visitor information to the mapped HubSpot contact properties.
When a matching contact is identified, the created ticket is associated with that contact. HubSpot information is also displayed in the LiveChatAI Chat Inbox.
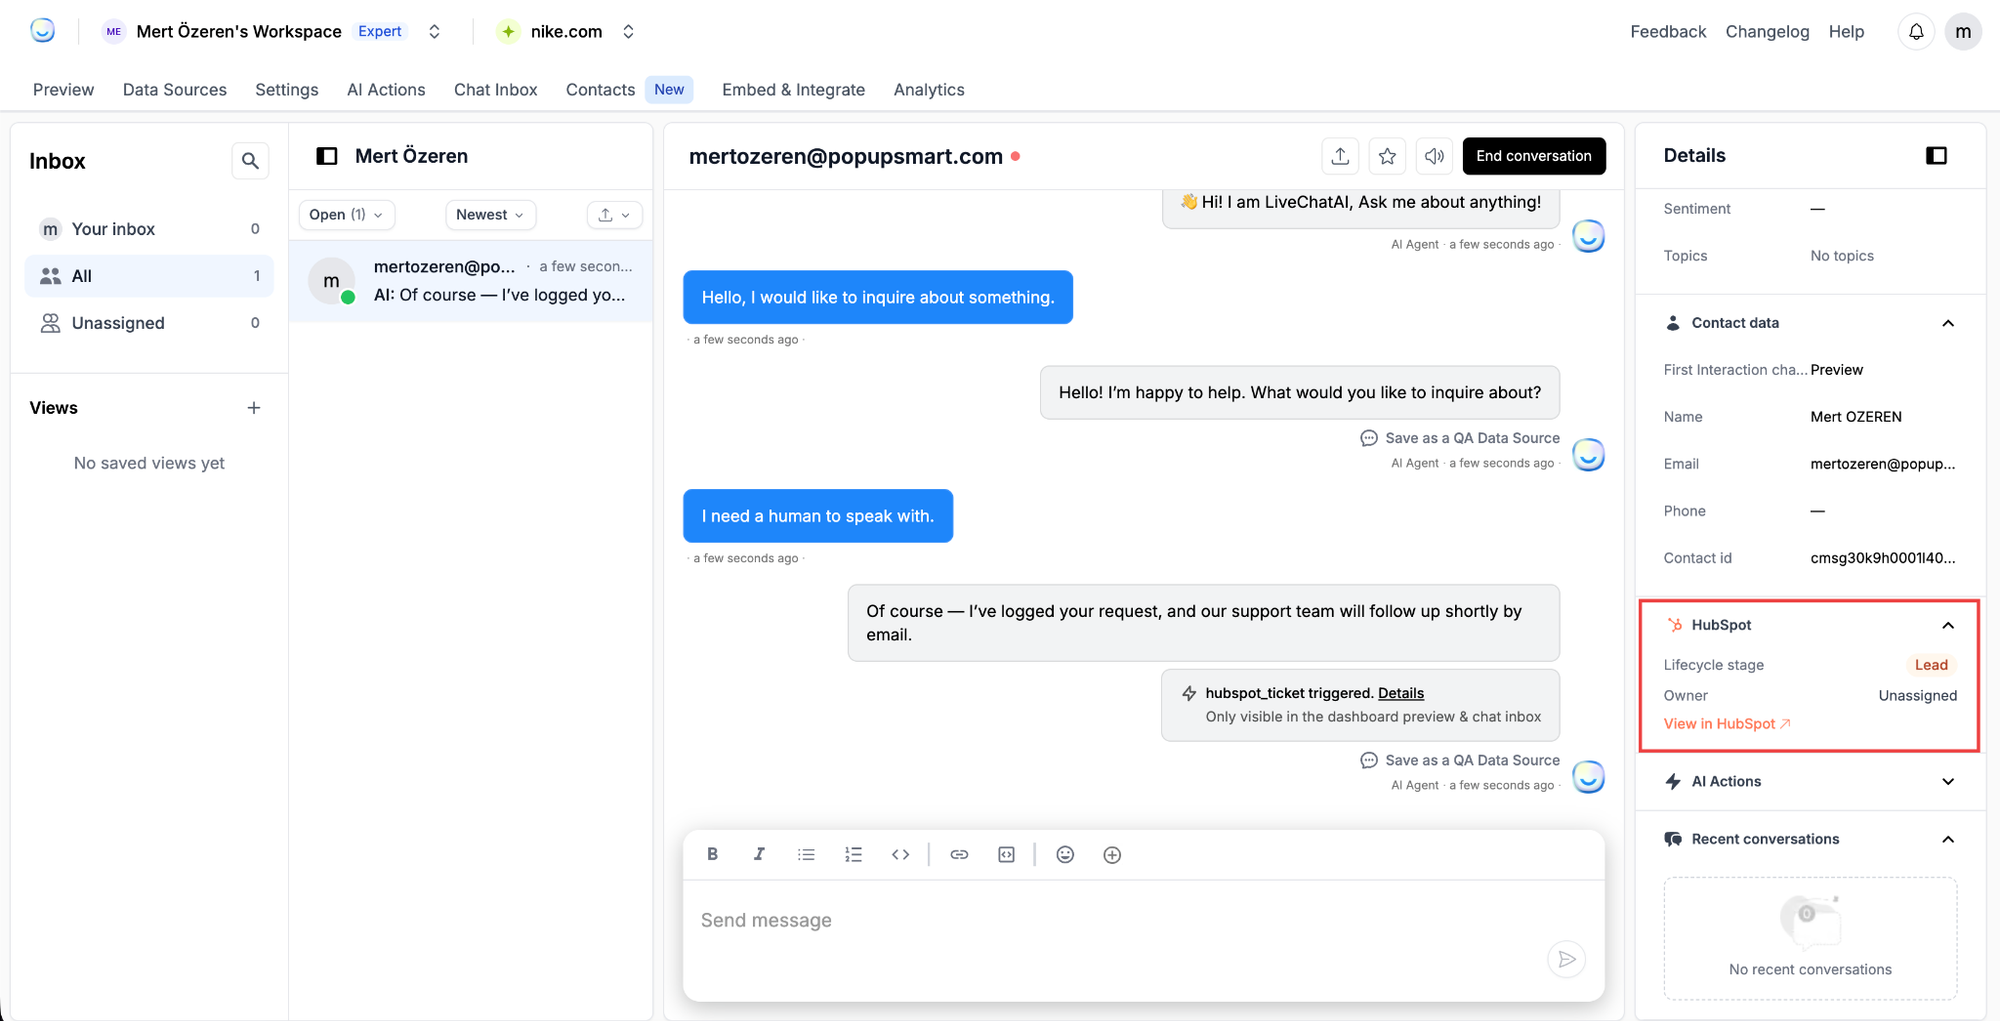
From the HubSpot panel, your team can view the contact’s lifecycle stage and owner or click View in HubSpot to open the full record.
What happens when the action is triggered
- A visitor meets the condition configured in the HubSpot Ticket action.
- LiveChatAI extracts the information defined under Collect Data.
- The visitor’s mapped contact information is synced with HubSpot.
- A HubSpot ticket is created and associated with the relevant contact.
- Your team can review and manage the ticket in HubSpot.
A confirmation event appears in the LiveChatAI conversation when the action runs.
Viewing the contact and ticket in HubSpot
Open the relevant HubSpot contact record to see the associated ticket.
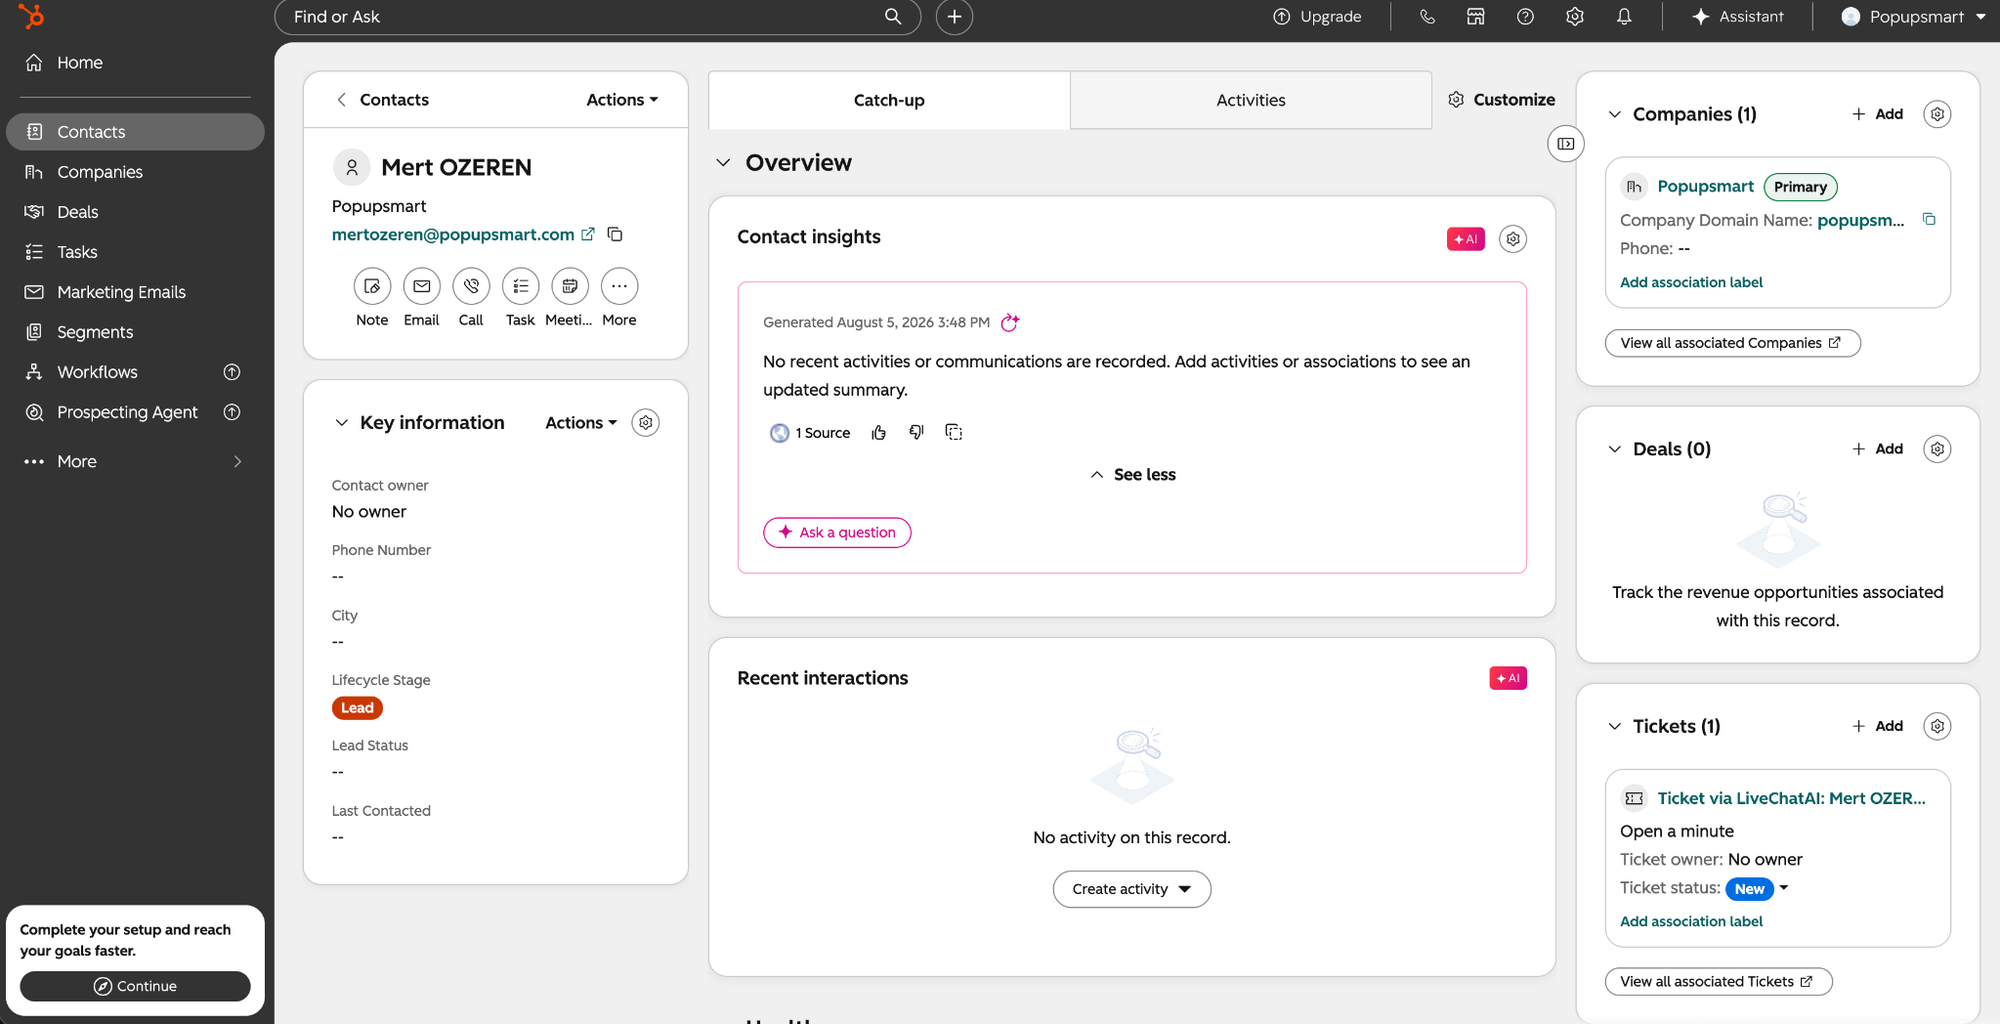
The ticket may include:
- Ticket name and status
- Pipeline and creation date
- Associated contact
- Collected conversation details
- A link to the conversation in LiveChatAI
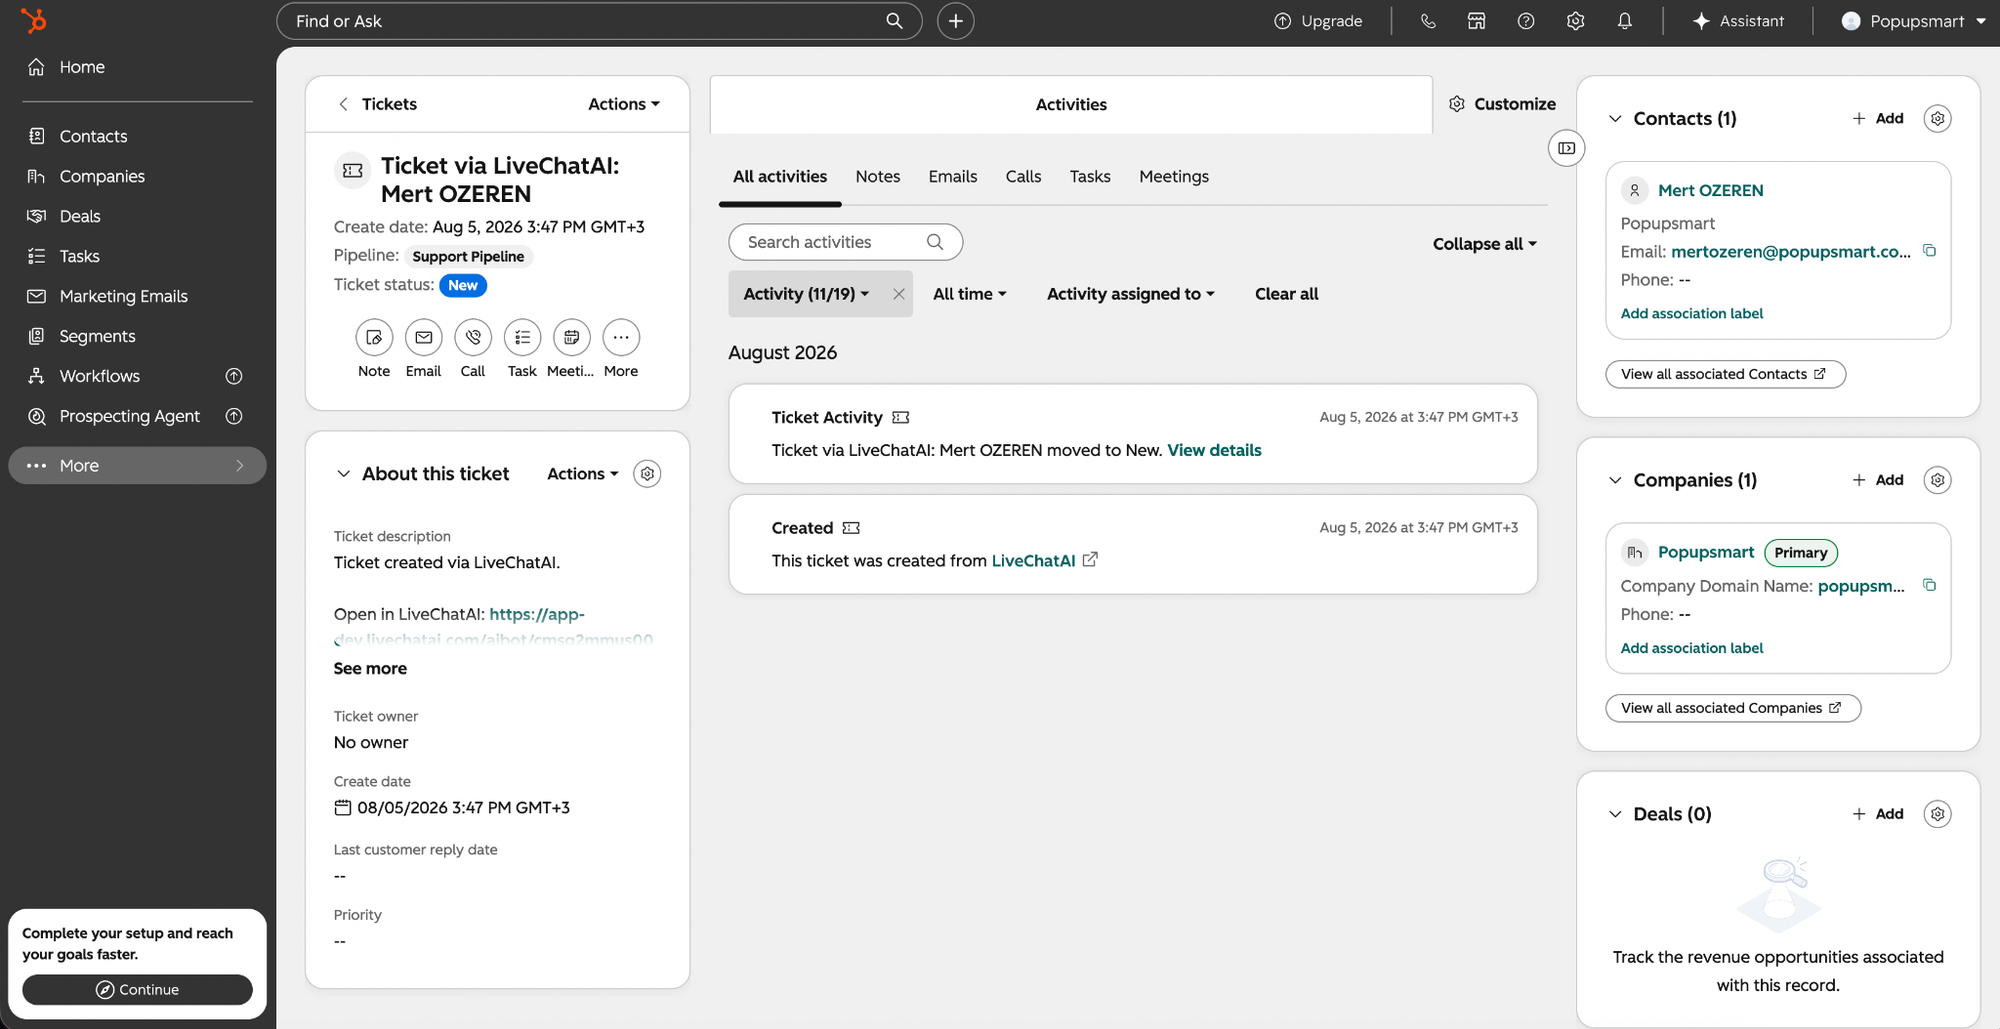
Your team can then assign an owner, update the ticket status, add notes, and continue the follow-up in HubSpot.
FAQ
Does this action transfer the live conversation to HubSpot?
No. It creates a ticket for follow-up. For real-time human conversations inside the LiveChatAI widget, use the Live Chat action.
Can I create tickets for conditions other than human-support requests?
Yes. You can trigger the action for refunds, technical issues, order problems, sales inquiries, complaints, or other scenarios that require follow-up.
What information is added to the ticket?
Information defined under Collect Data is extracted from the conversation and added to the ticket description.
Can I map custom contact fields?
Yes. Use Map to HubSpot properties to connect LiveChatAI contact fields with compatible standard or custom HubSpot properties.
Can I change the configuration later?
Yes. Open the HubSpot Ticket action settings, update the condition, collected data, or mappings, and click Update.