Customizing Branding Settings
When it comes to the further customization of your AI chatbot, LiveChatAI provides the possibility of customizing the branding settings.
On the Branding Settings, you can easily change the appearance and help emphasize the importance of brand identity.
By editing the details based on your brand image, LiveChatAI helps you display a more personalized and relevant style to your business.
To Customize Branding Settings
1. Find "Customize" to Edit.
The "Customize" option is among the titles on the LiveChatAI dashboard.

2. Choose "Branding Settings" and Start Editing.
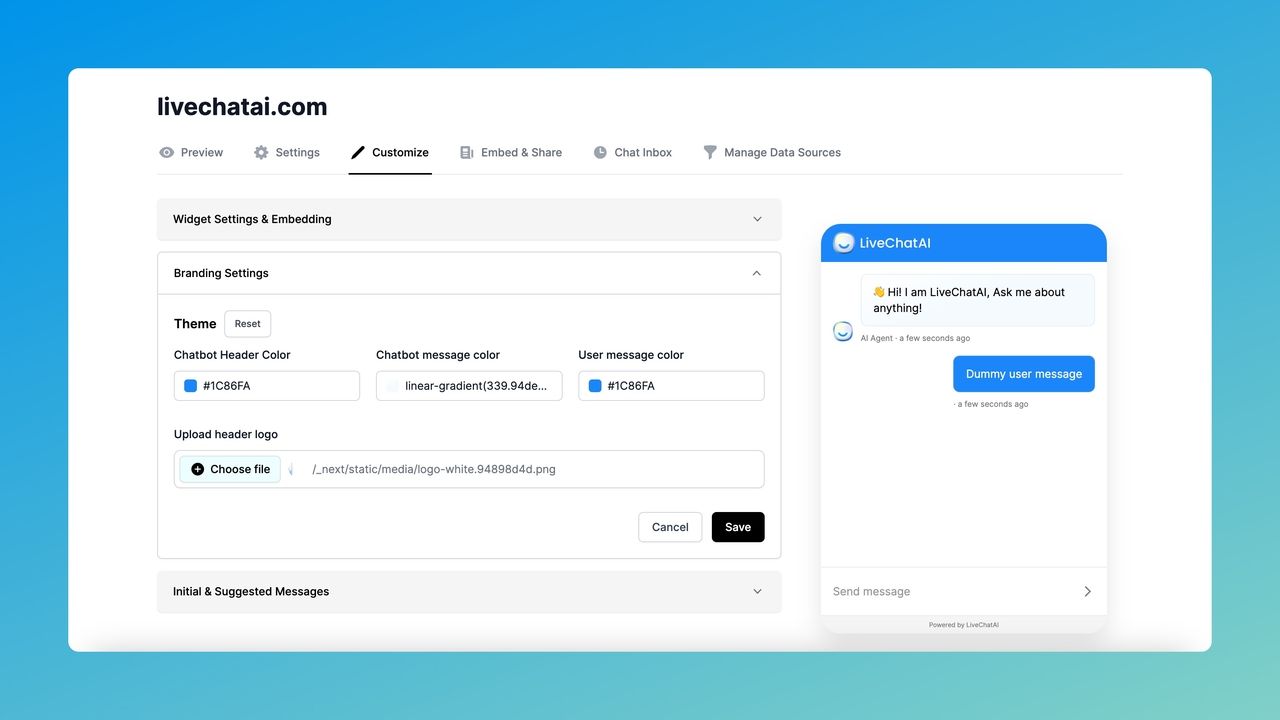
You can...
- "Reset" the Theme if you like.
- Change the Chatbot header color,
- Edit the Chatbot message color,
- Modify User message color,
- Upload the header logo.
3. Save Your Changes.
To apply all the changes you made, you should save the changes by clicking the "Save" button.
All in all, after saving all the changes, you will have a proper AI chatbot that can be a better fit for your website.
If you have any questions about customizing branding settings, we're always ready to help.
Additional Settings
White Label Option
Enable the 'White Label' toggle to remove the 'Powered by LiveChatAI' text from your chat widget.
This feature is available for Expert plan users and allows you to fully customize the widget by replacing the LiveChatAI logo with your own brand logo.
Upload Your Logo
Use the 'Upload Your Logo' toggle to add your brand logo to the chat widget.
For Pro and Advanced plans, your logo will be merged with the LiveChatAI logo, creating a collaborative look.