AI Actions with Make.com
Our initial rollout introduces integration with Make.com, renowned for its versatility in connecting various applications and services. This integration allows users to automate tasks by connecting the AI chatbot to multiple services through Make.com's robust webhooks.
Setting up AI Actions is straightforward.
Let's take a look at a use case example to see how AI Actions can effectively streamline your business processes.
How to Set Up a Shopify Order Tracking System Using Make.com: A Detailed Guide
To start the process you need to have a LiveChatAI, and Make.com account, and a Shopify store first.
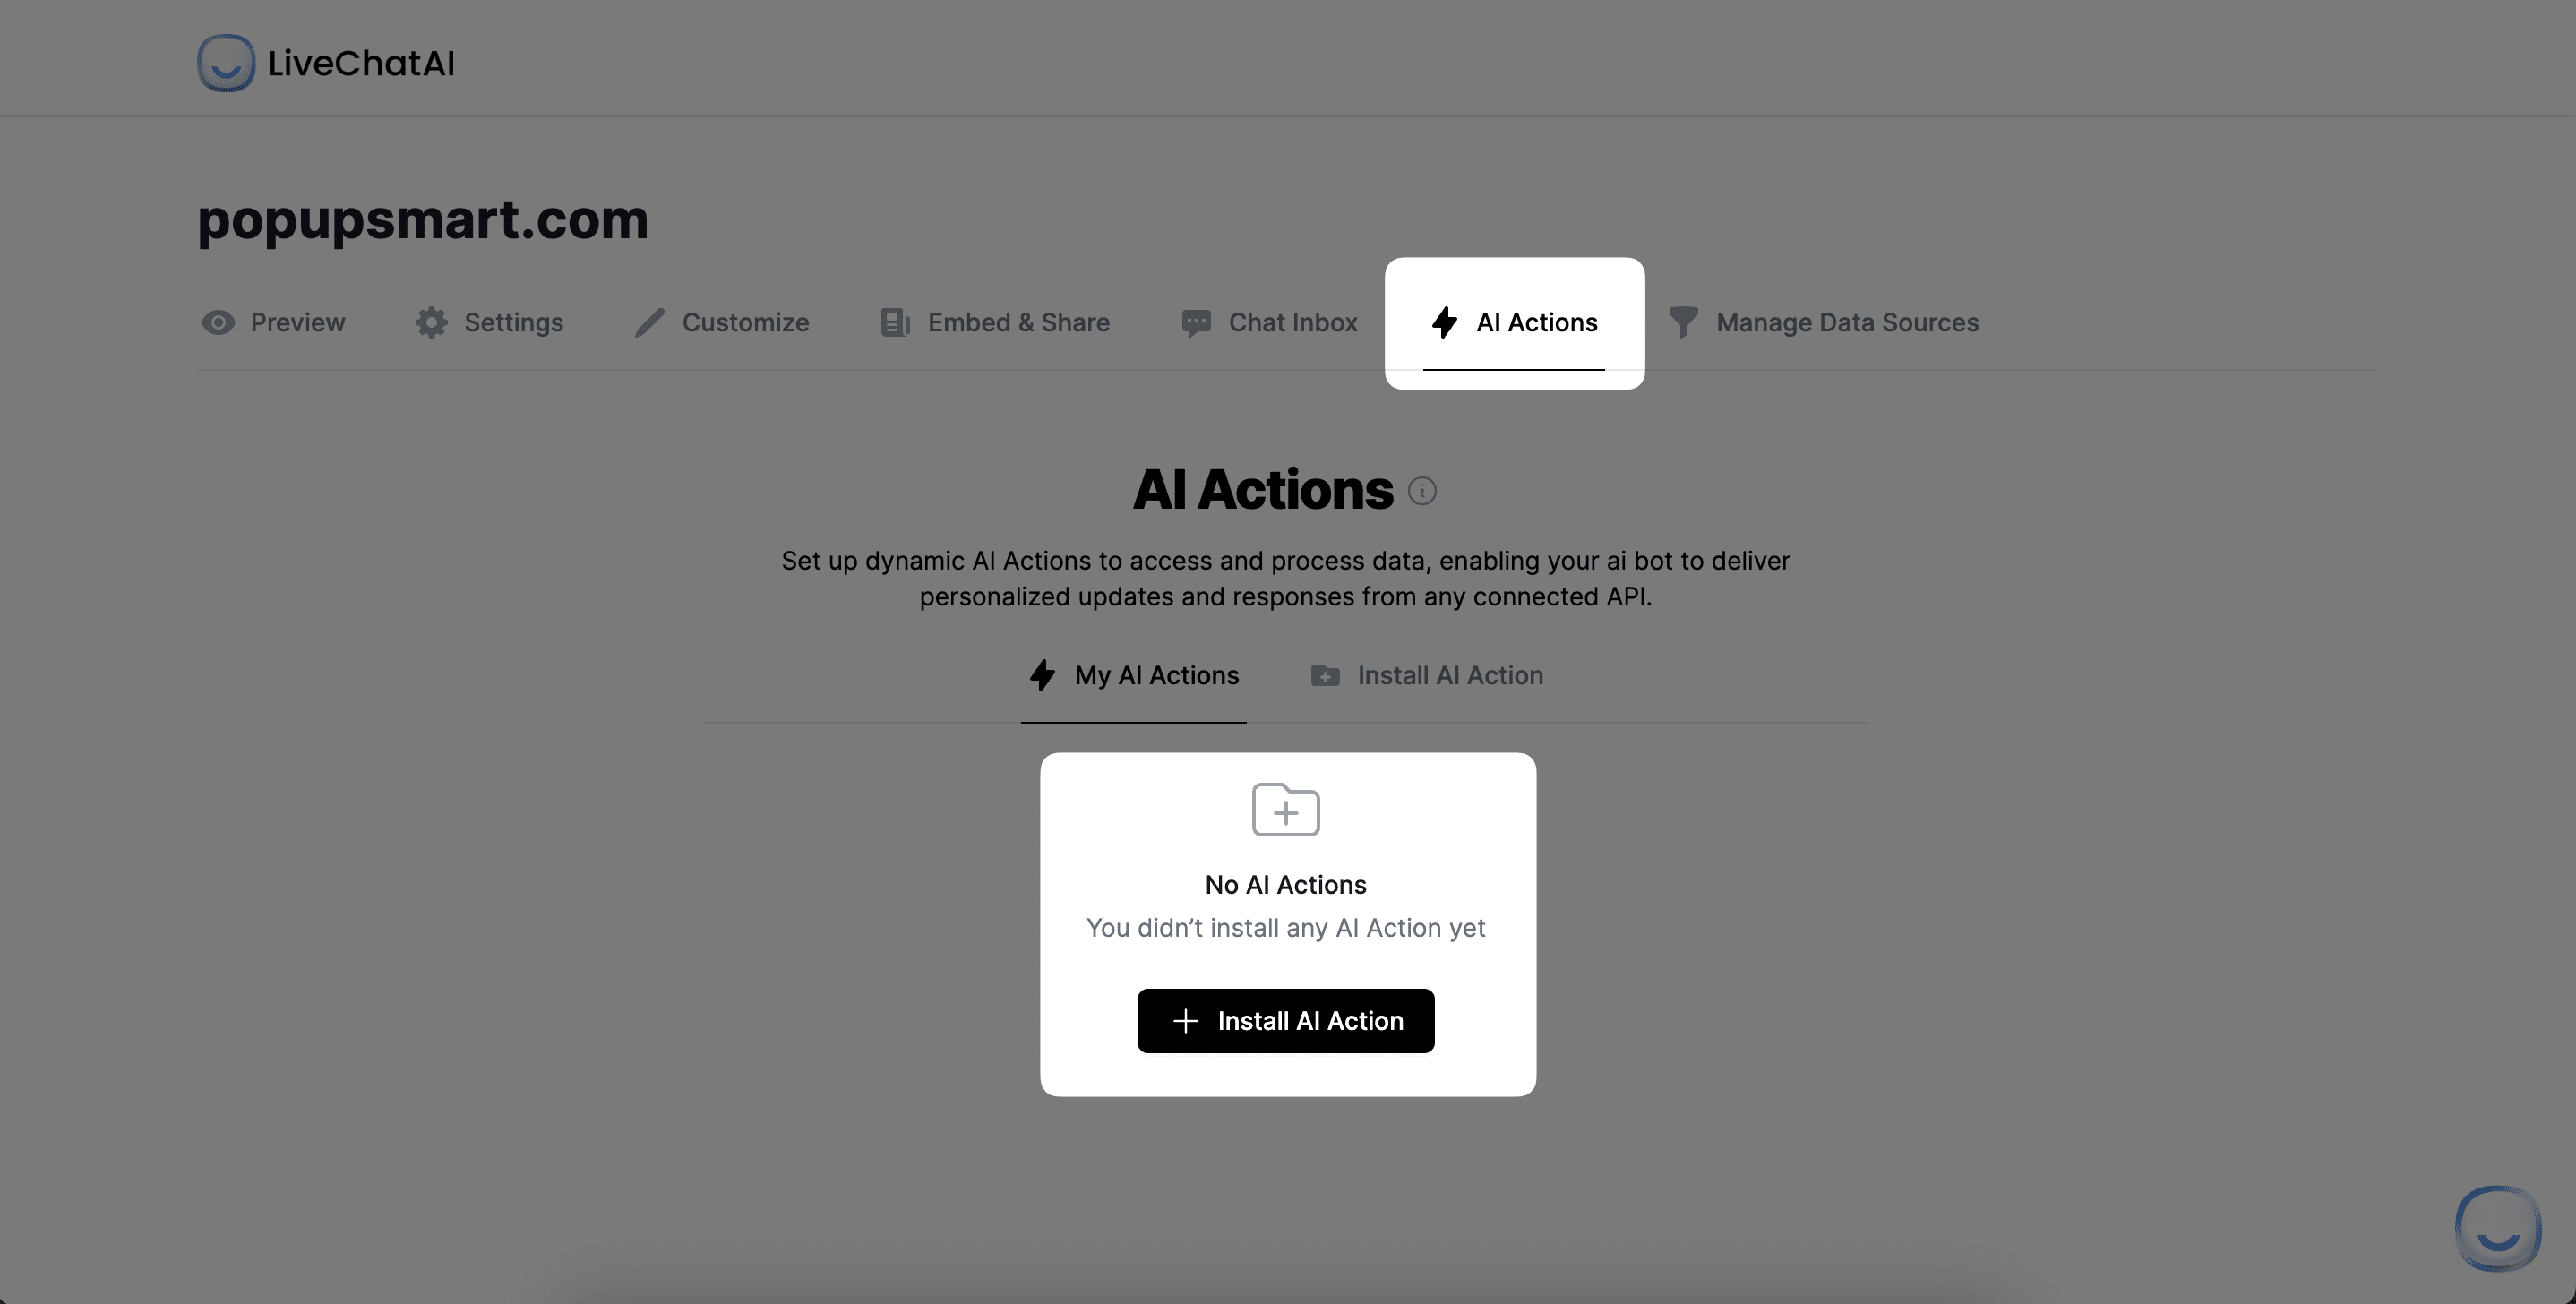
- Log in to your LiveChatAI account first and navigate to the AI Actions section from the AI chatbot dashboard.
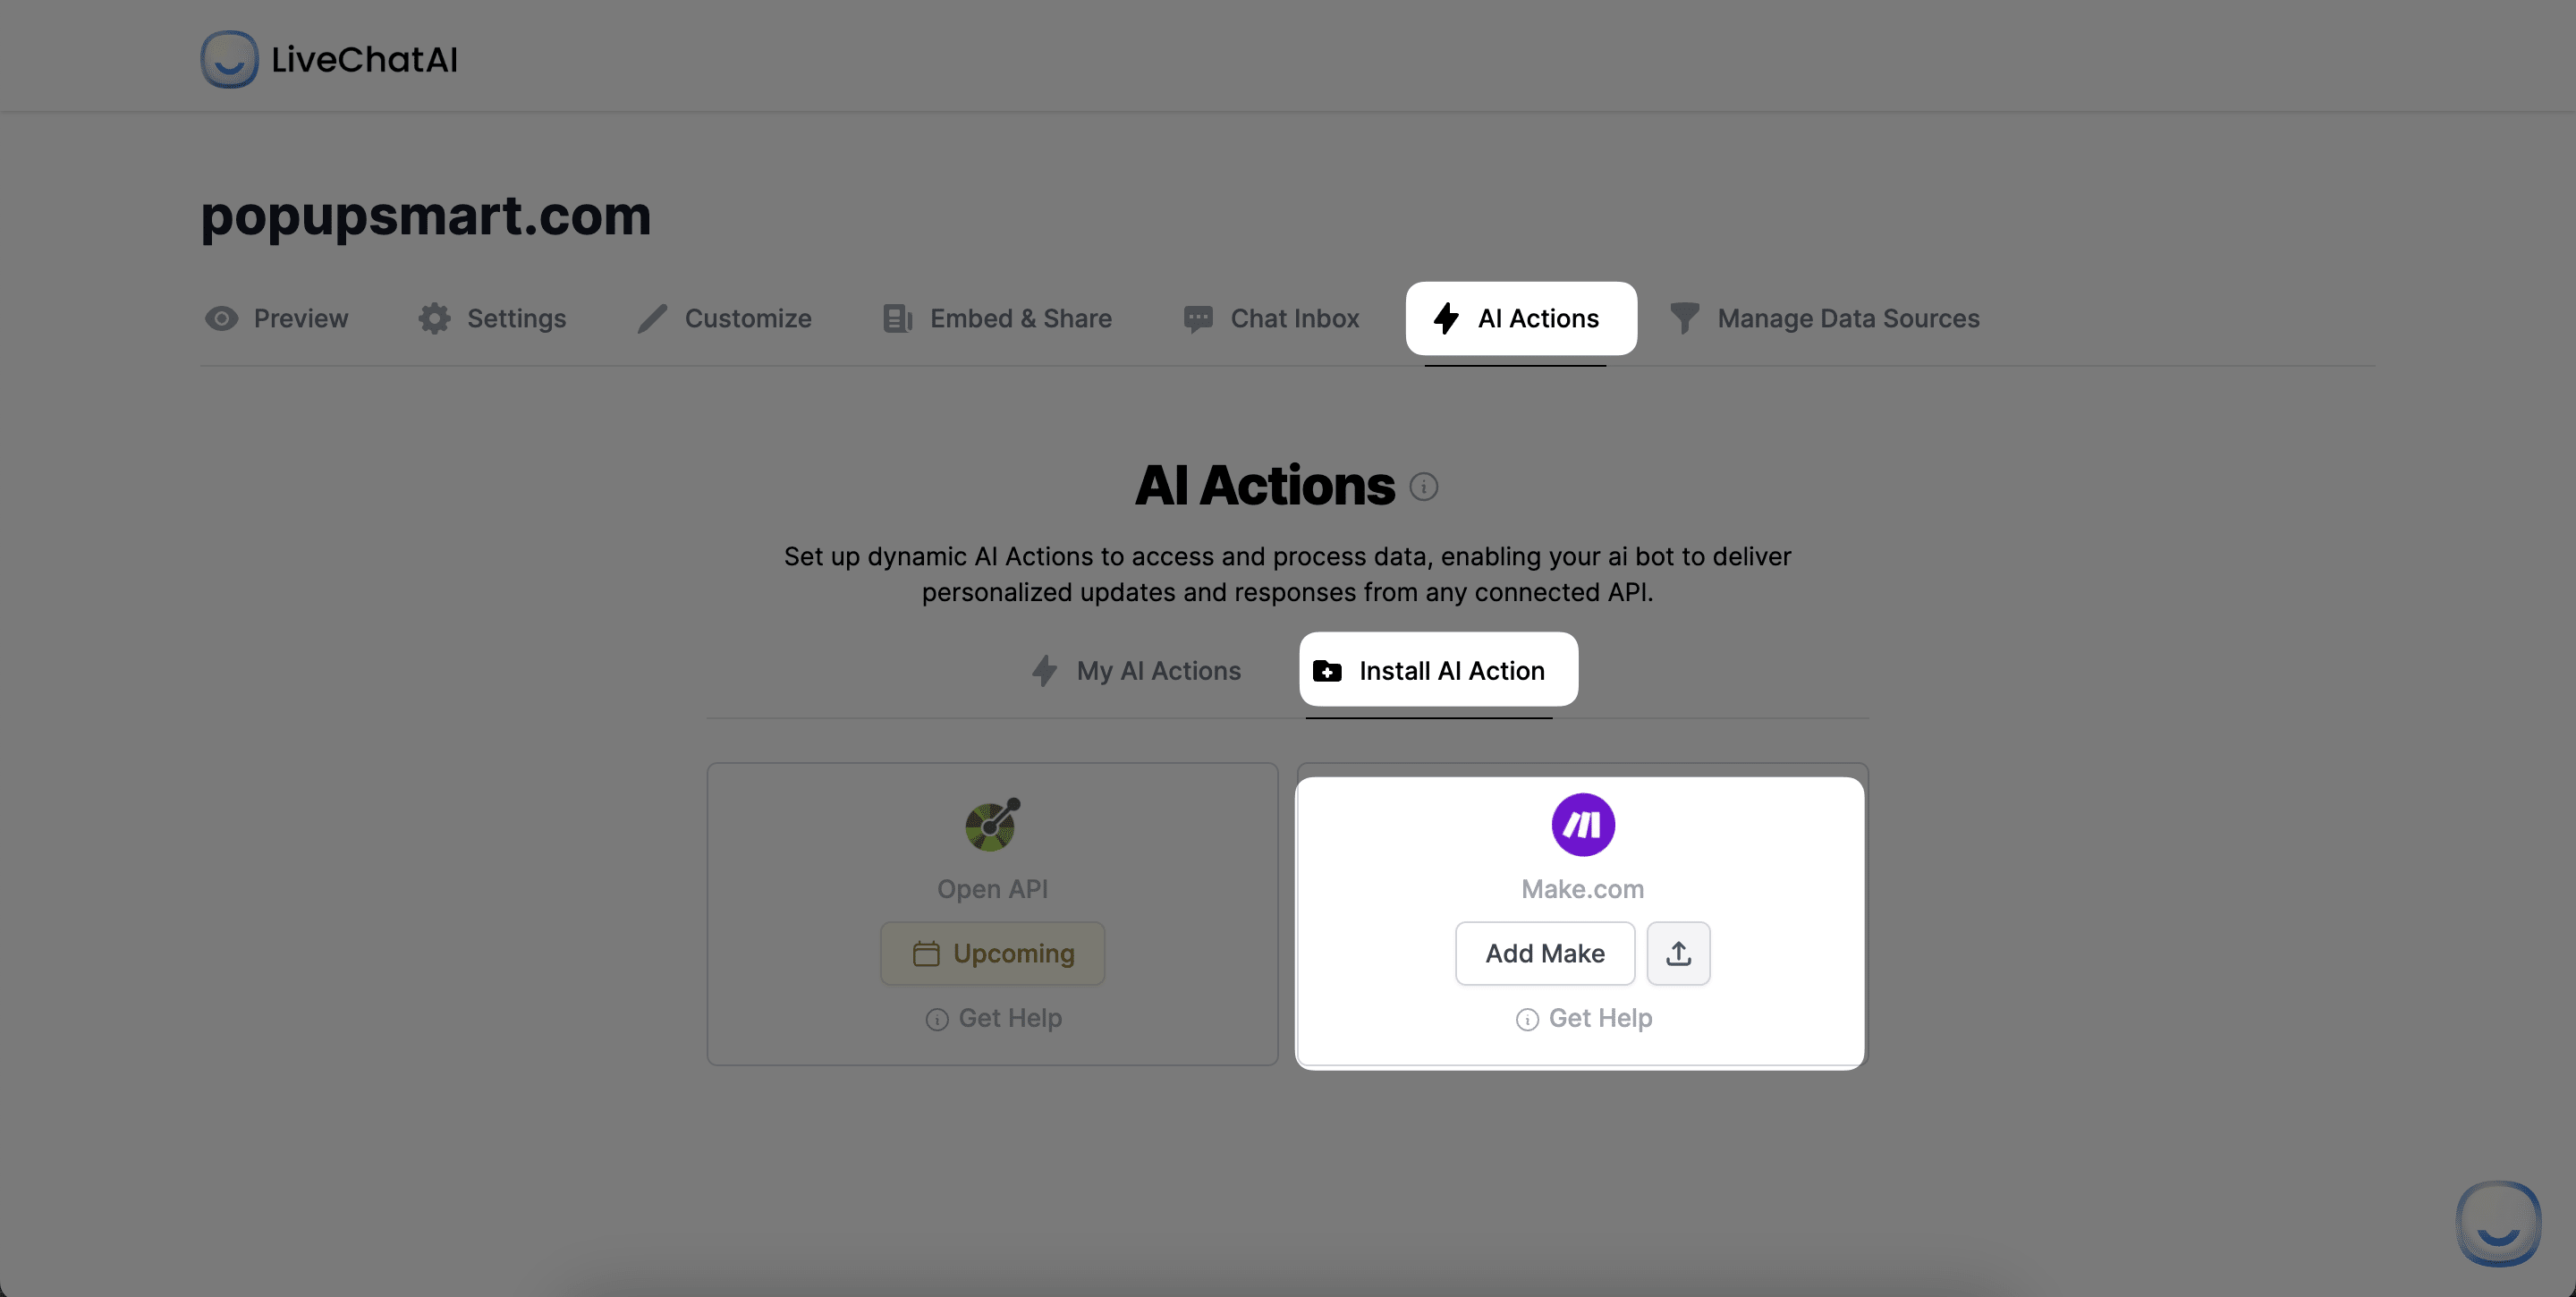
2. Click on the Install AI Action button to continue, you will see Make.com. Click Add Make button,
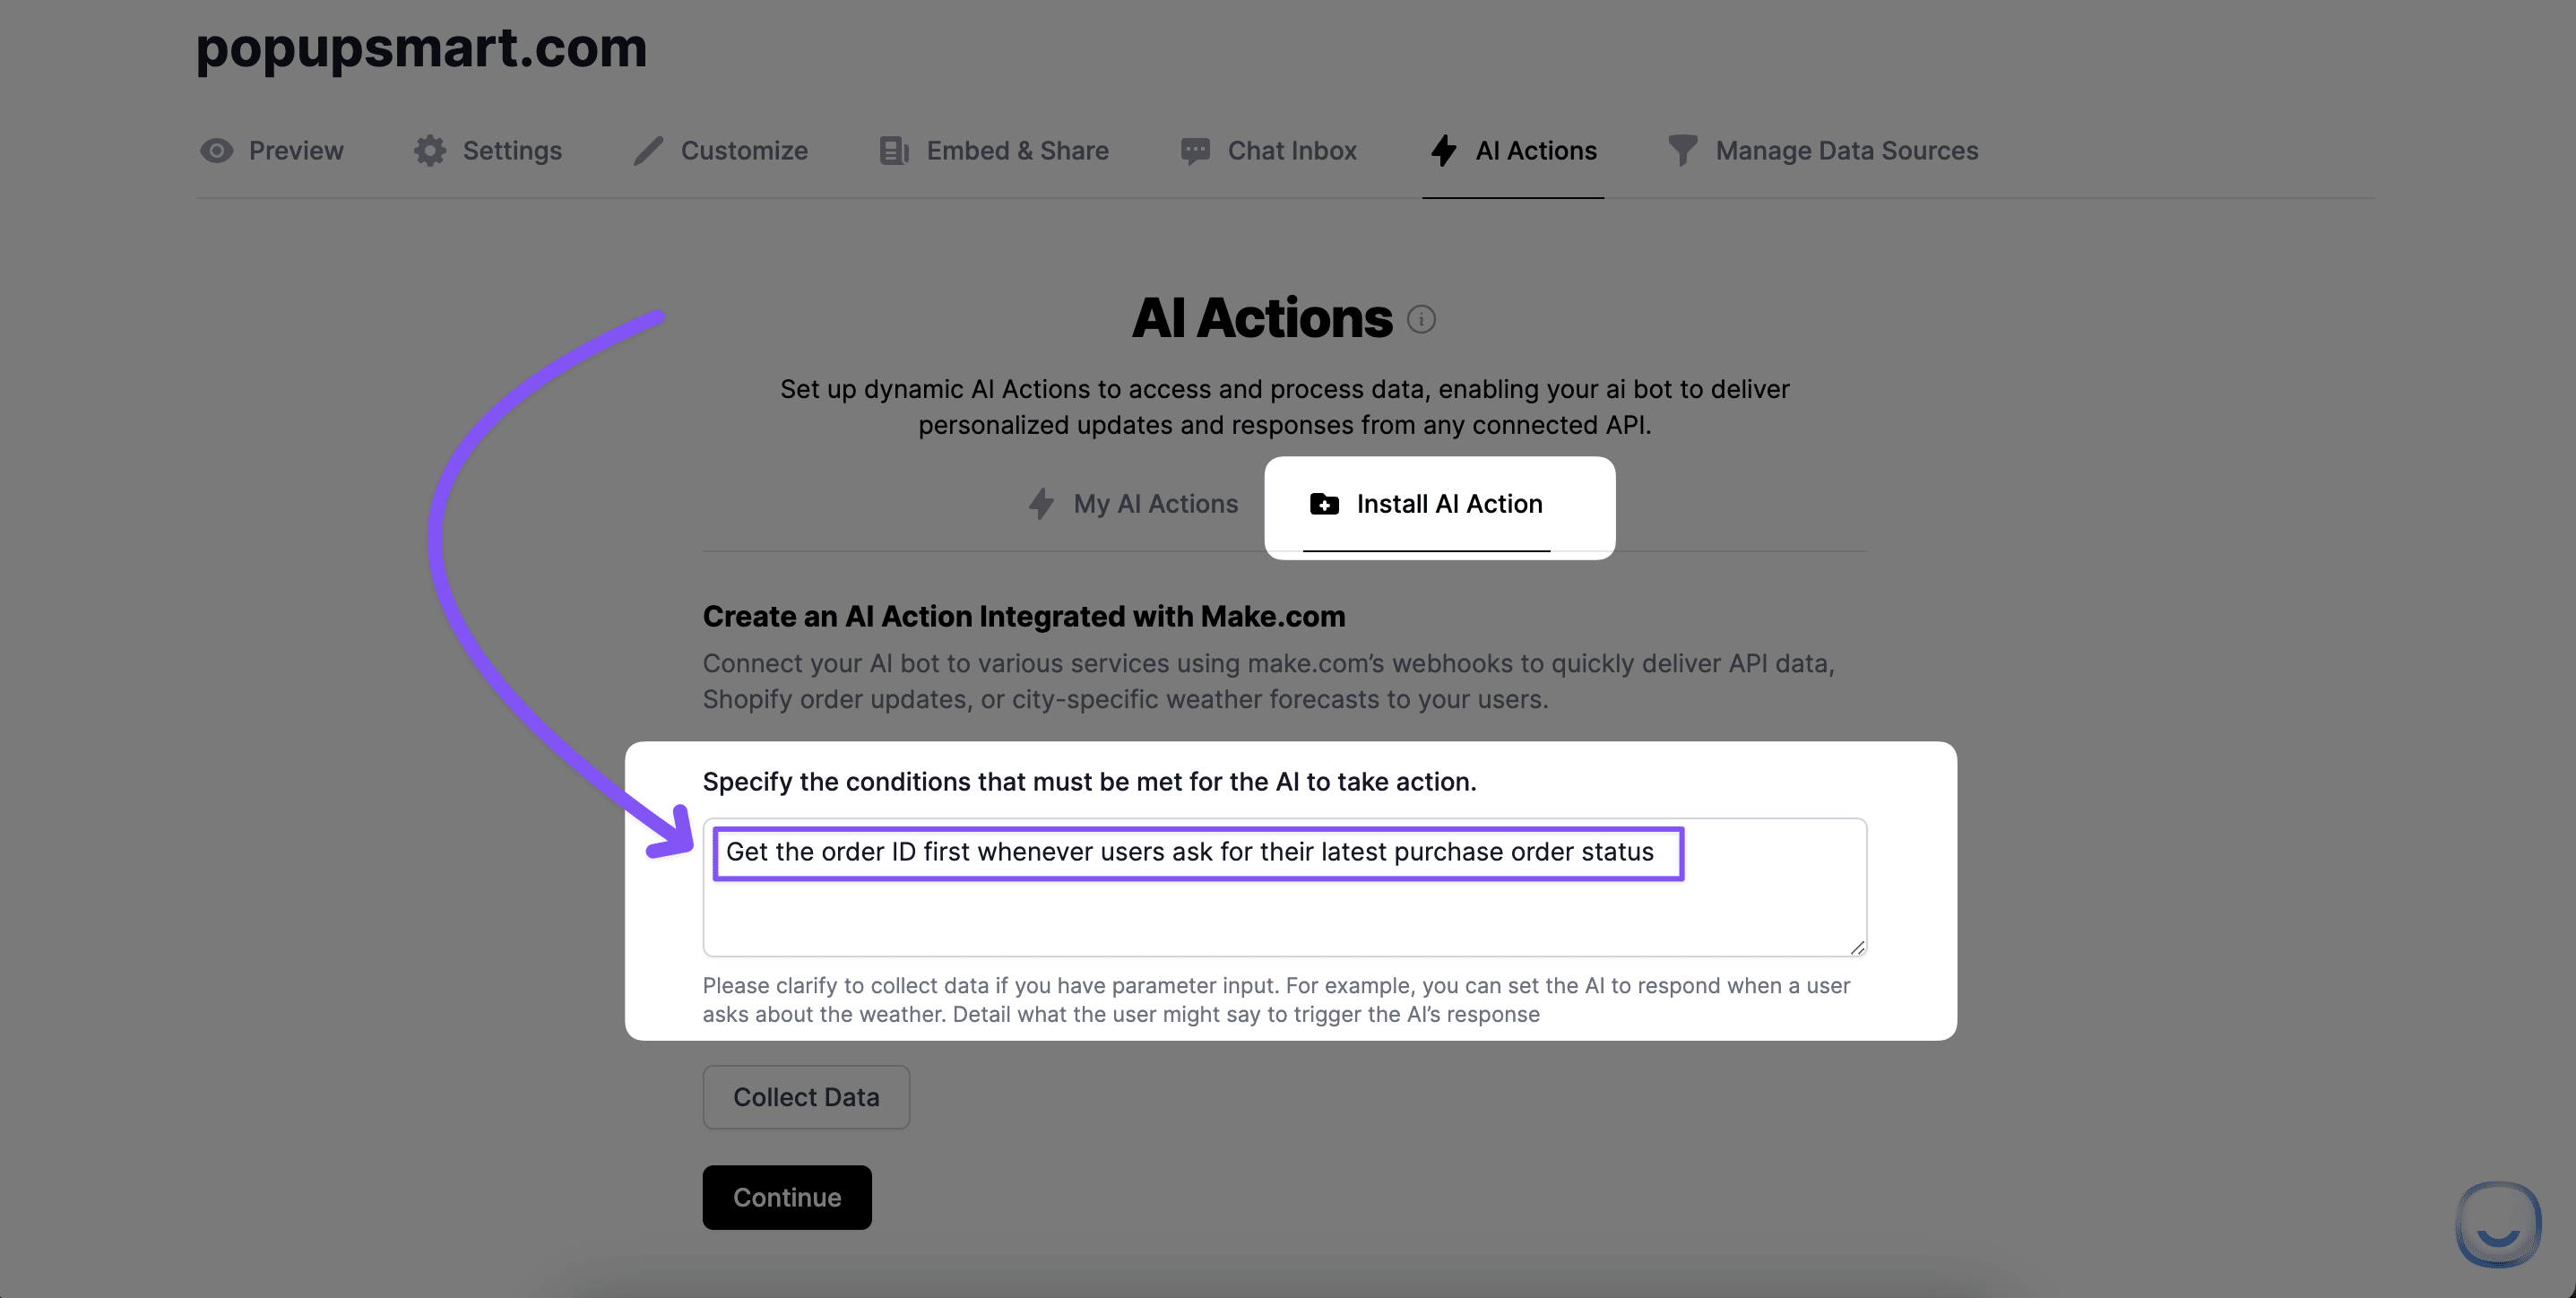
3. After clicking, please enter on which condition you want your AI chatbot to take an action,
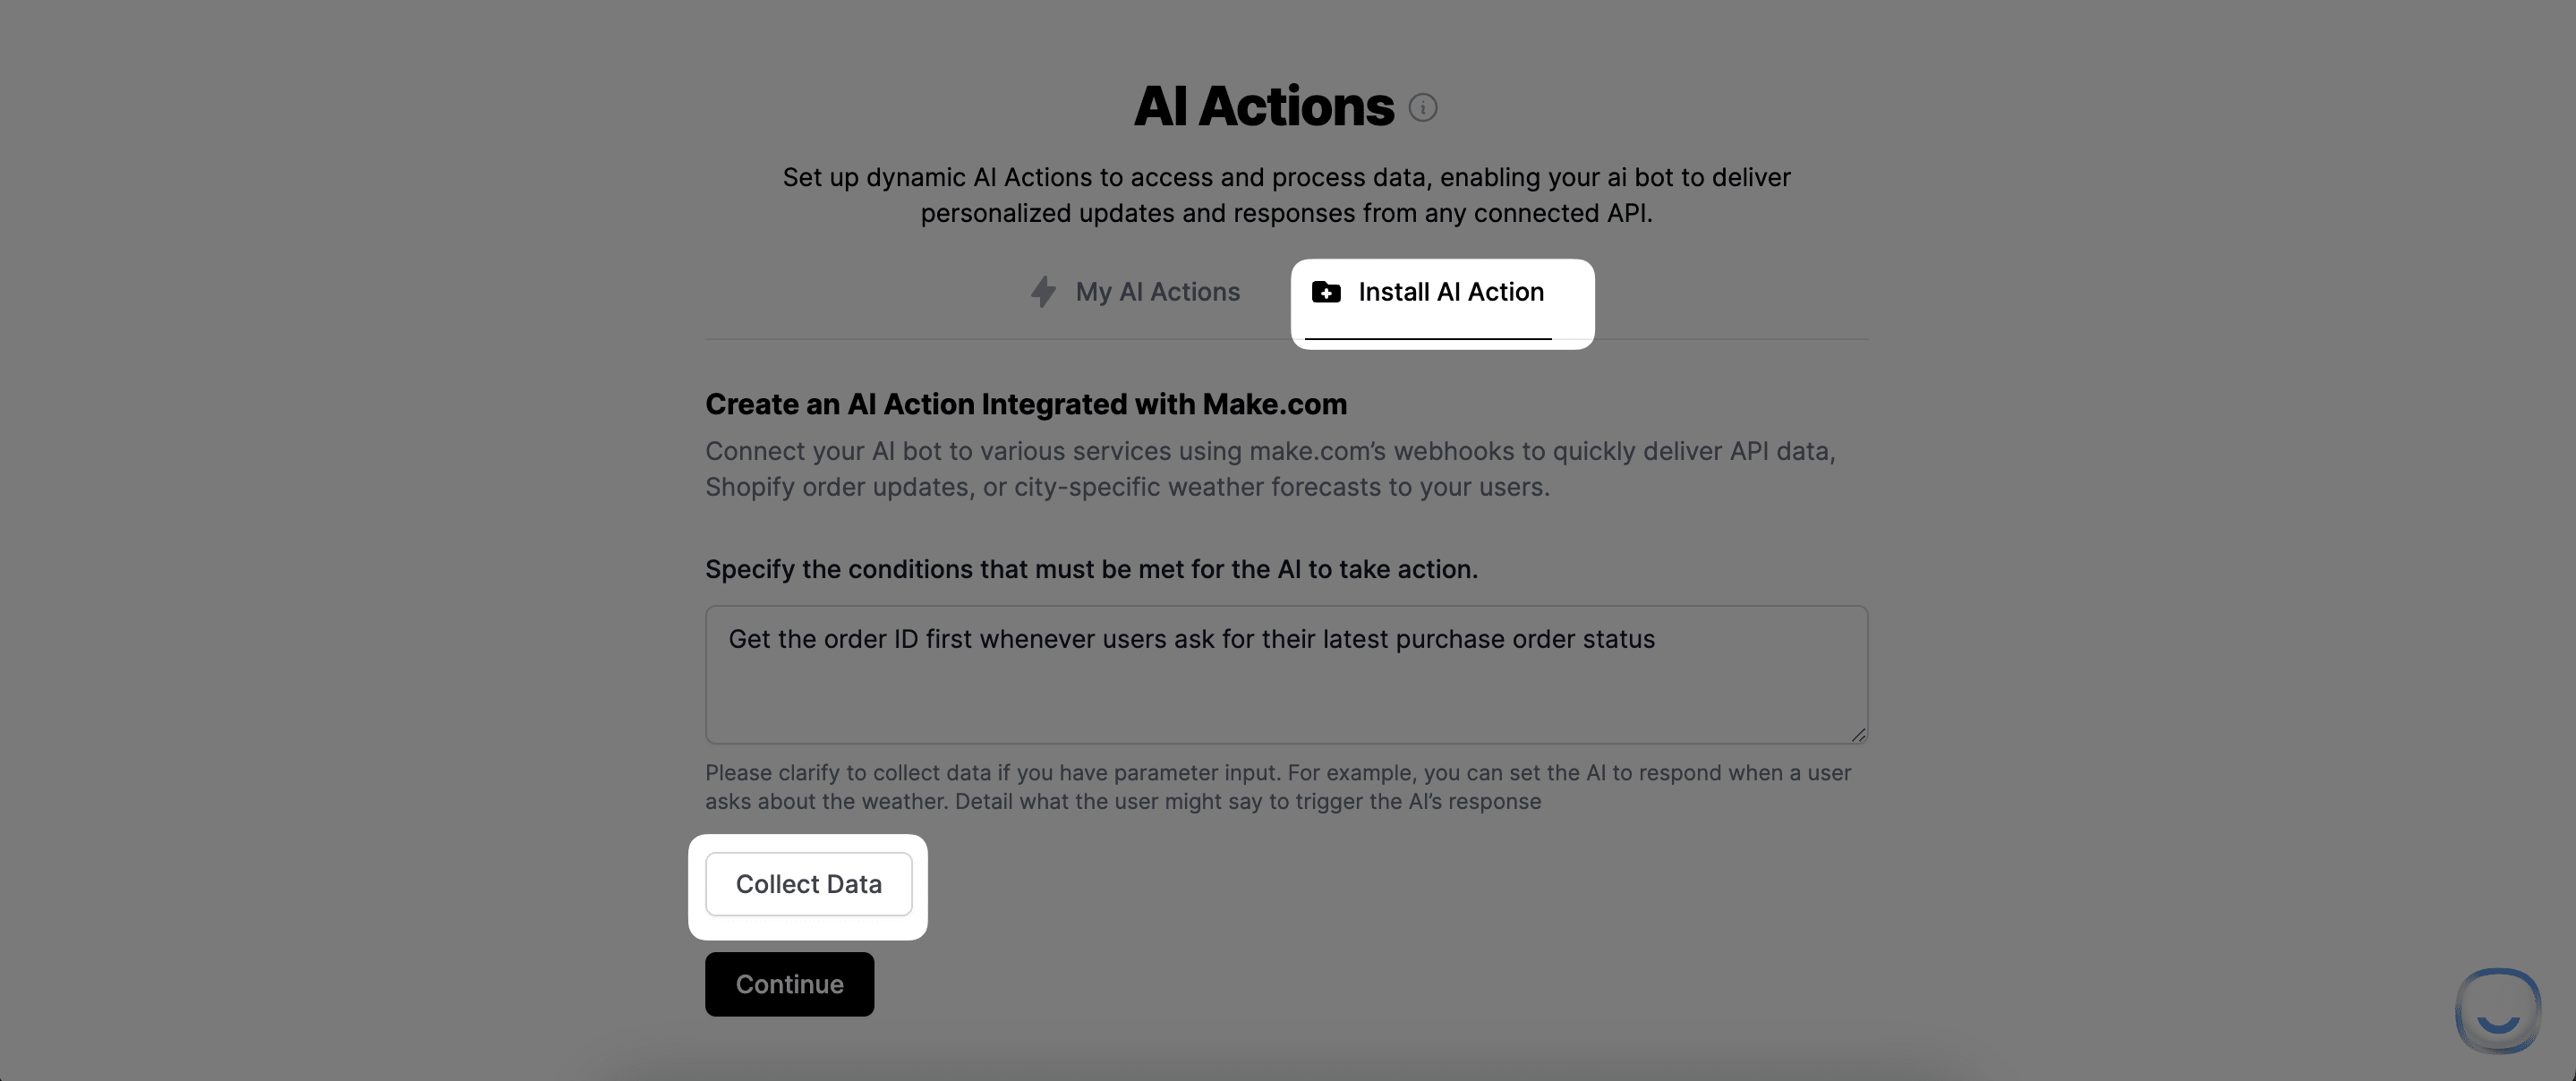
4. Click the Collect Data button to clarify your trigger condition,
5. Identify and specify the data to be collected from visitors, adding detailed descriptions for each Input for clarity,
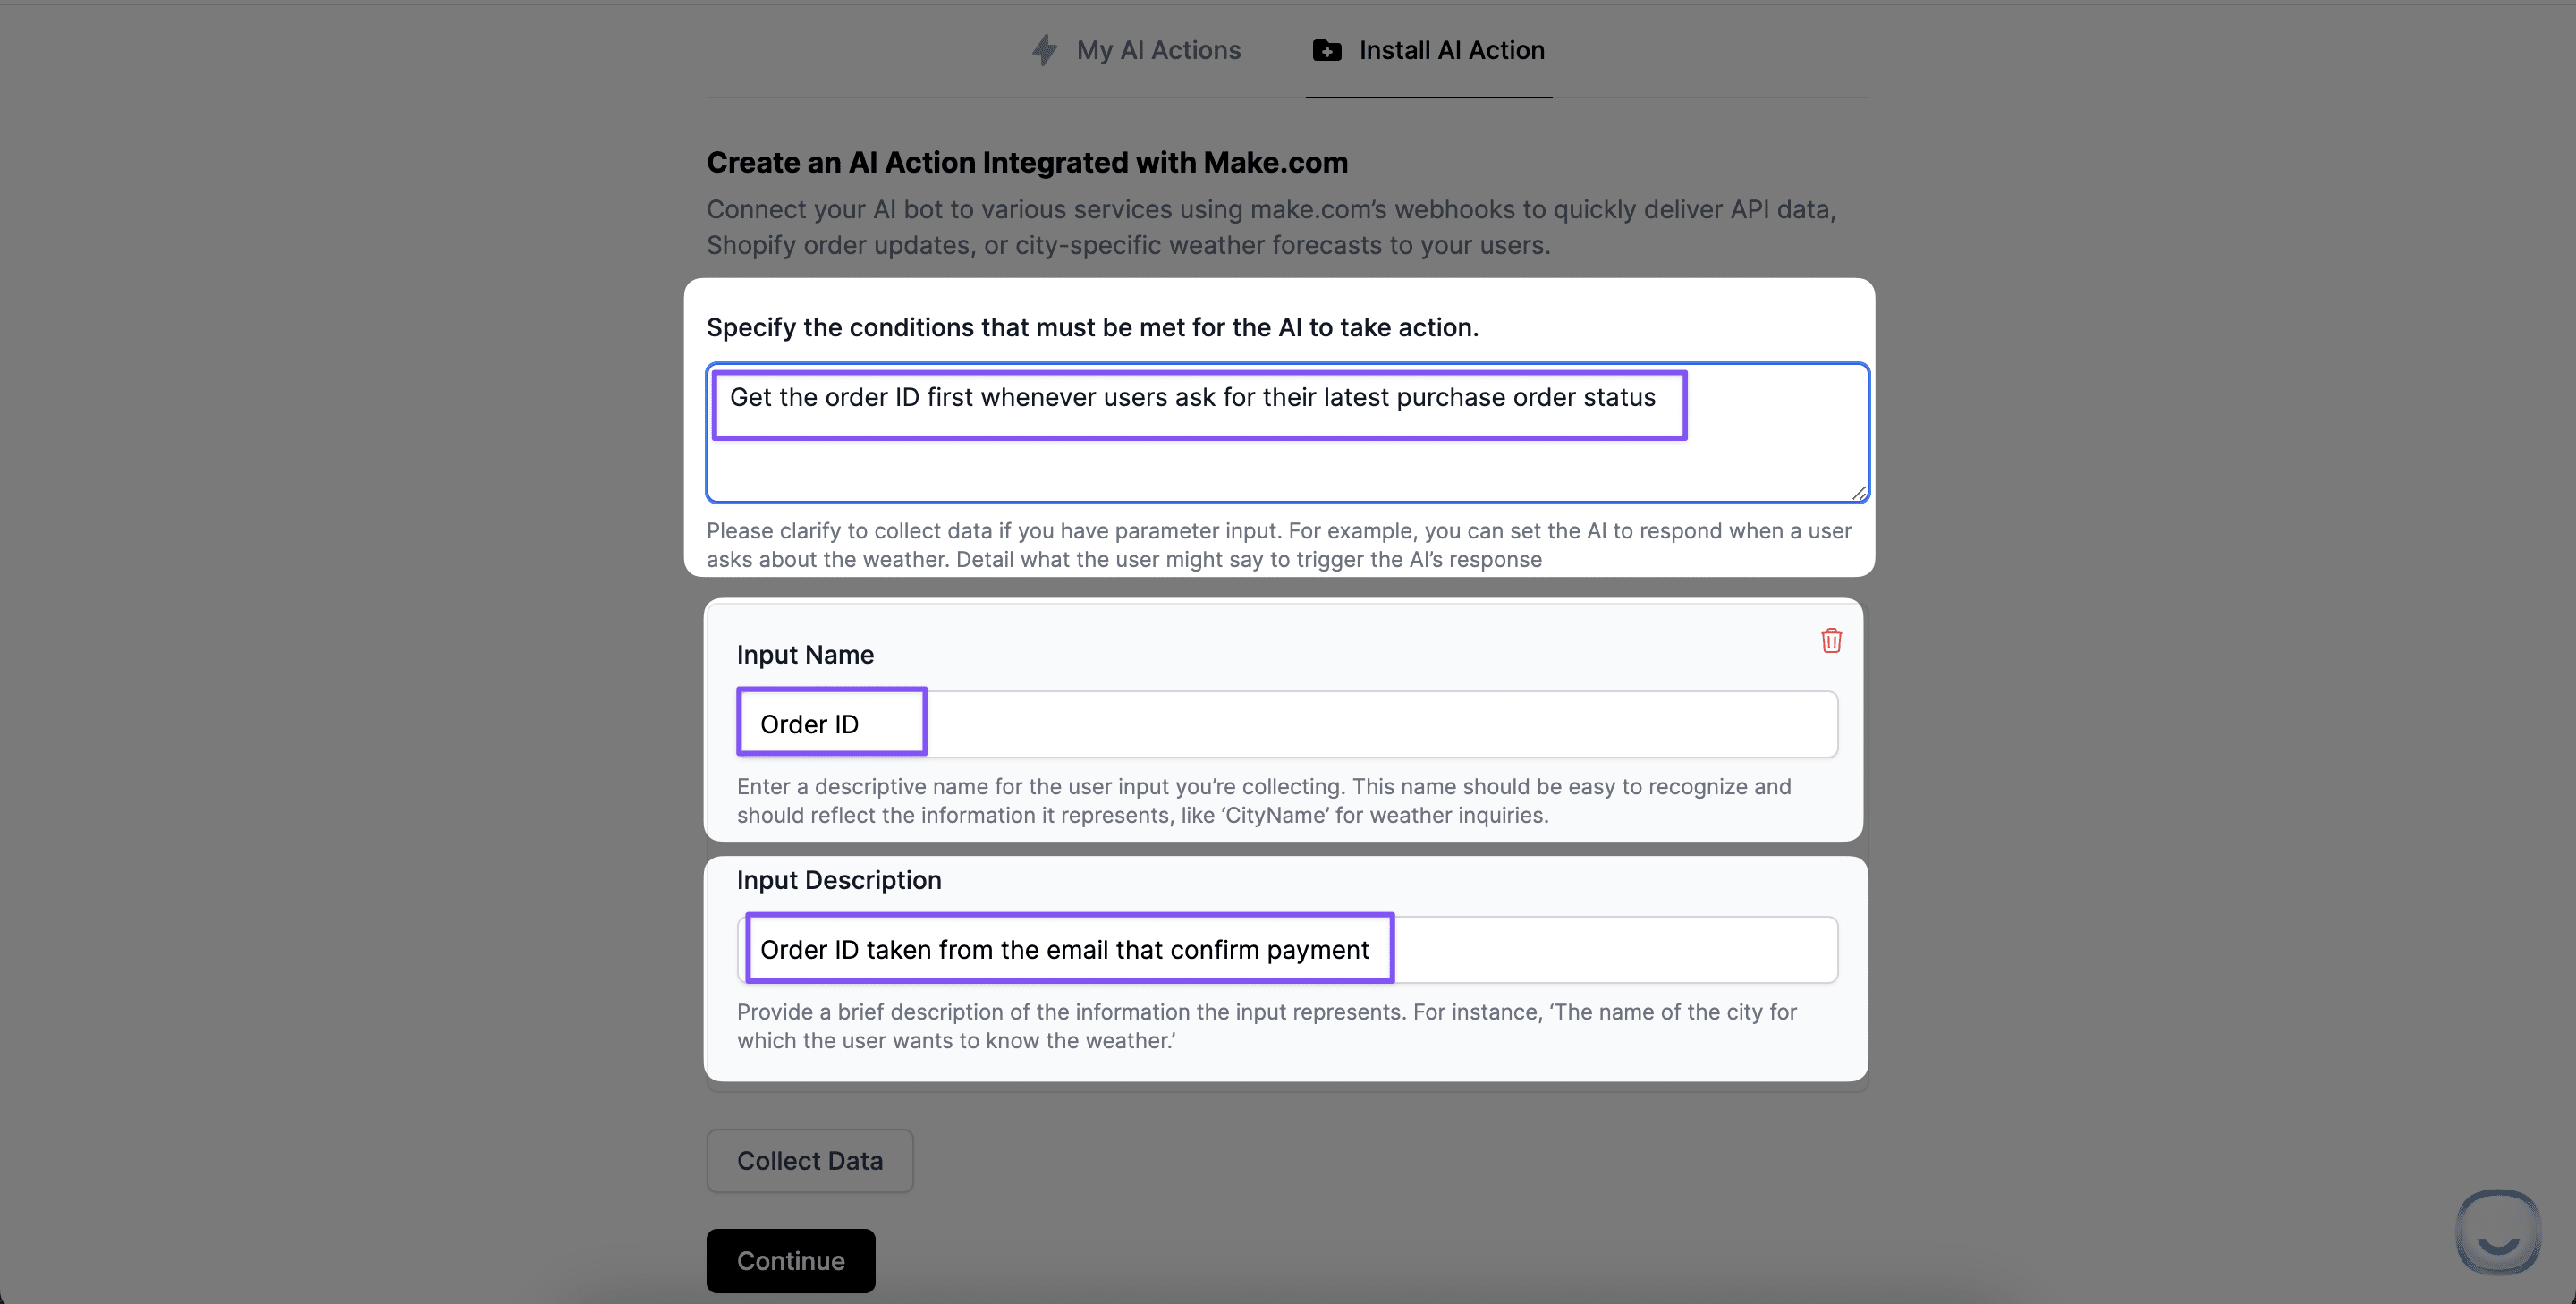
6. Click the Continue button below to add the webhook URL and navigate to your Make.com account.
Creating a New Scenario on Make.com
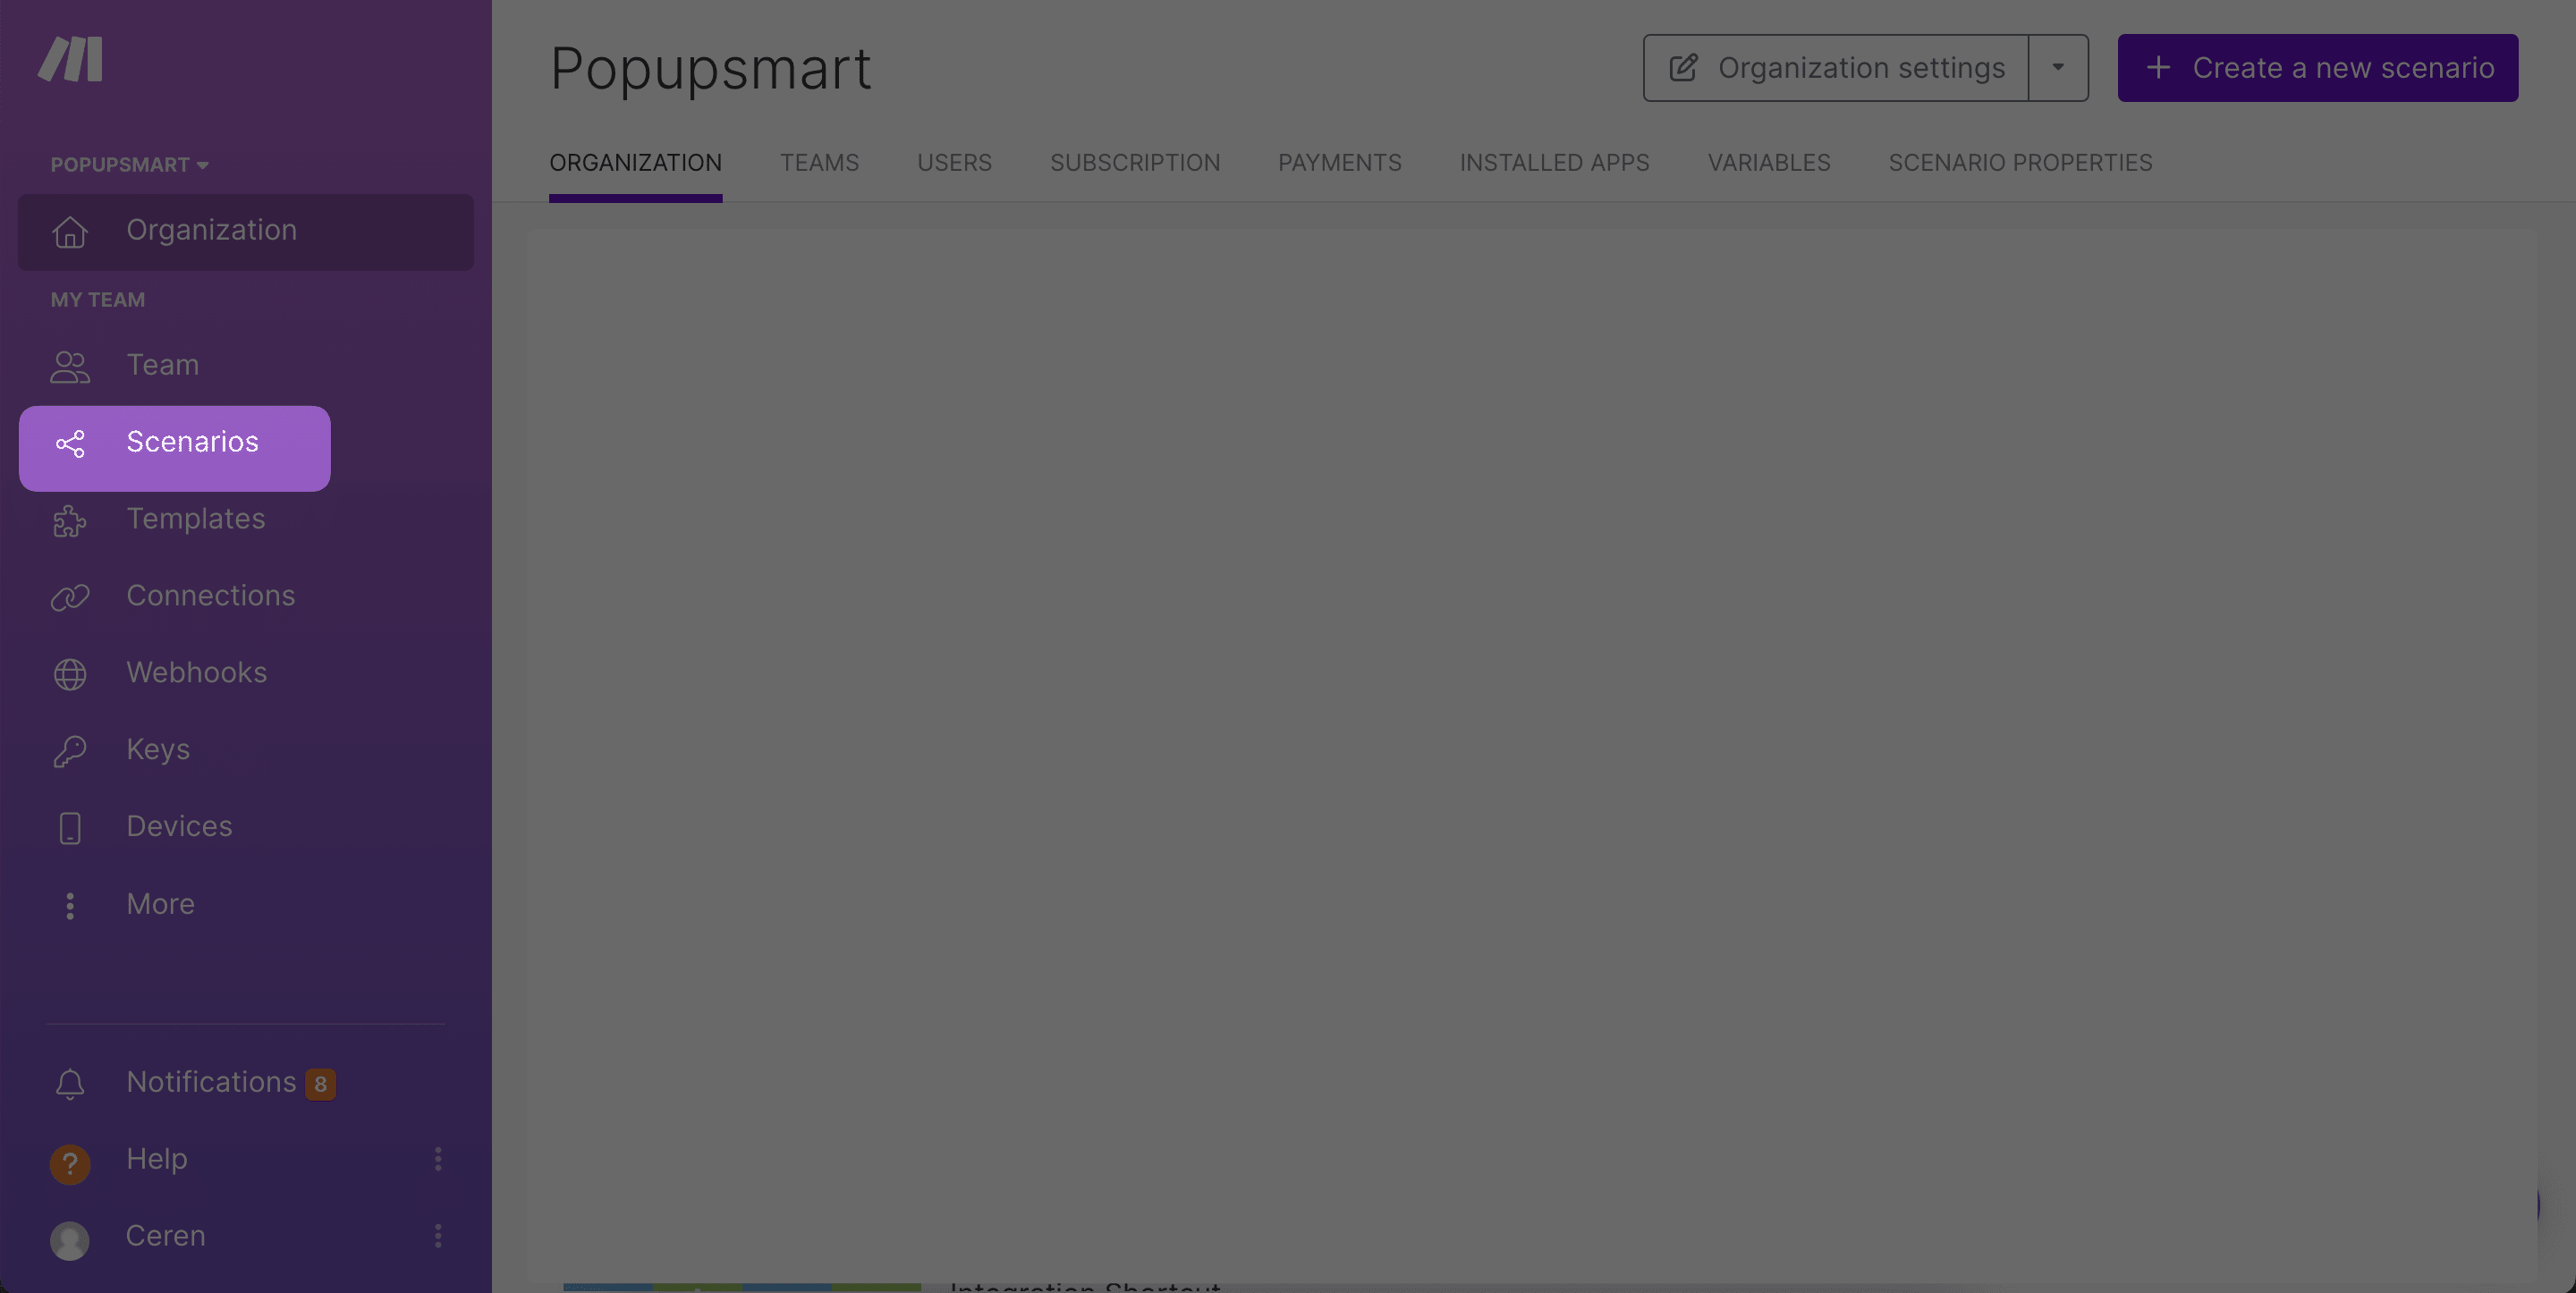
Login to your Make.com account first.
- Click the Scenarios option from the left sidebar,
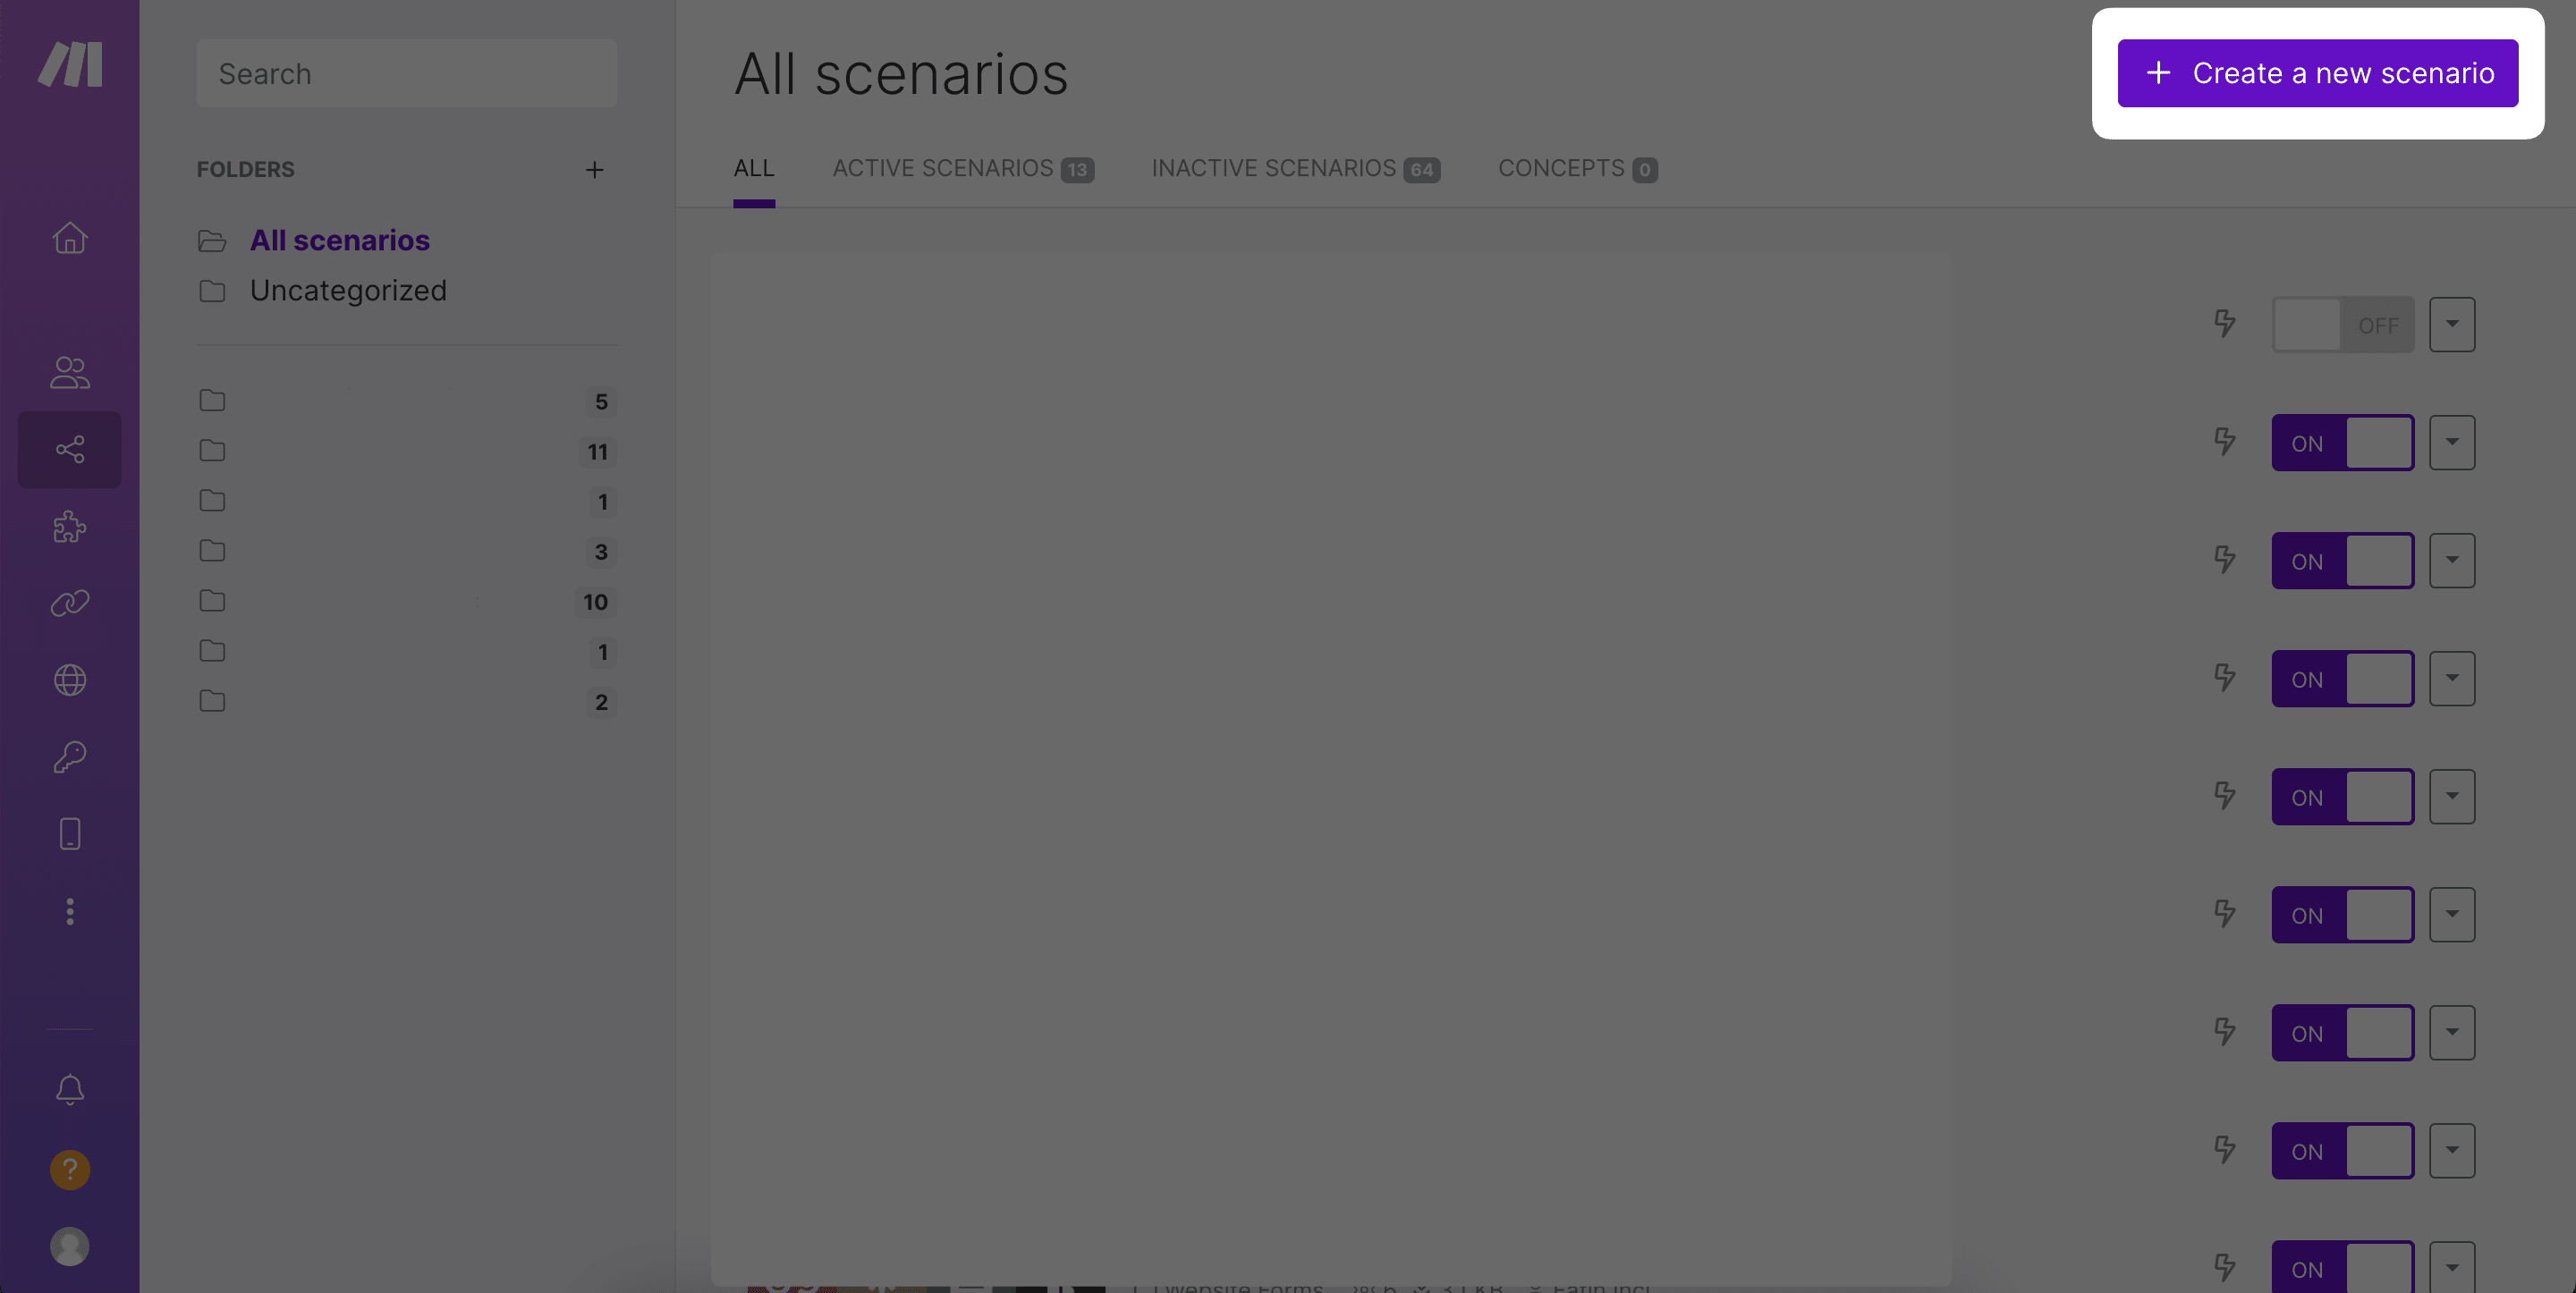
2. After navigating the Scenarios page, please click the Create a New Scneario button from the top right,
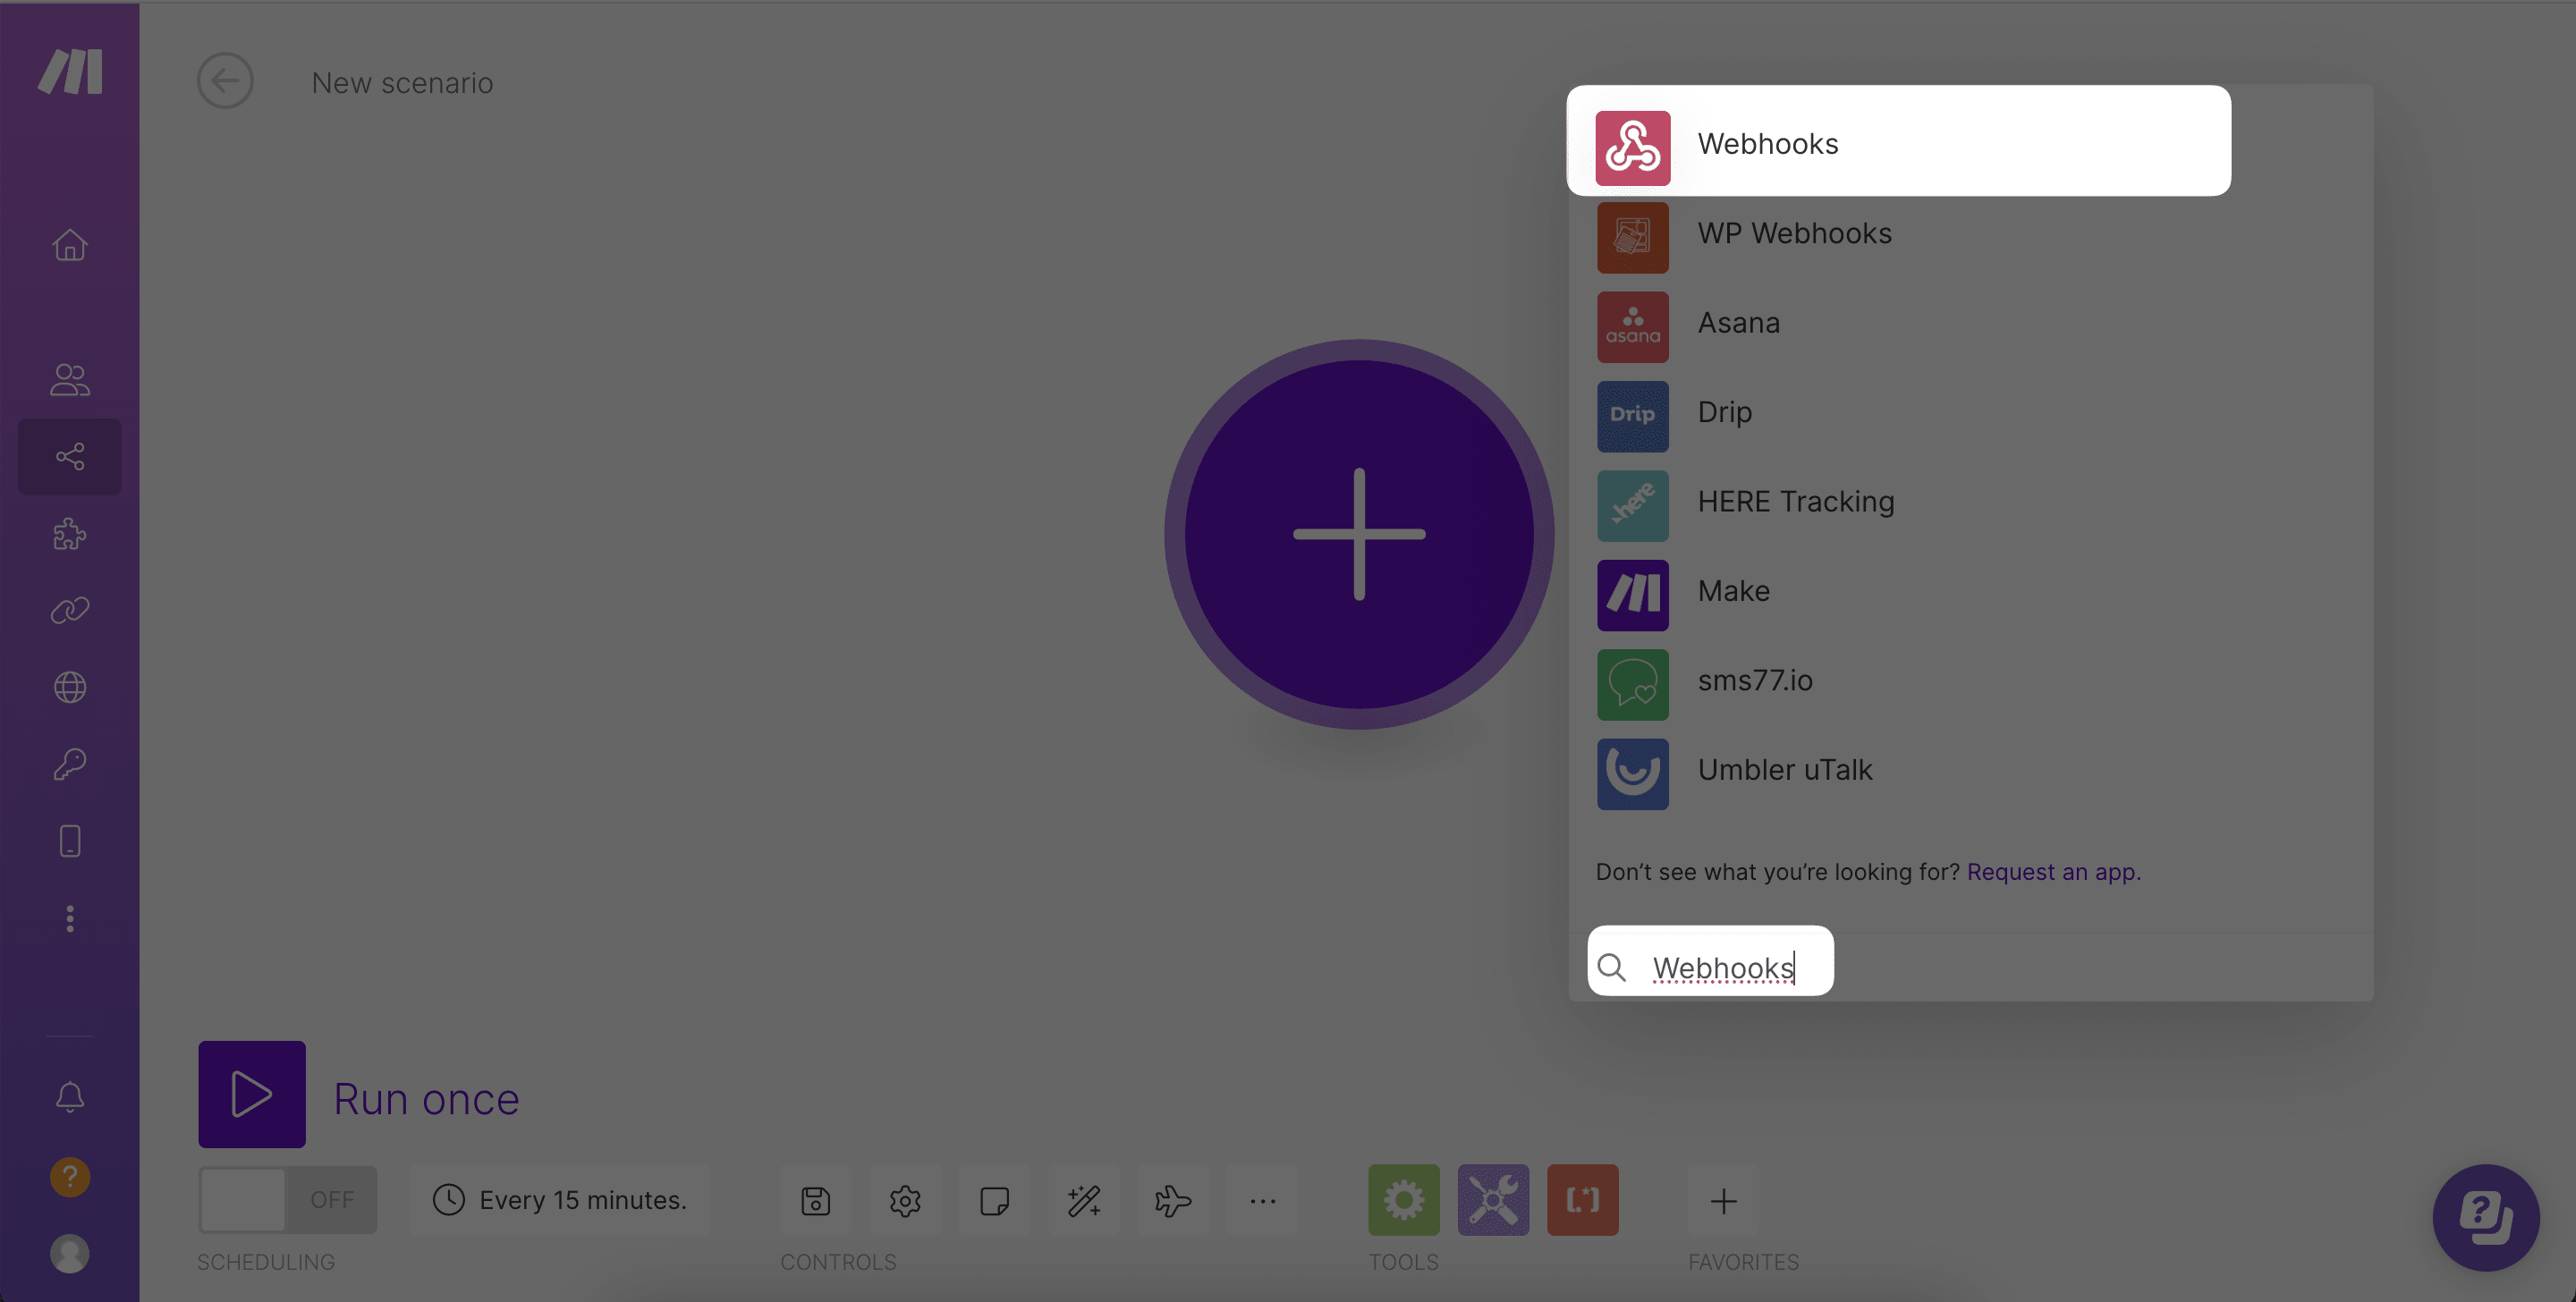
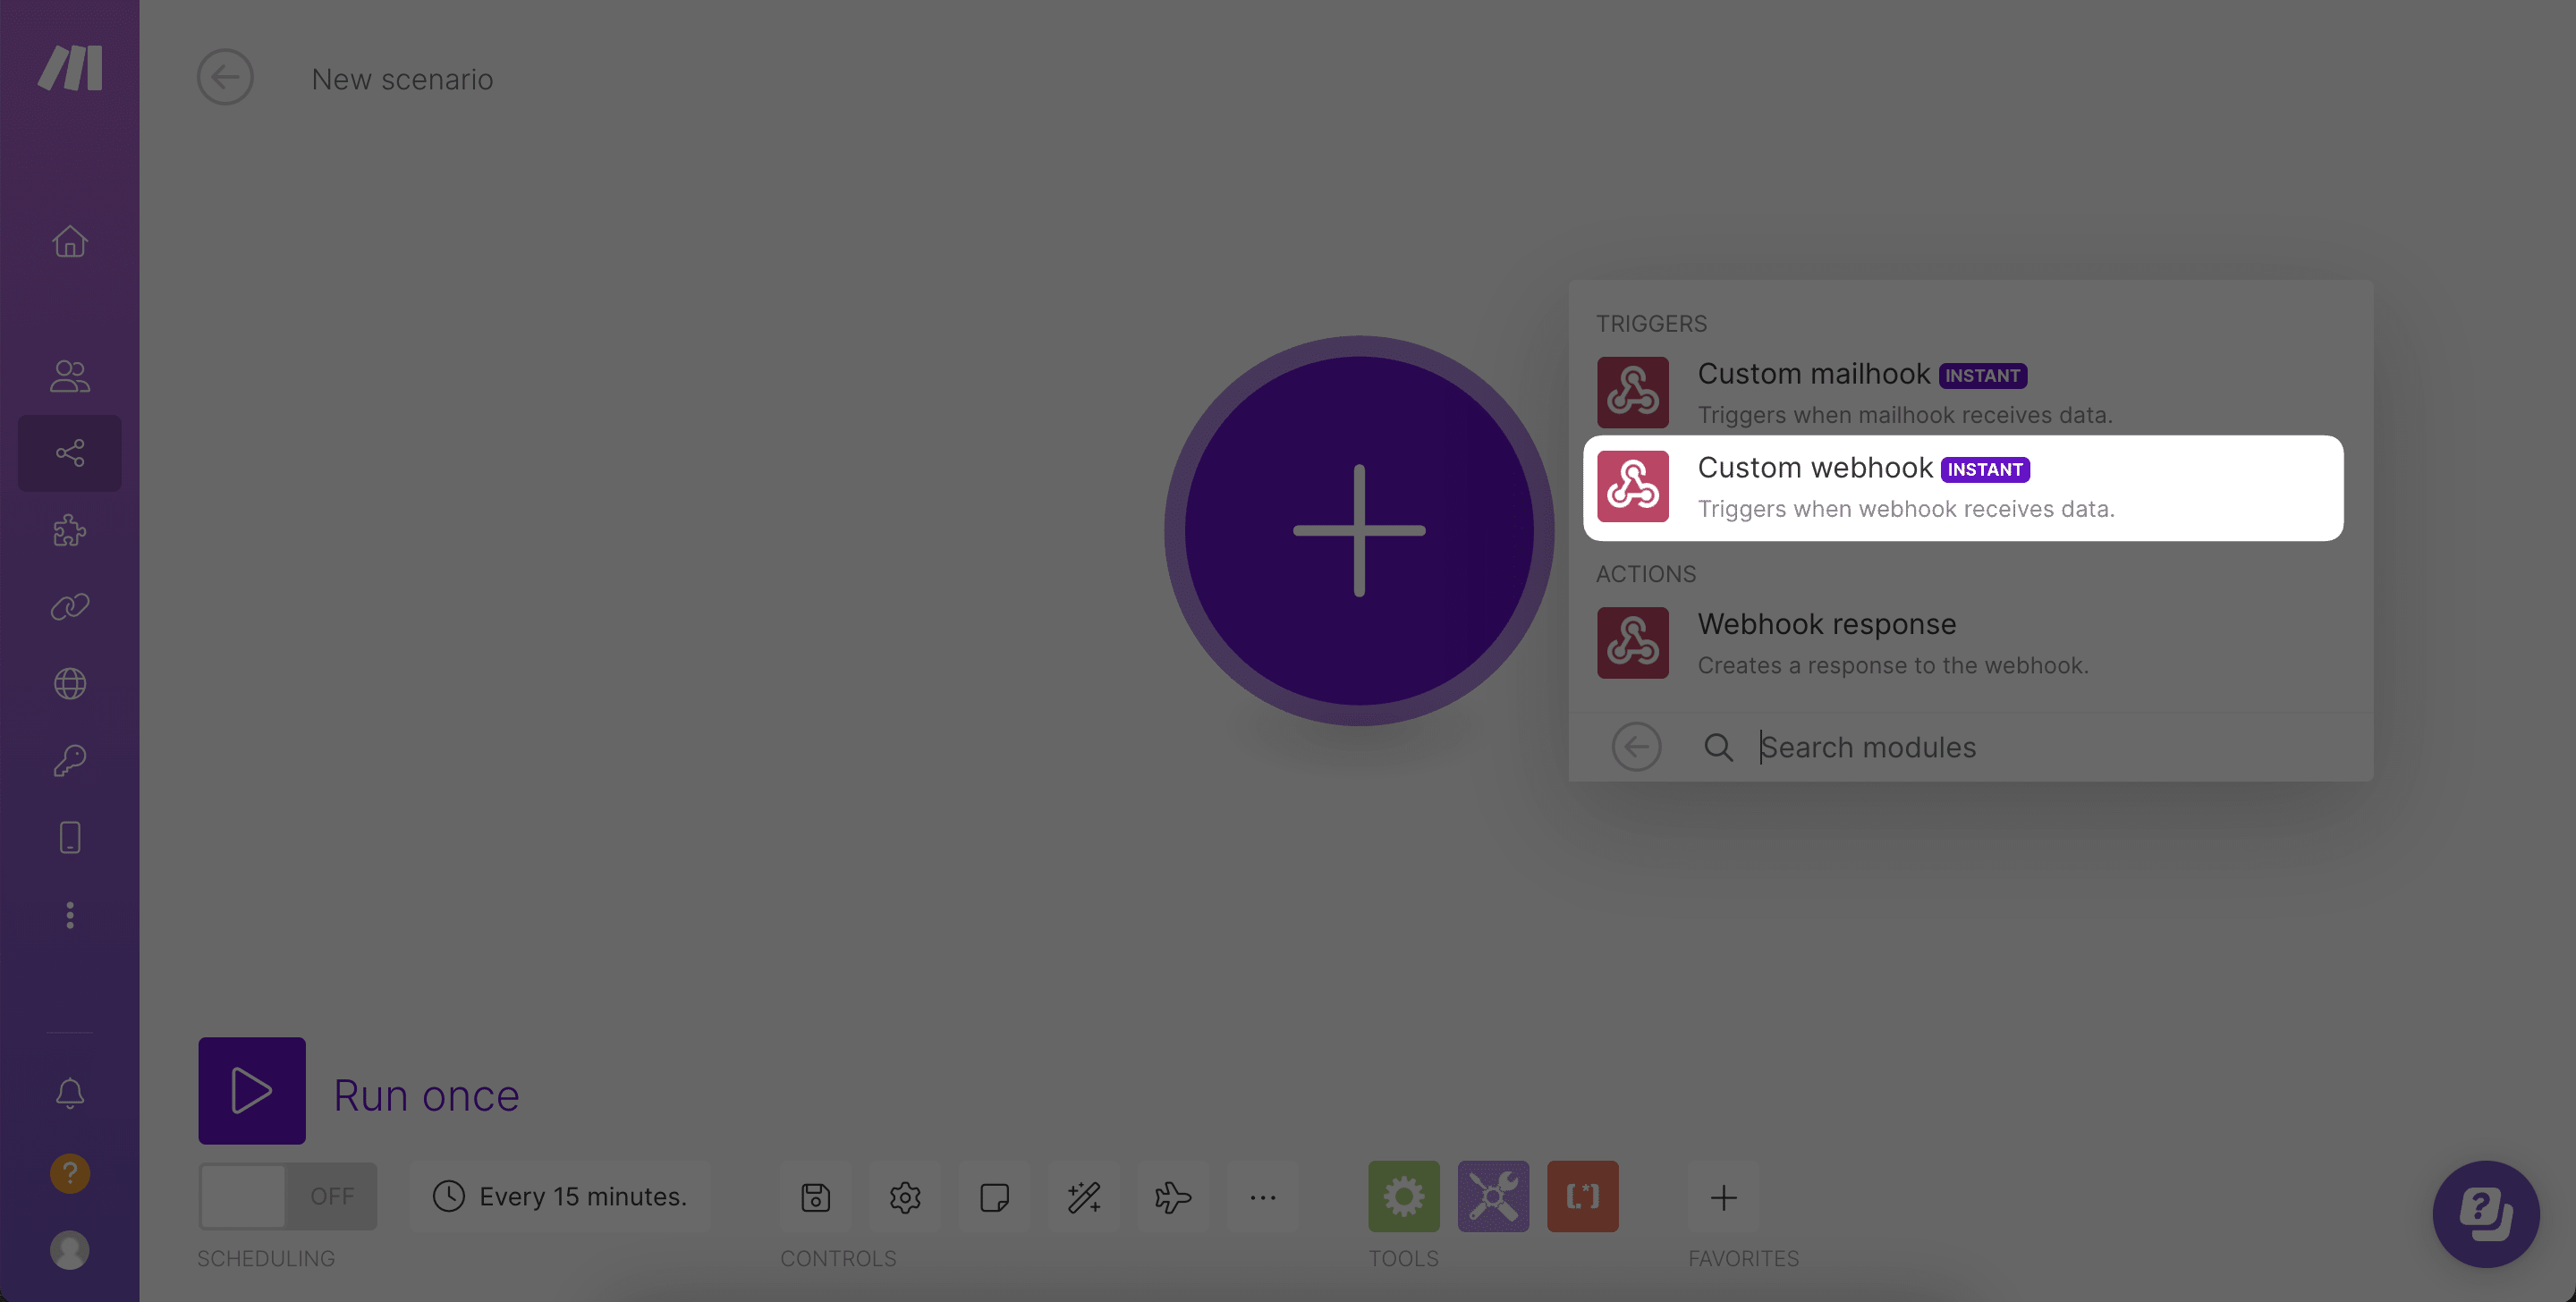
3. Then, you need to tap "+" button and find Webhooks from the list,
4. By the time you add Webhooks, you need to choose the Custom Webhook trigger from the list,
5. After adding the trigger, you must Add a new hook,
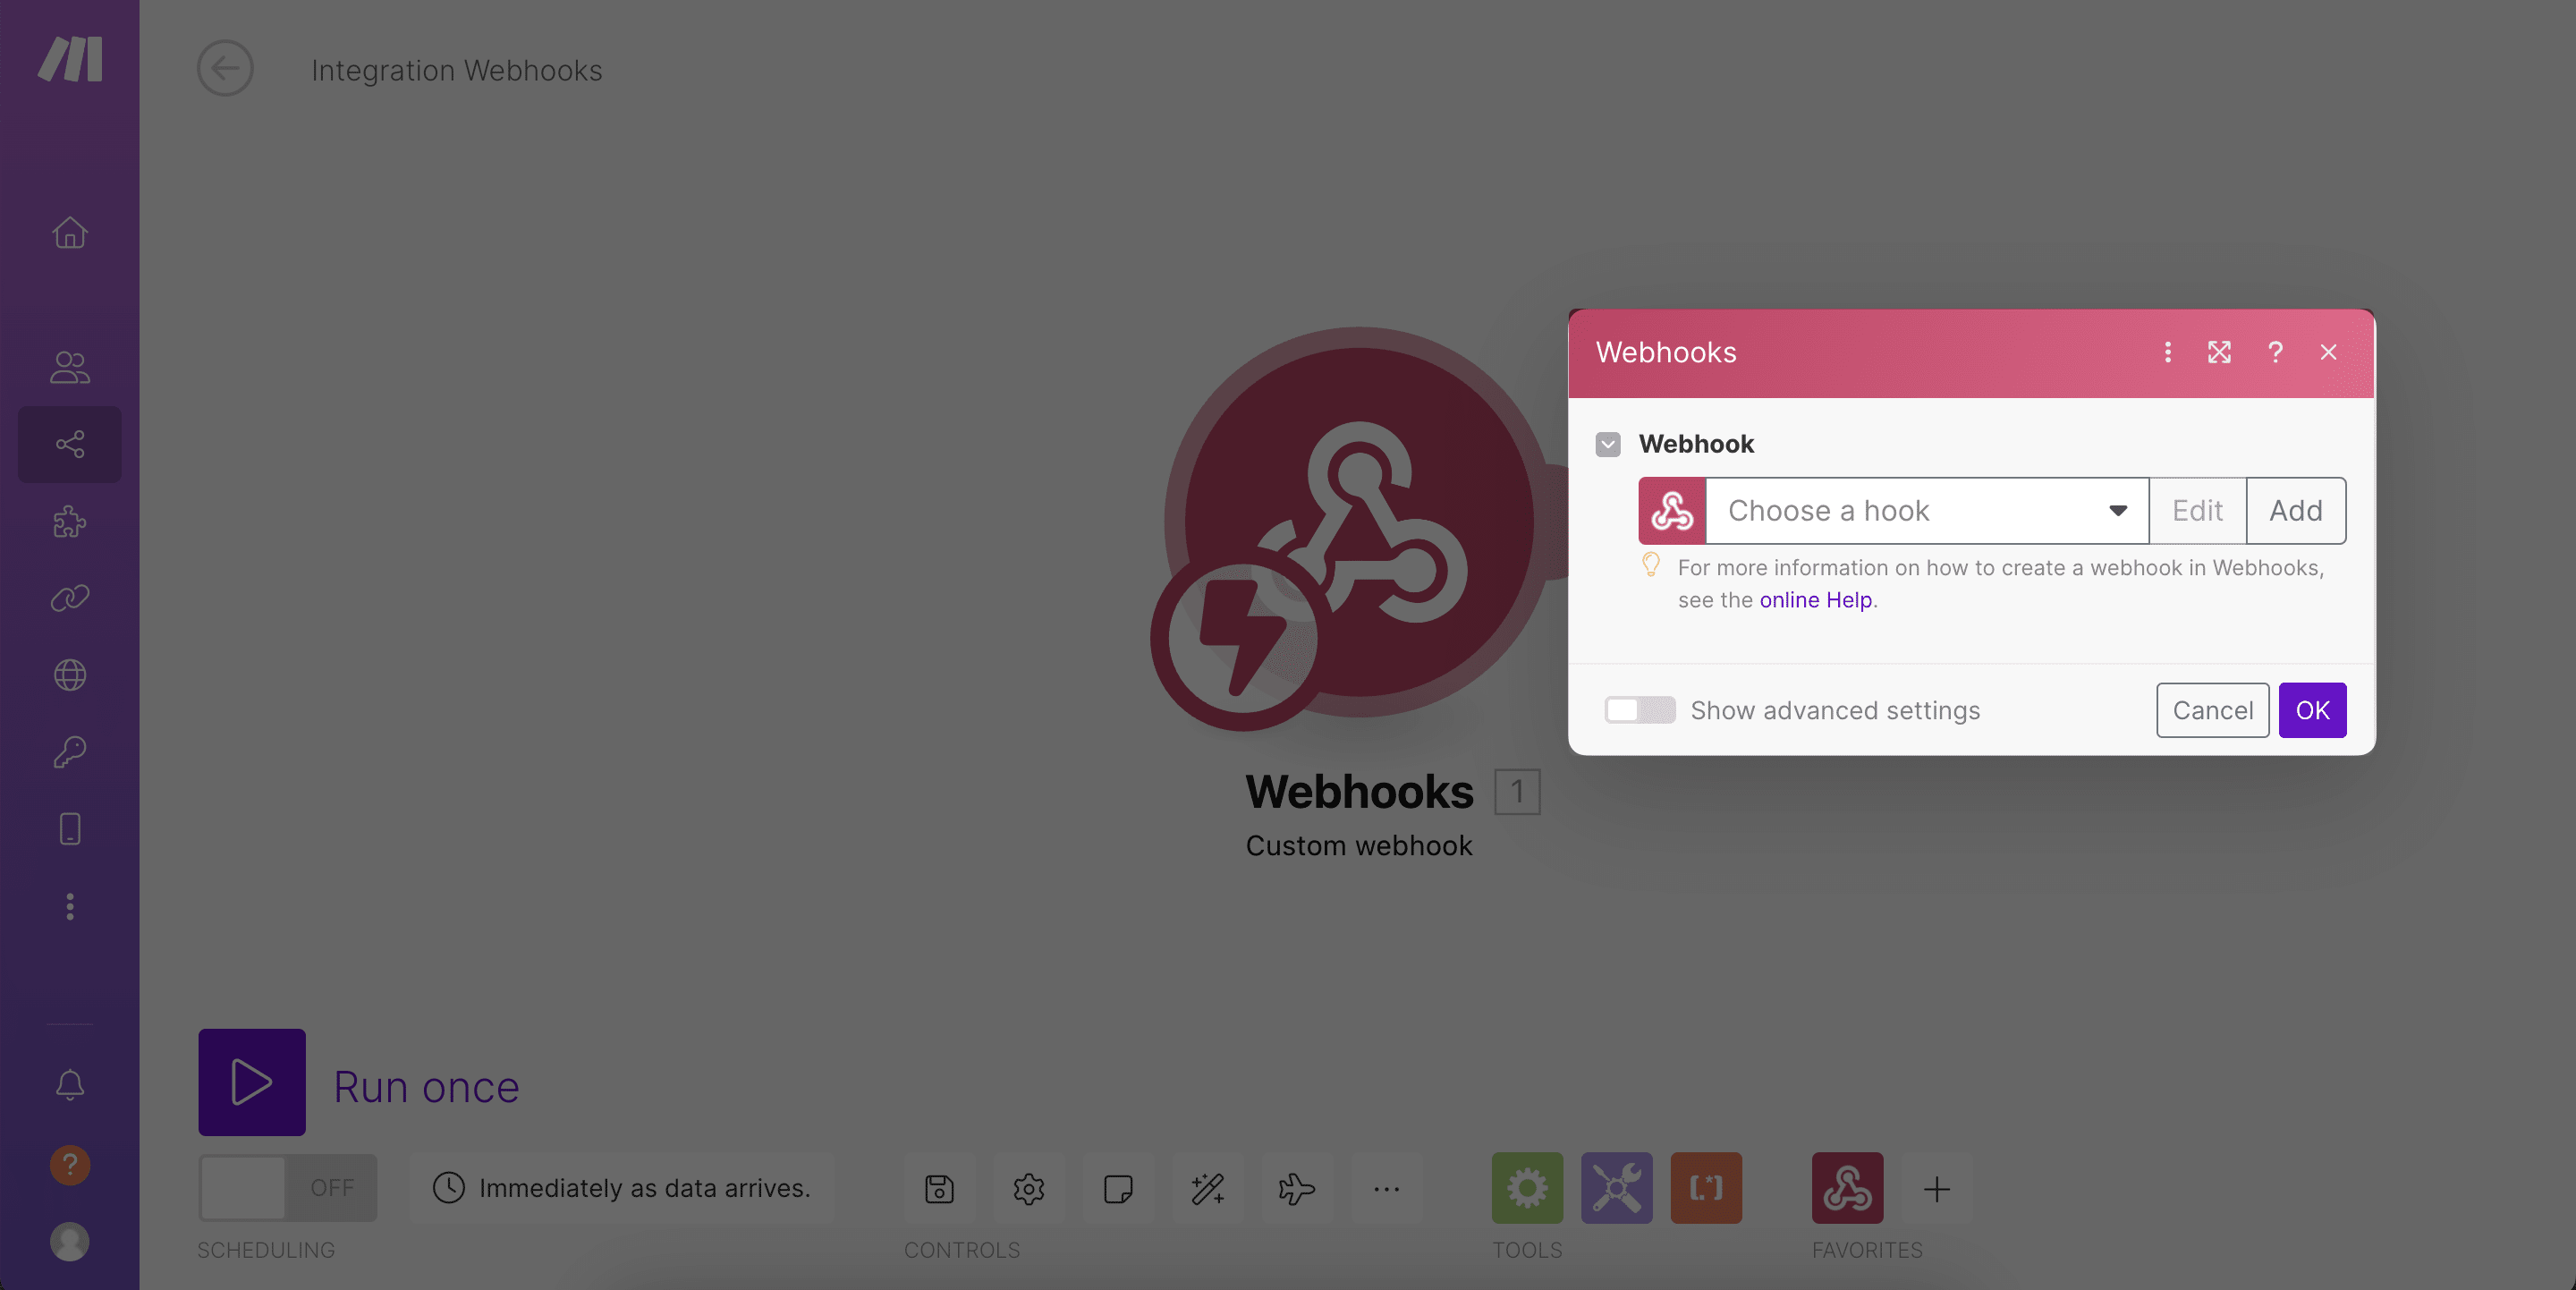
6. Following the naming the hook, you will get a "Webhook URL". Please do not forget to copy this URL because you must paste it to LiveChatAI.

7. Navigate back to where you left LiveChatAI dashboard and paste the URL to the related section,
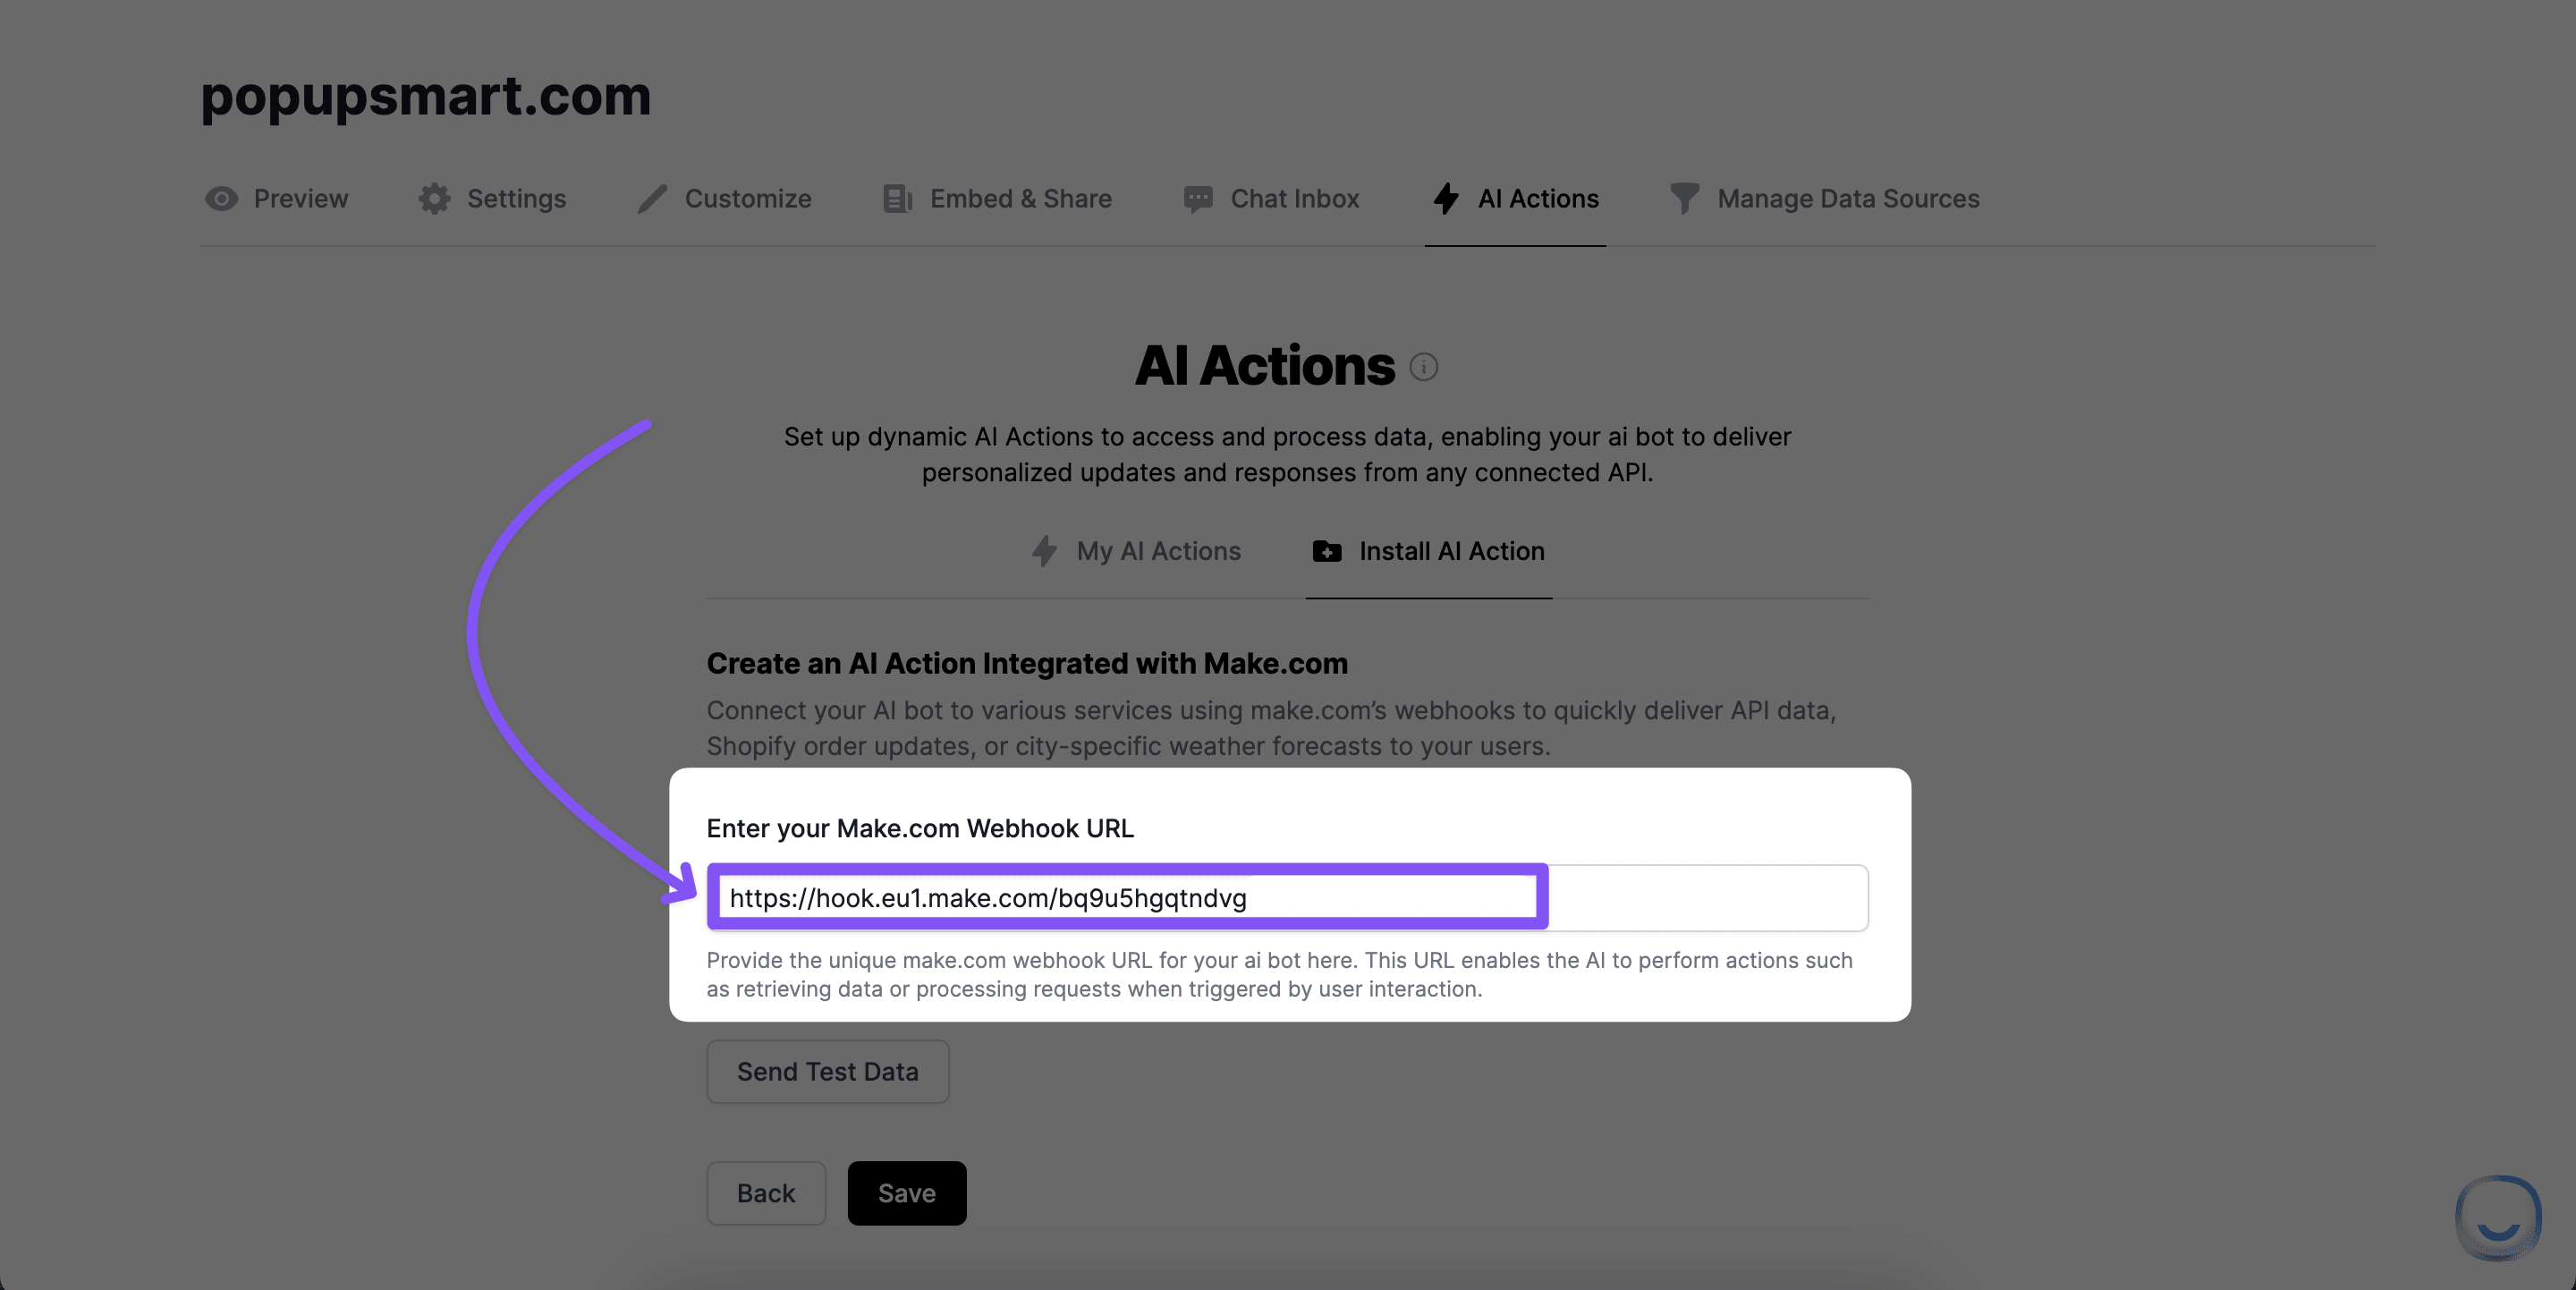
8. Once you click the Save button below, your Action will be activated, completing the setup process on the LiveChatAI platform.

9. Turn back to Make.com to complete your scenario and click "+" button to add Shopify module this time,
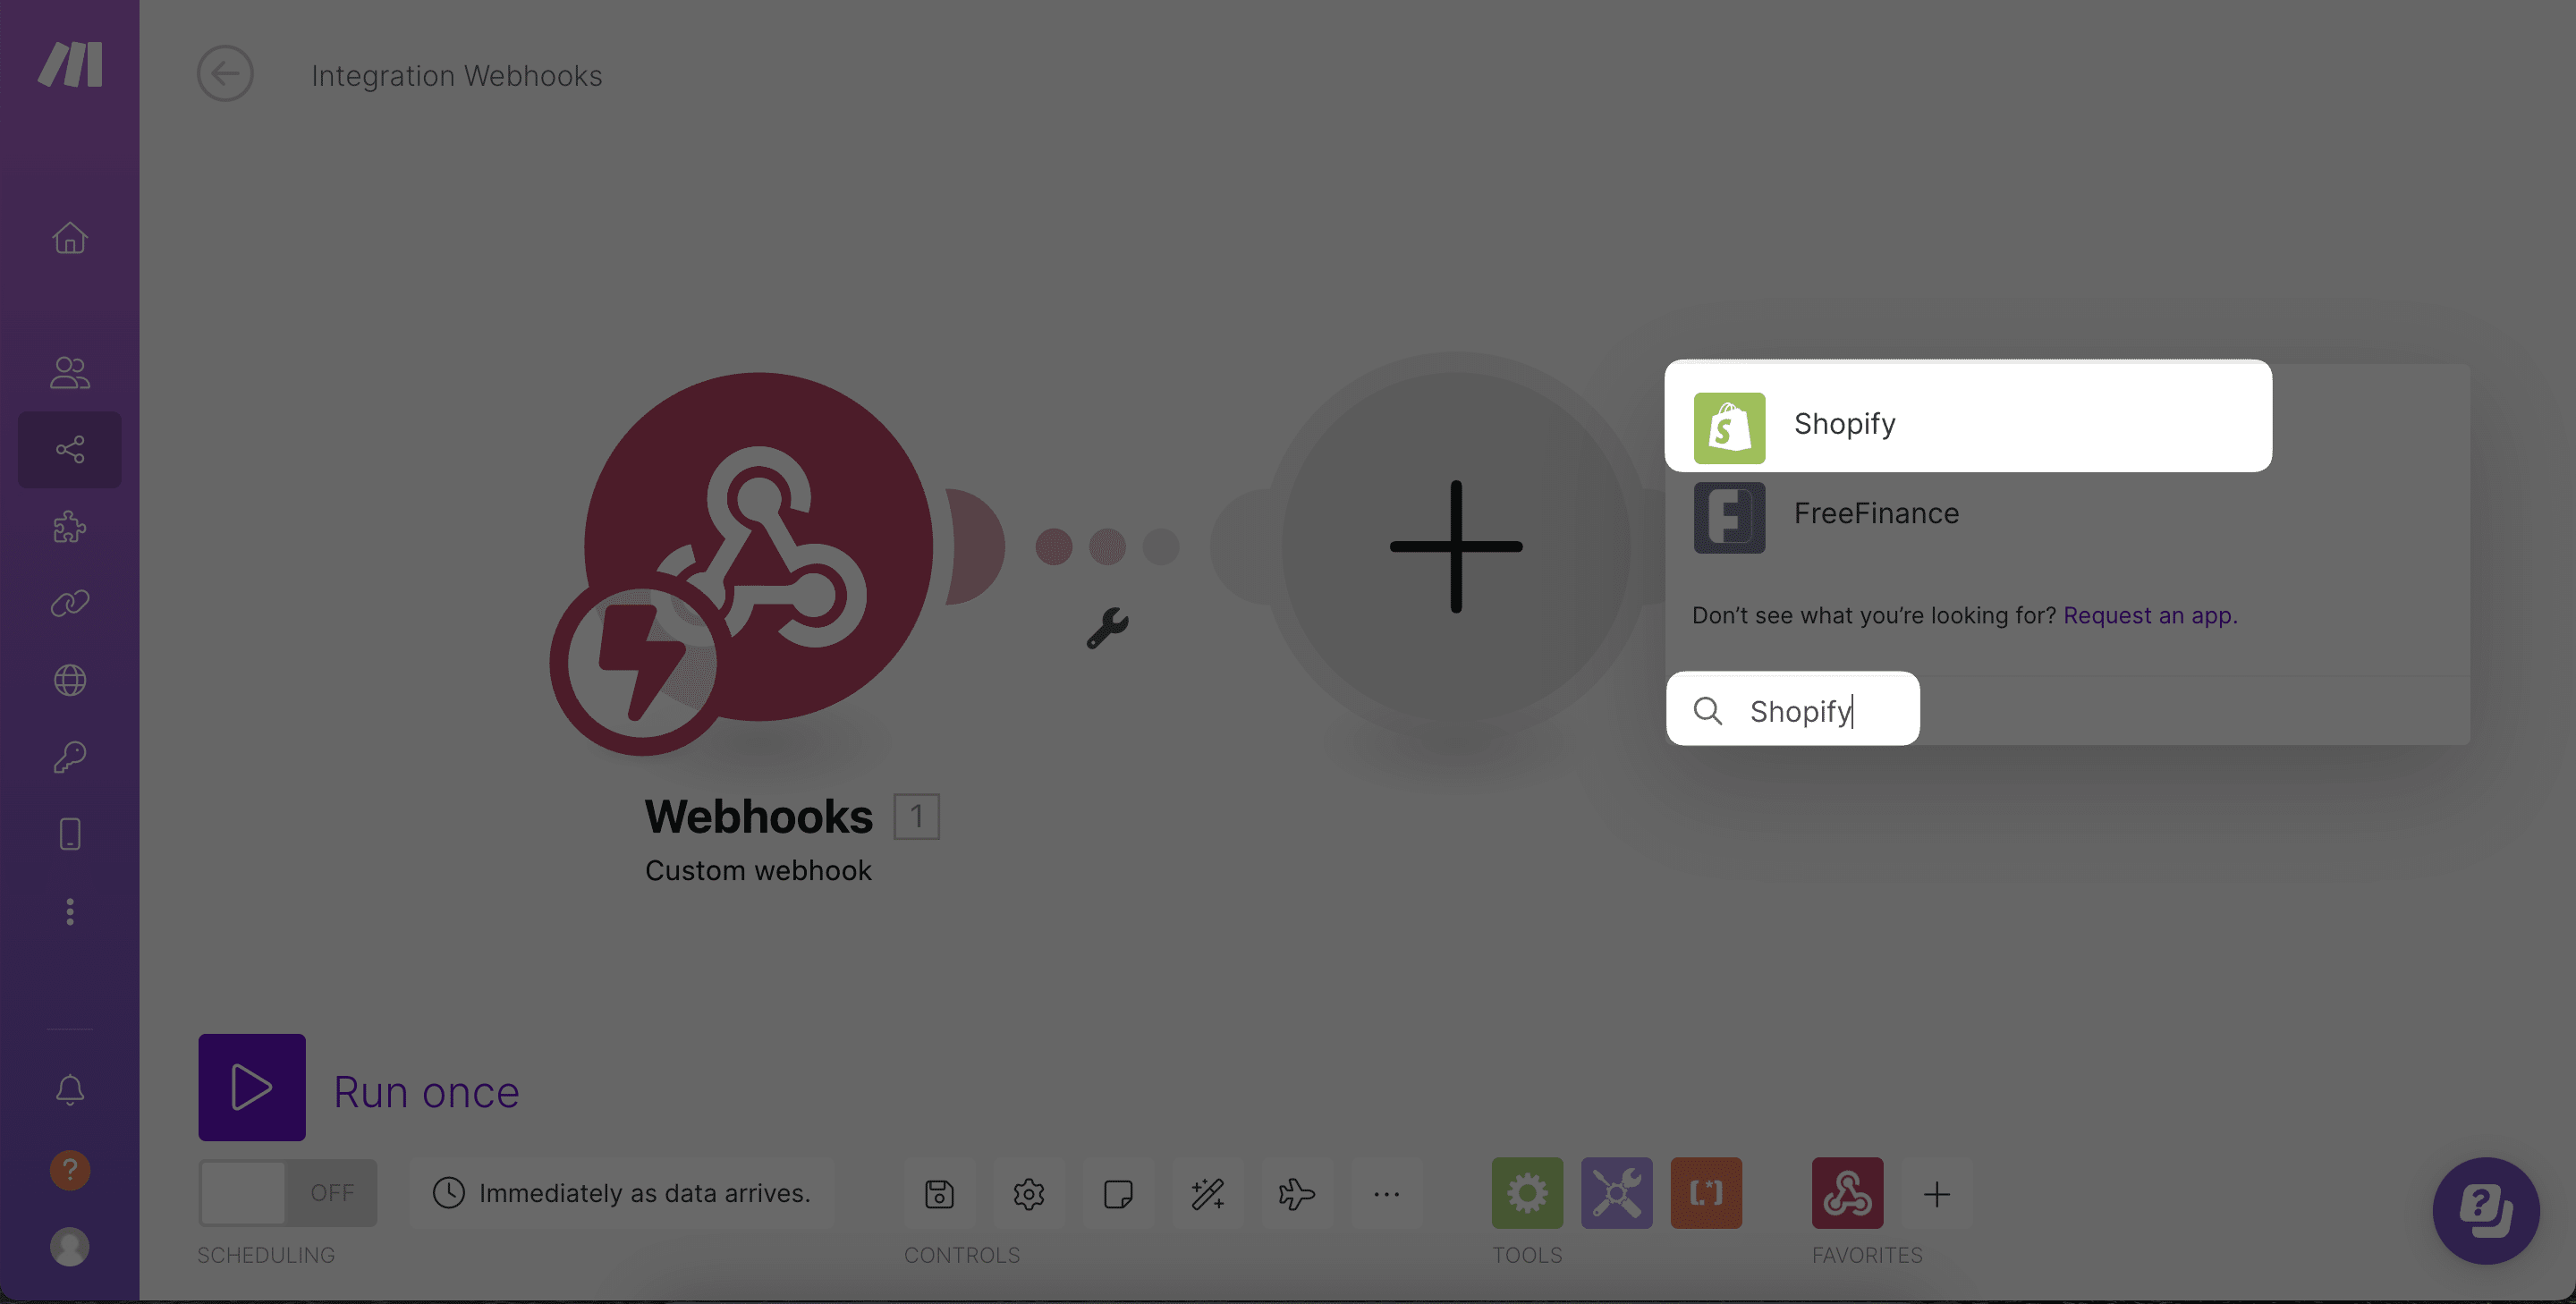
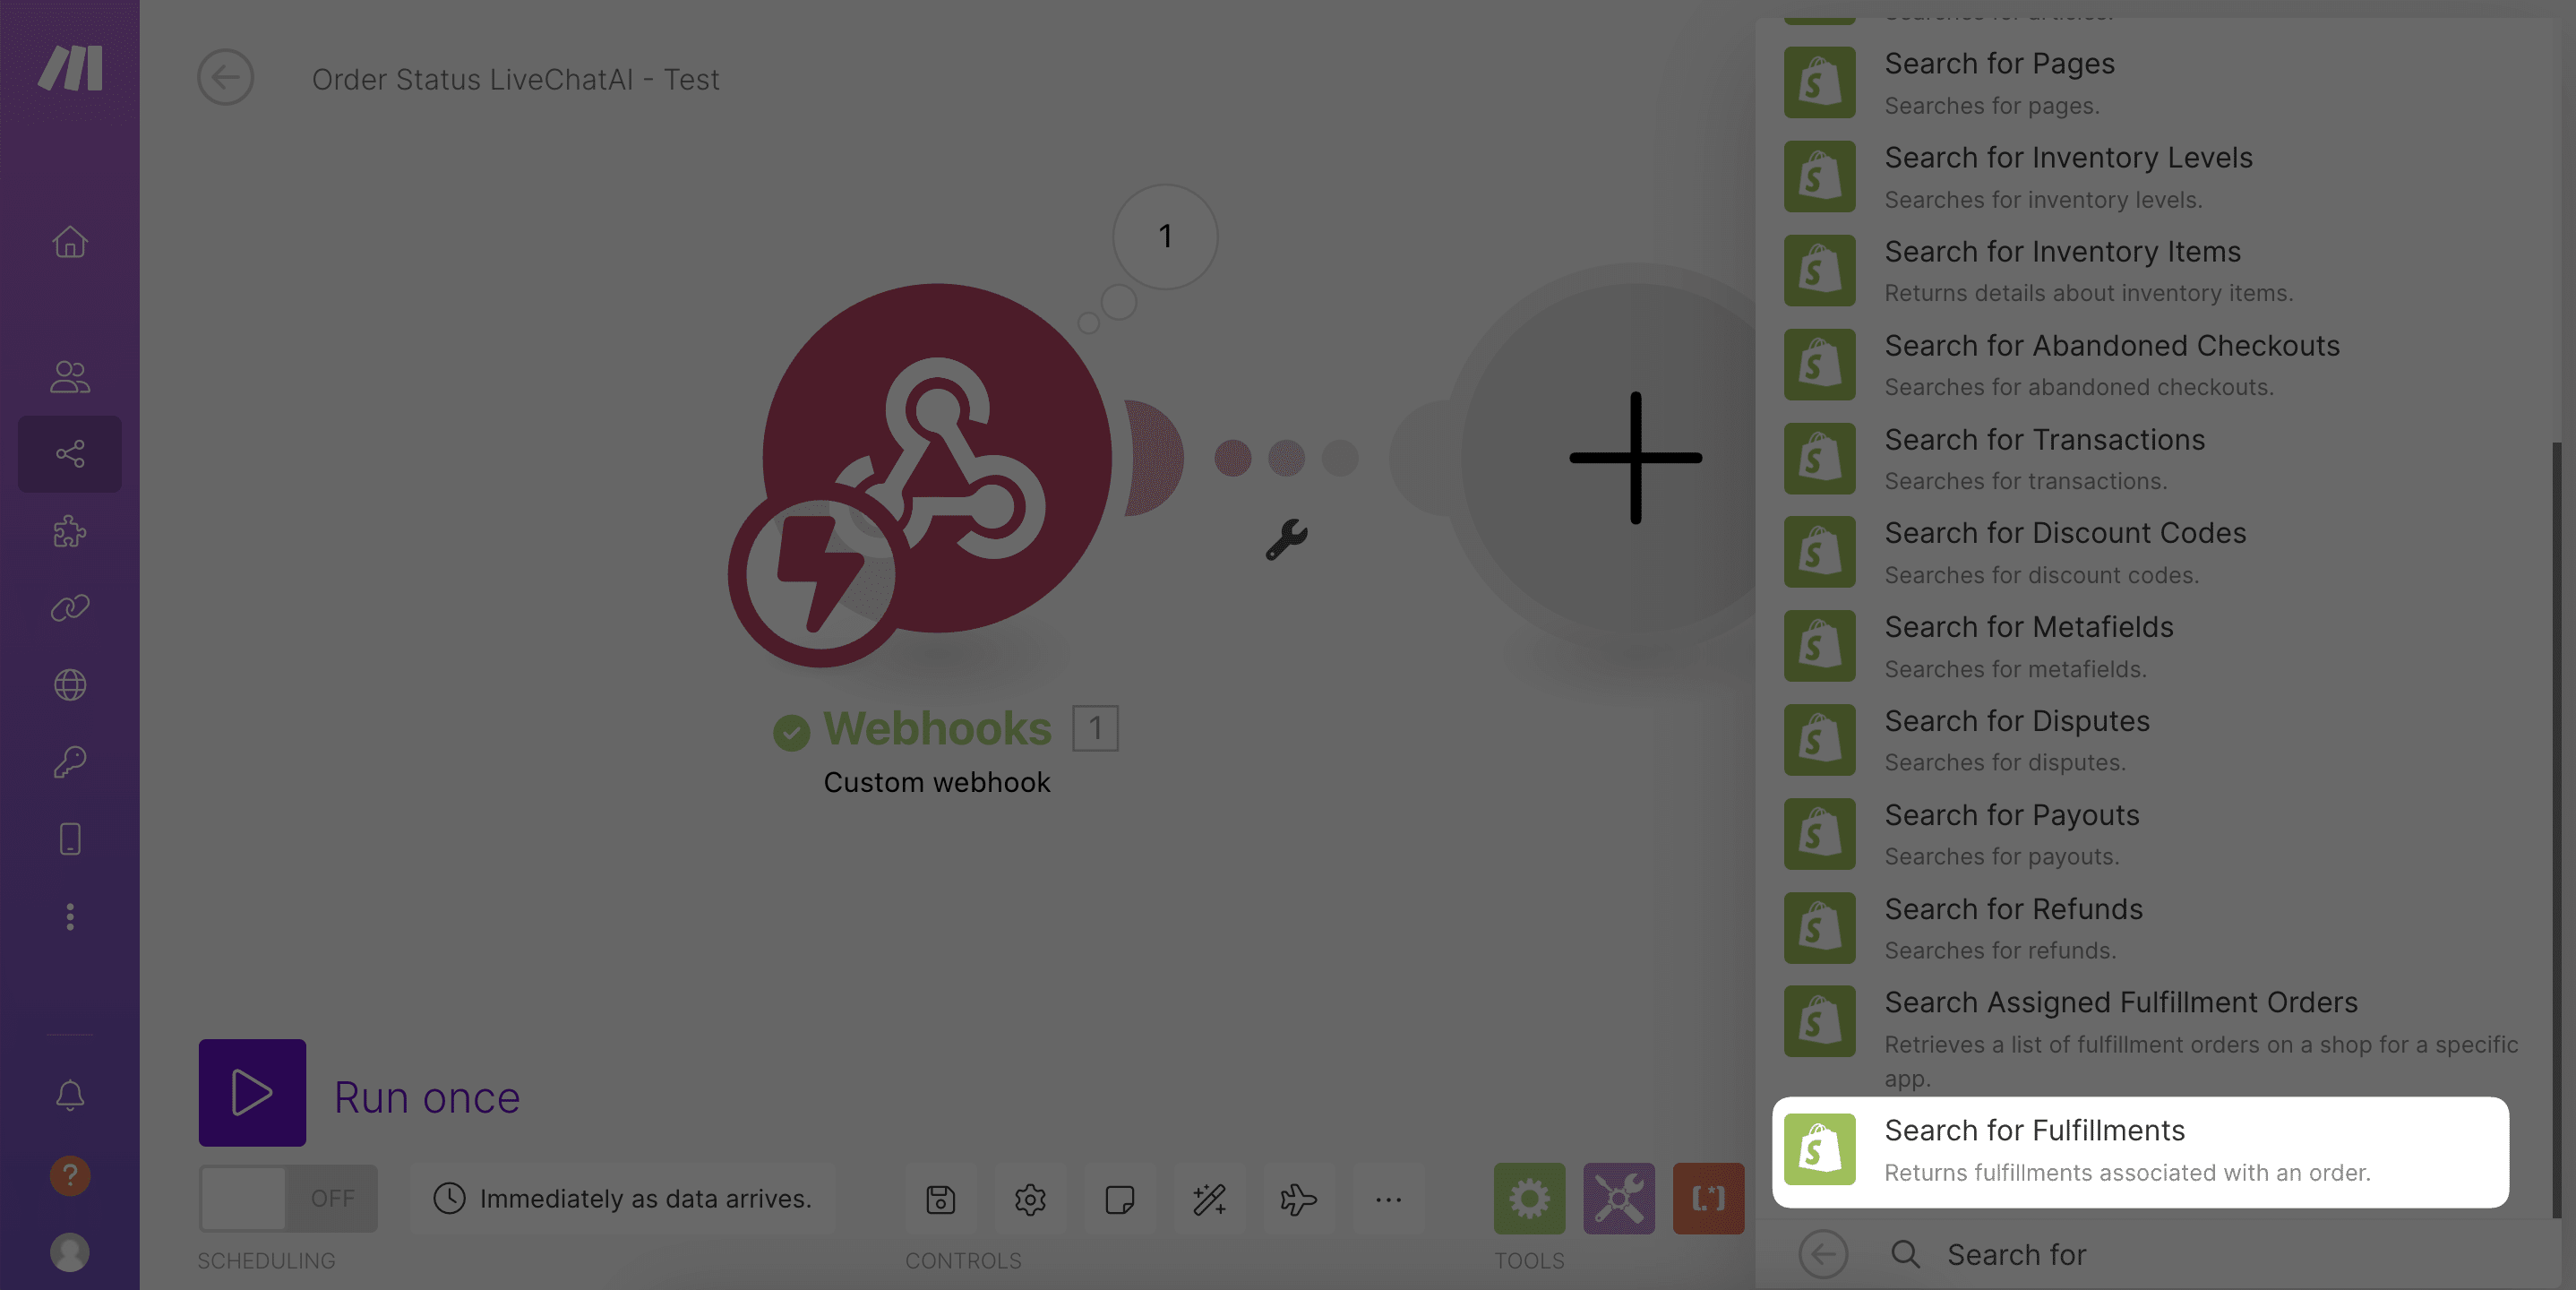
10. In this scenario, we will use the Search for Fulfillment as the key identifier to provide customers with the most up-to-date order status,
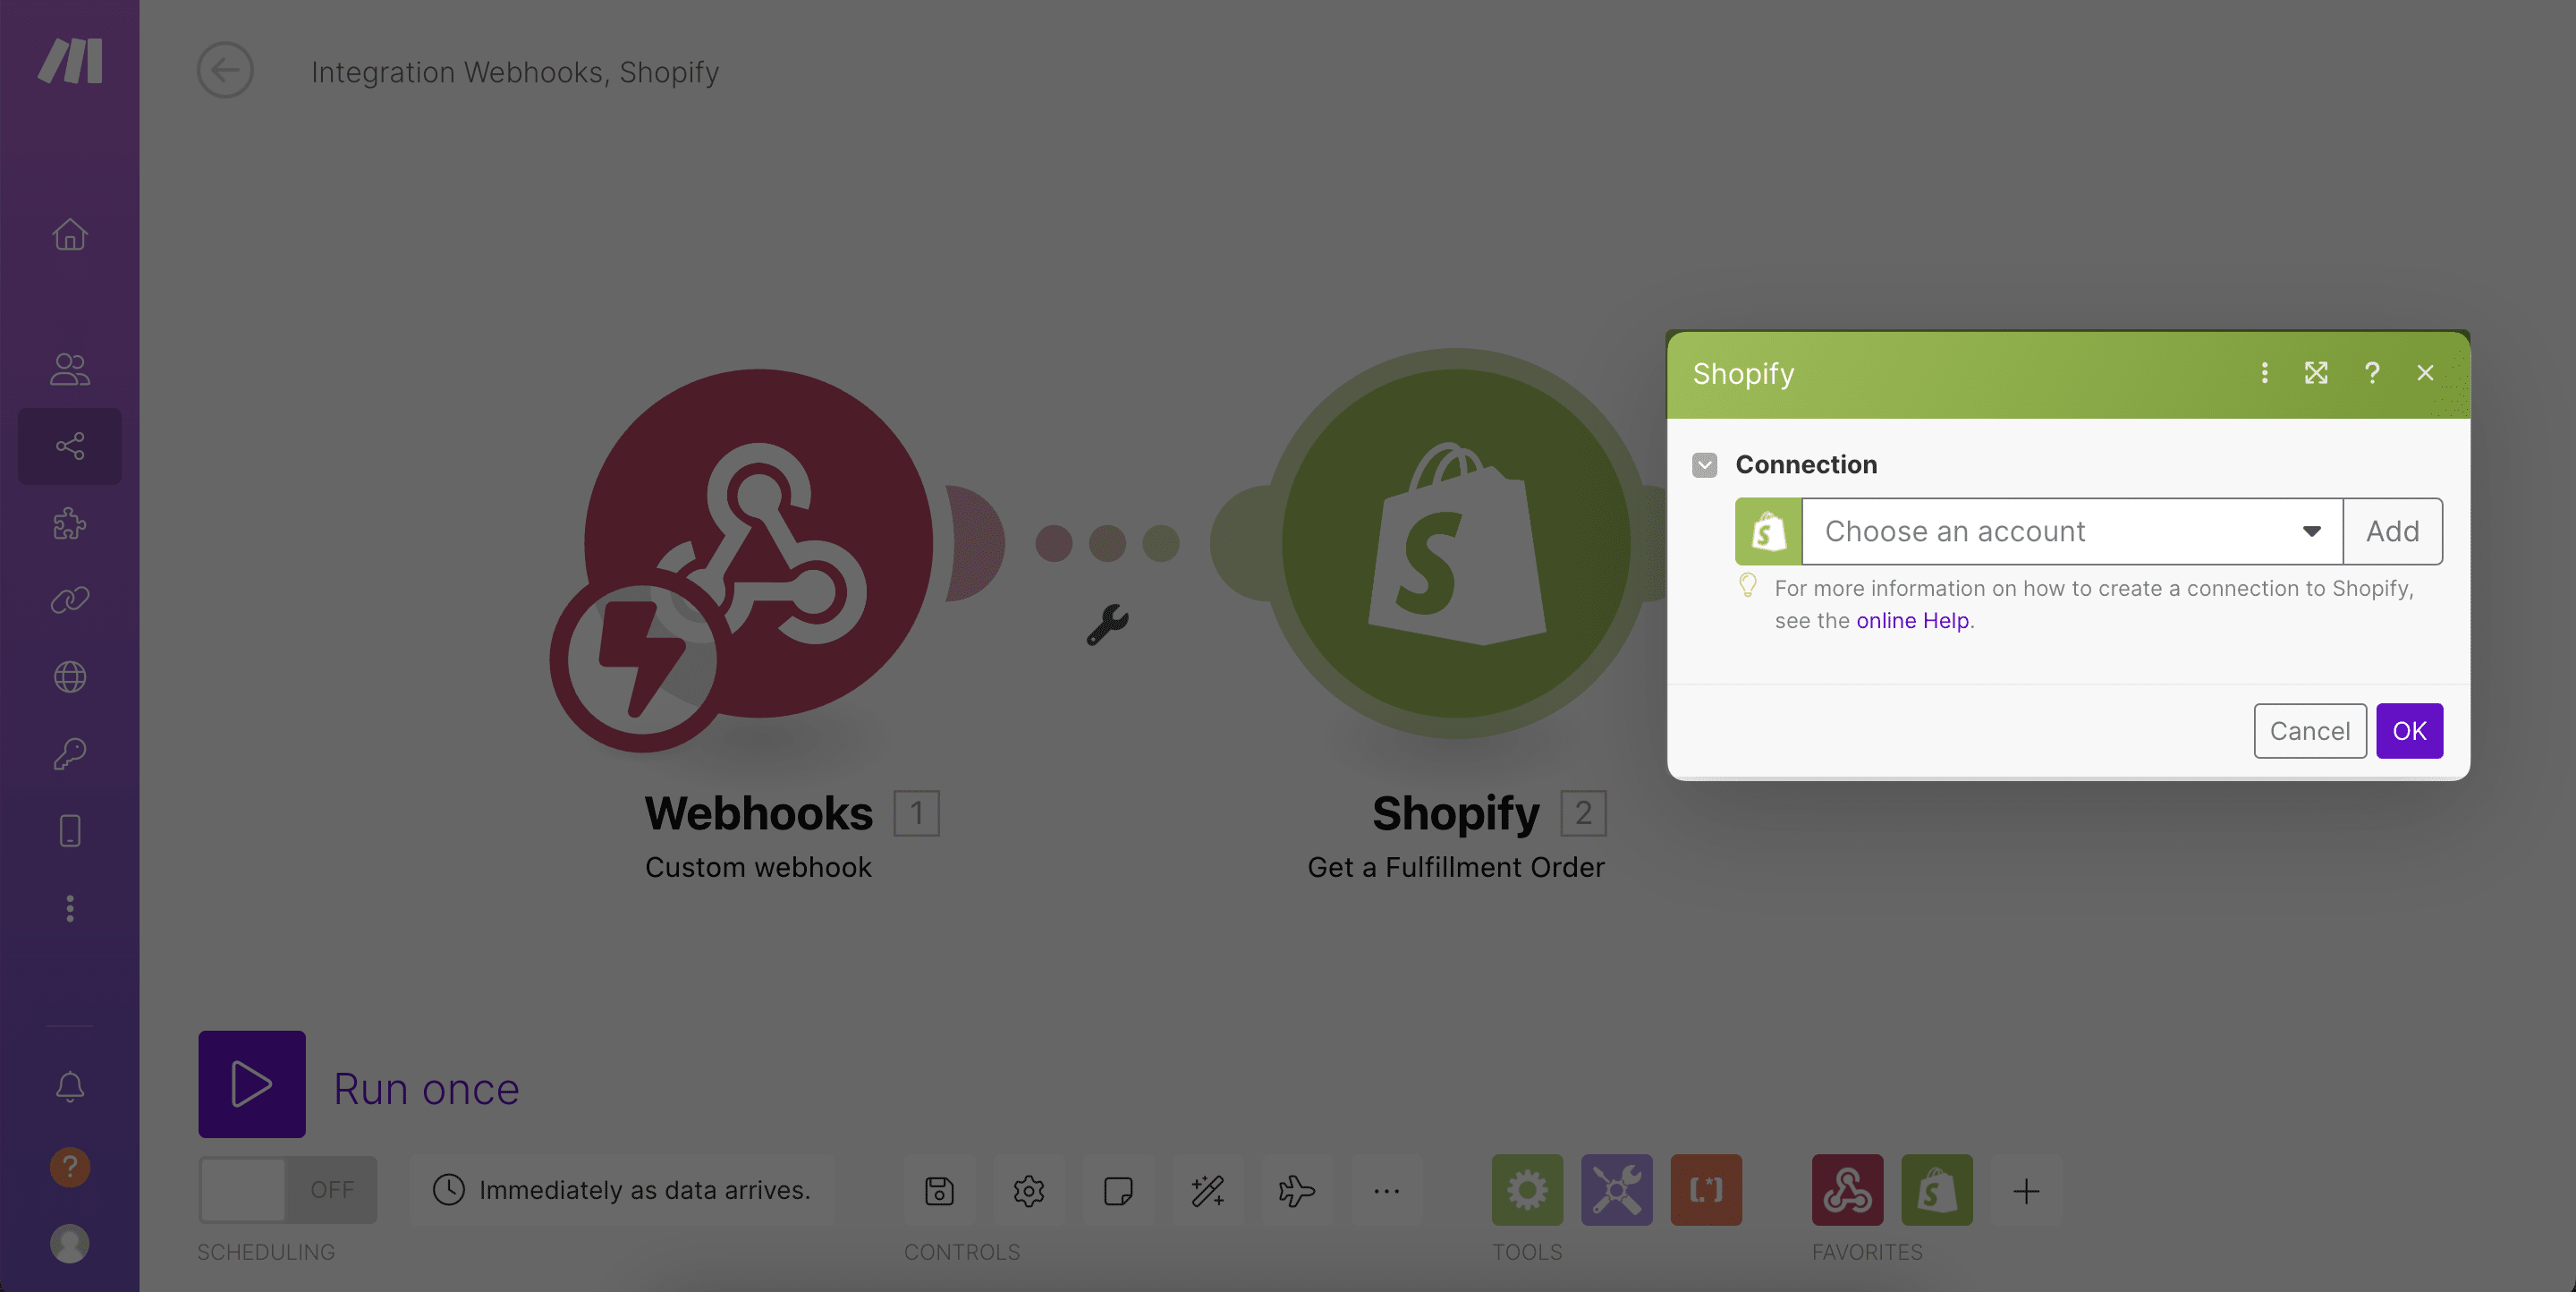
11. Select a Shopify account from the list where you want to get order status by clicking the Add button,
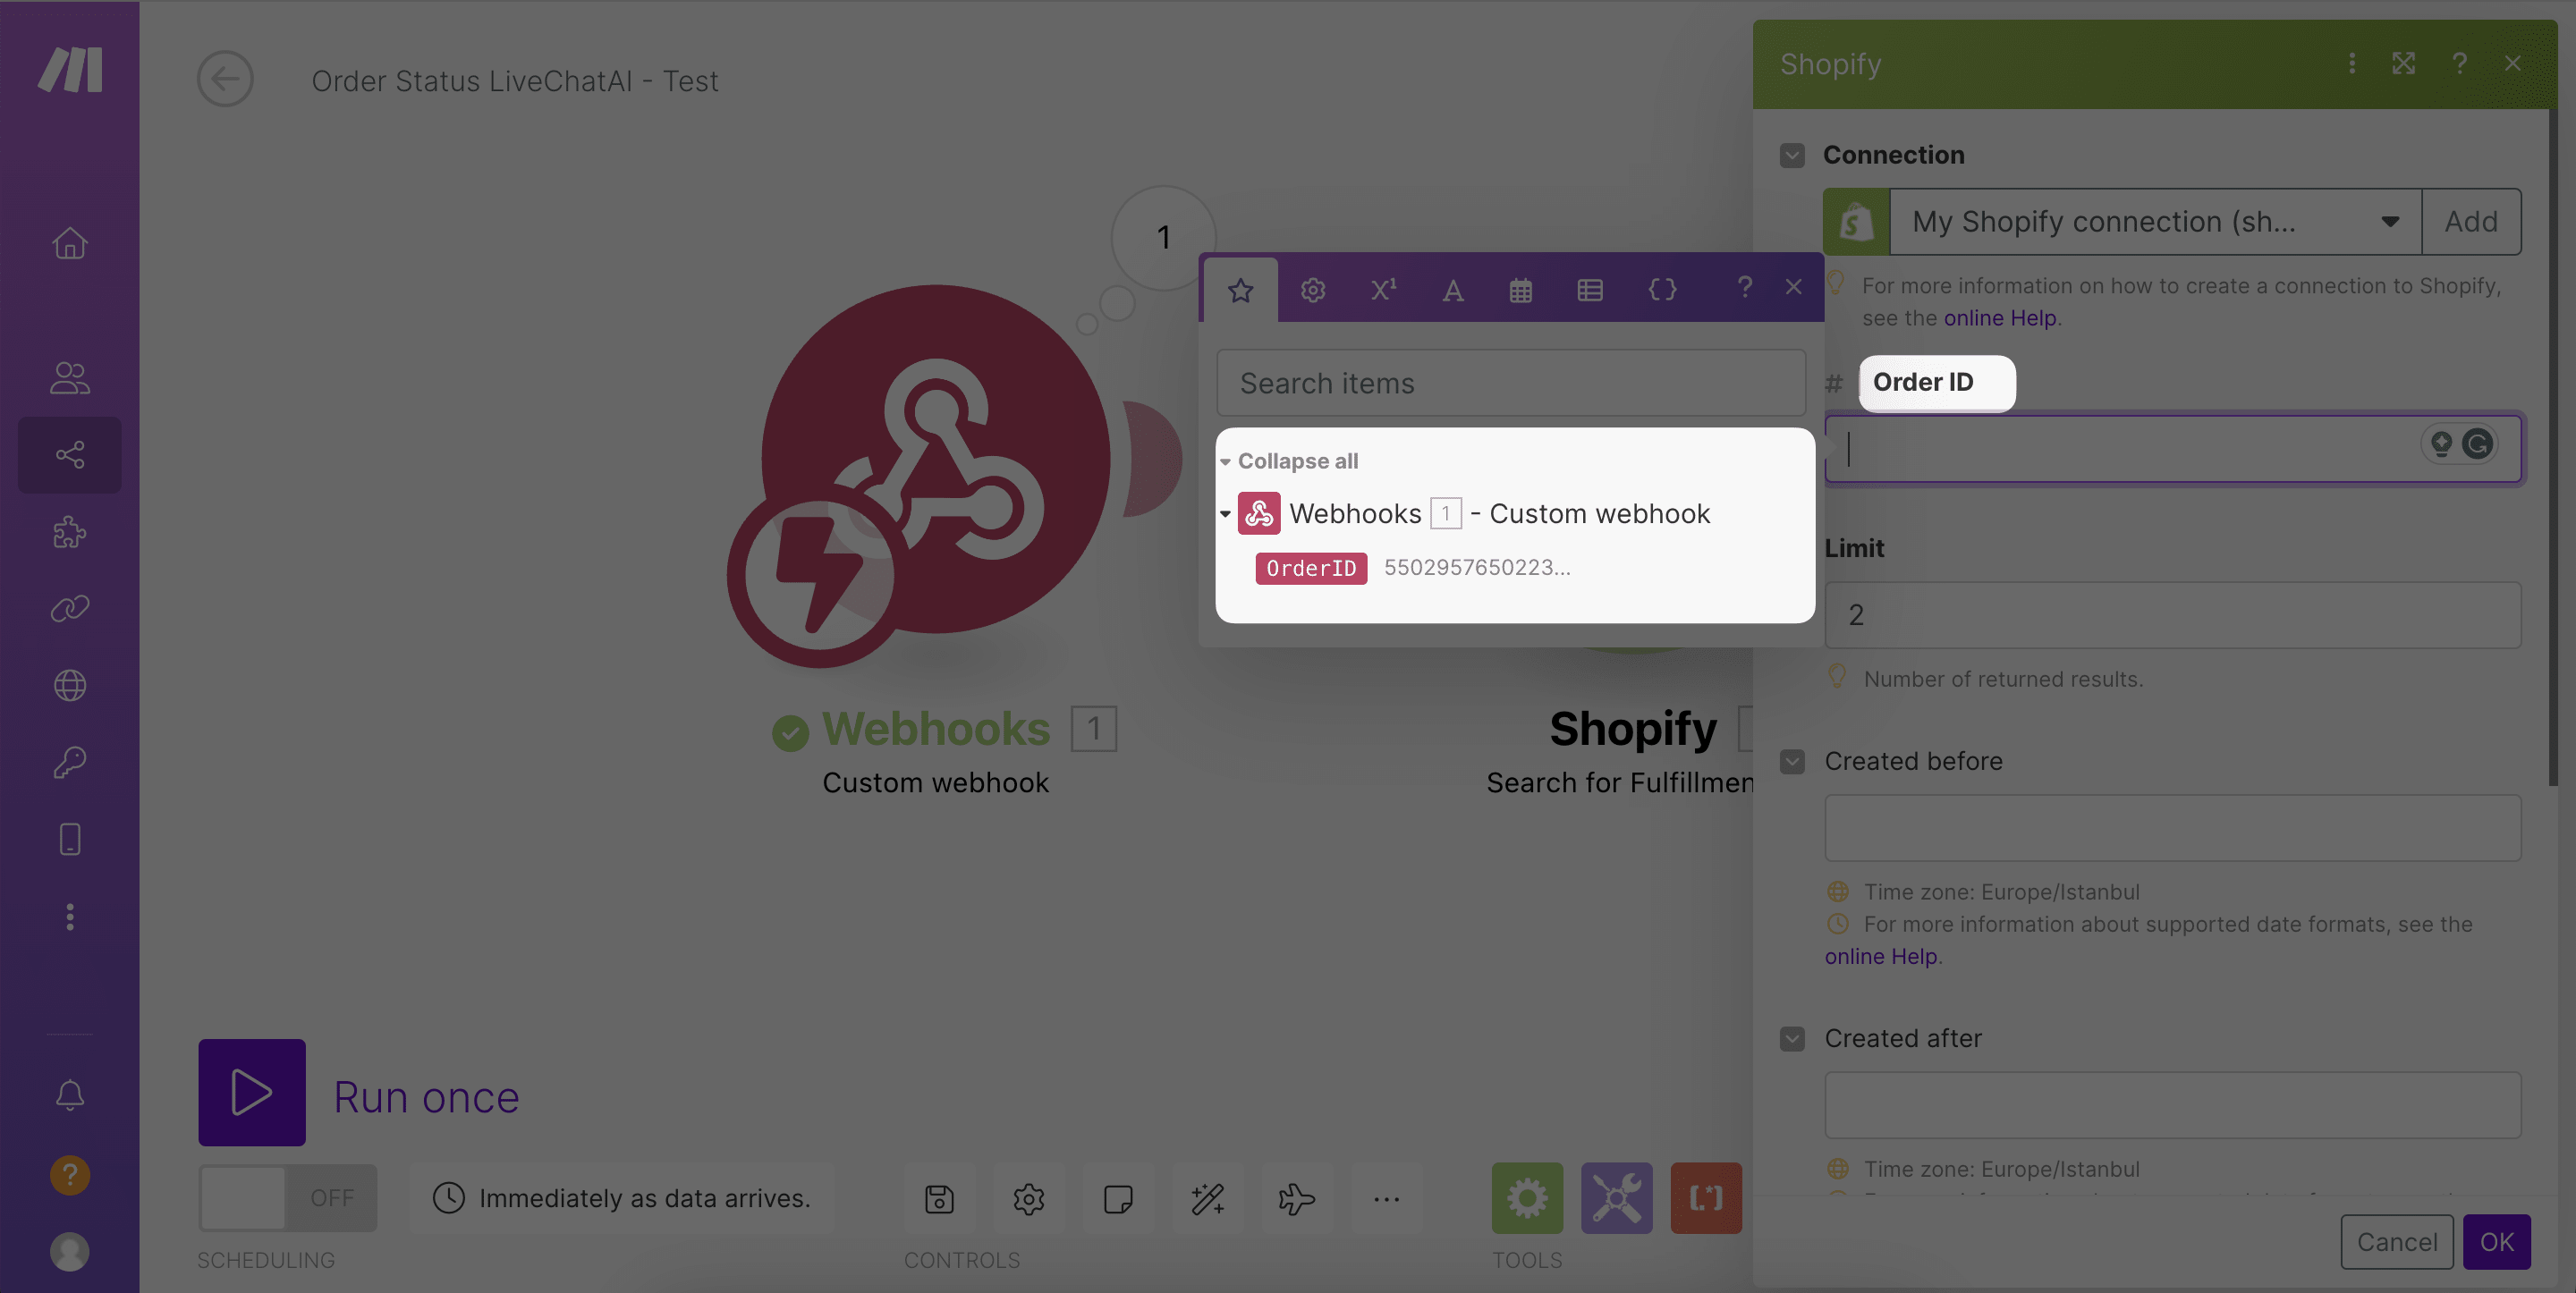
12. To continue, link your Shopify account with Make.com for authorization. Once connected, choose a predefined 'Order Id' to use as the Order ID,
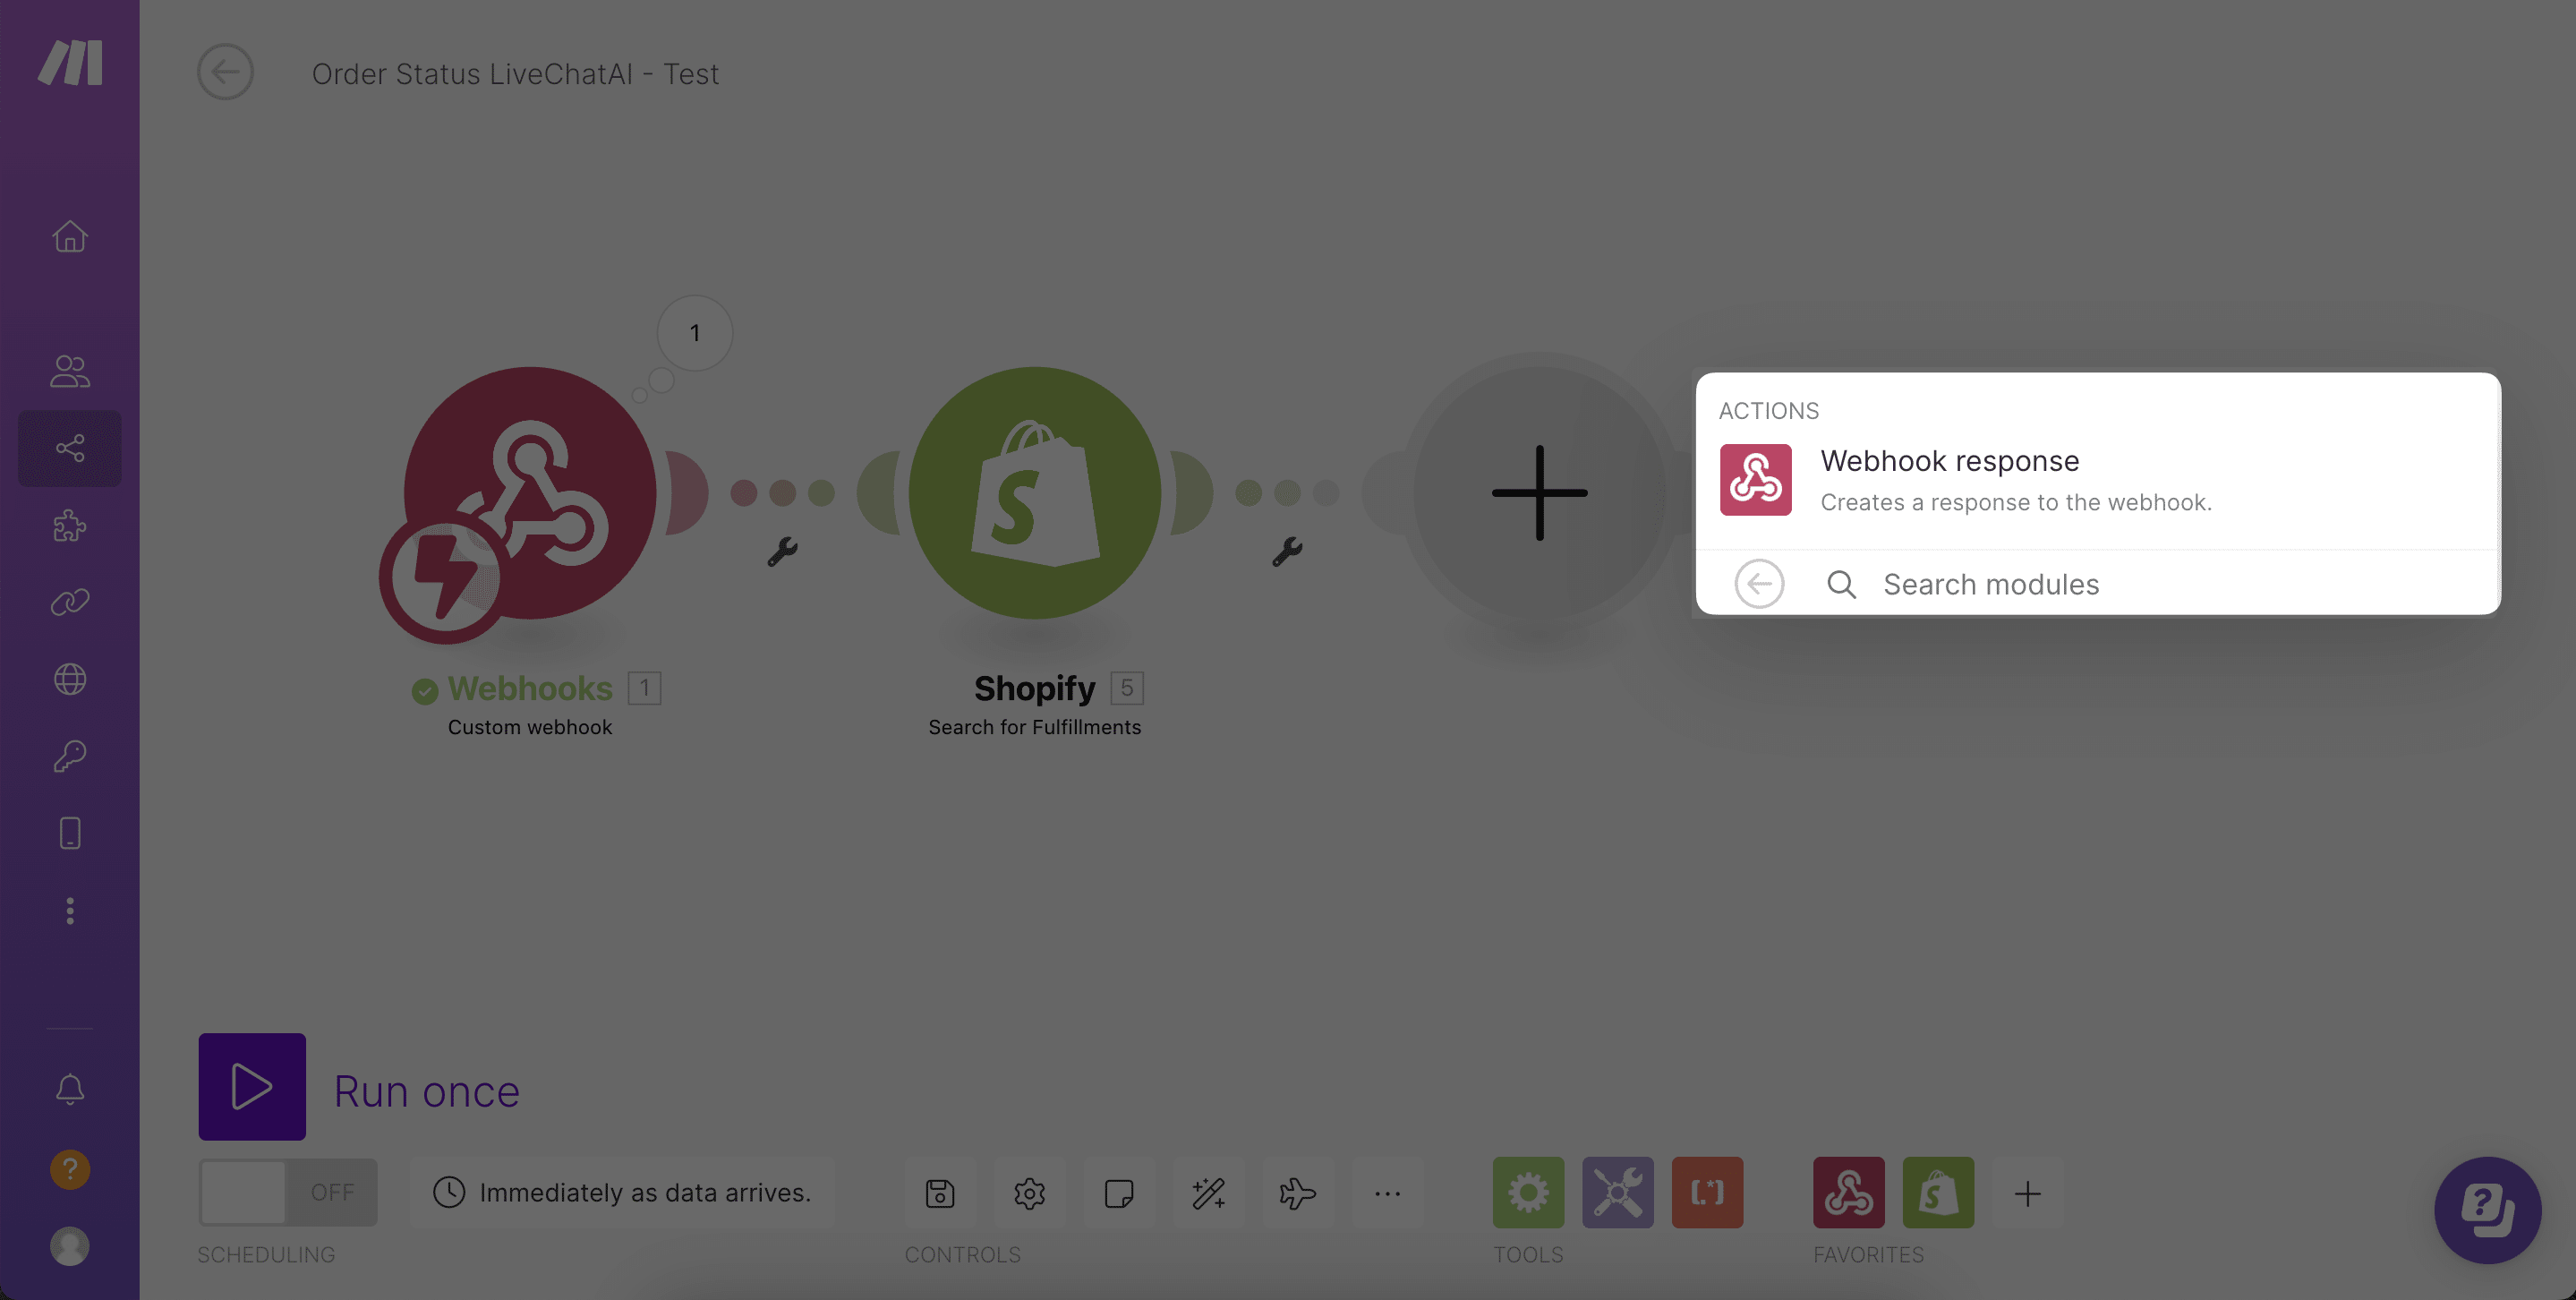
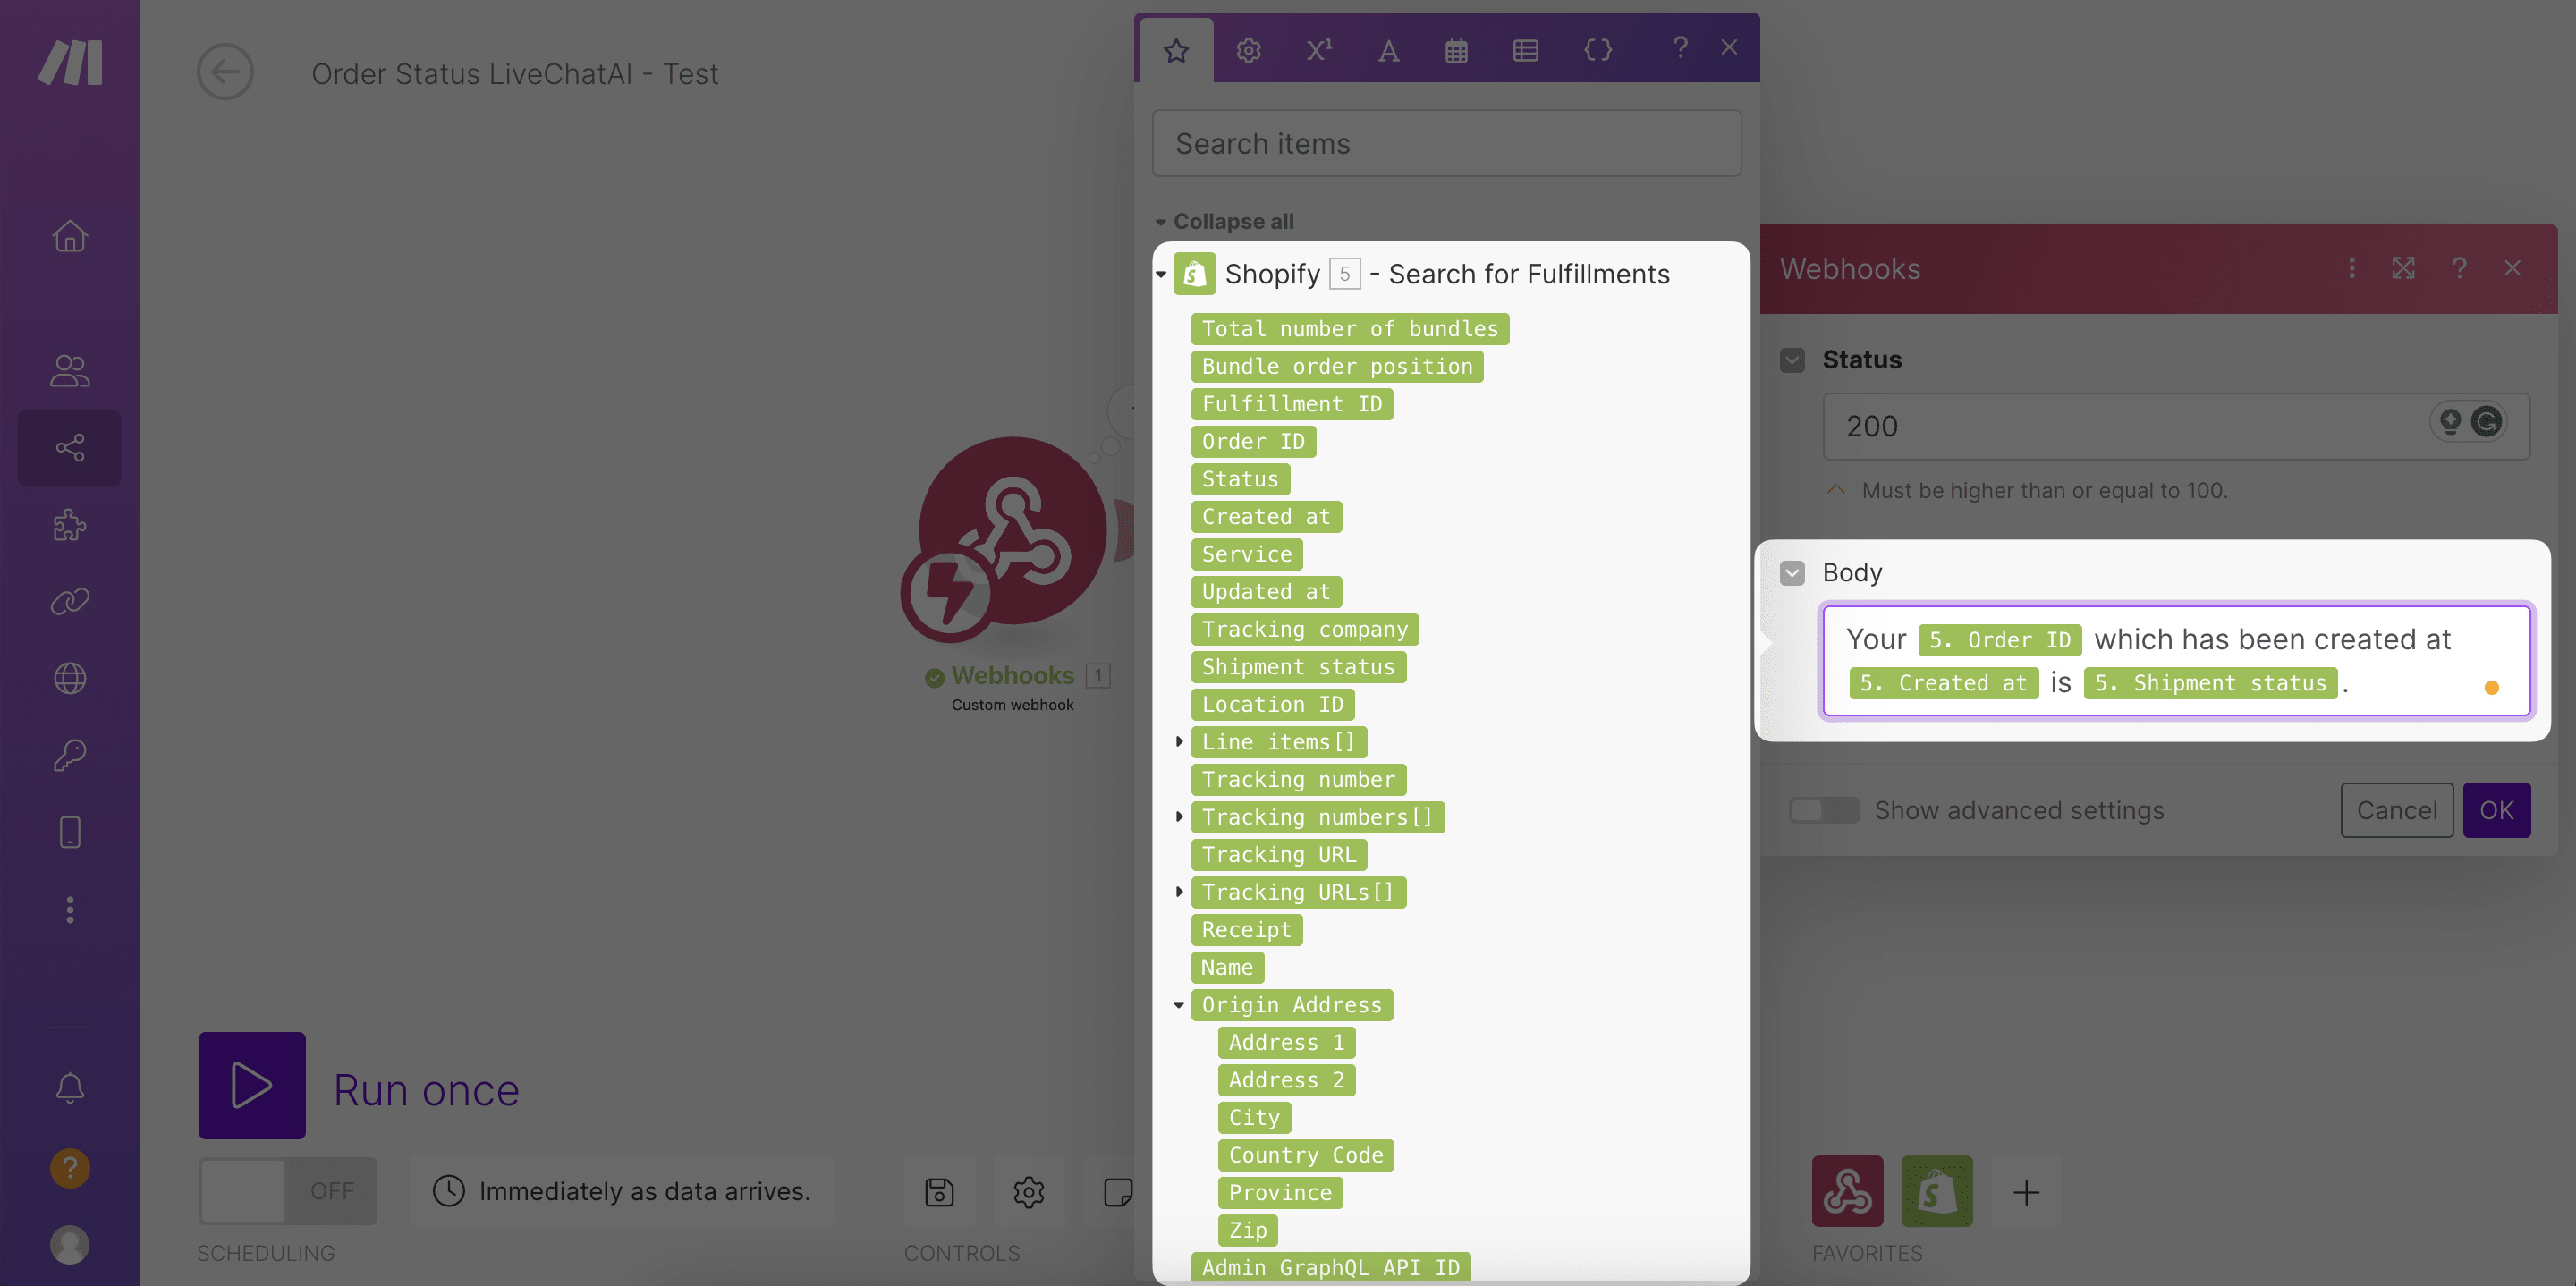
13. To give a proper response, you need to add another module to your scenario with Webhooks again and select "Webhook Response" from the Actions list,
14. Then, you need to enter the Body part to your response and decide what AI chatbot response is going to be when a customer asks for order status.
15. After you finish editing your modules, do not forget to save the scenario and make the status "On".
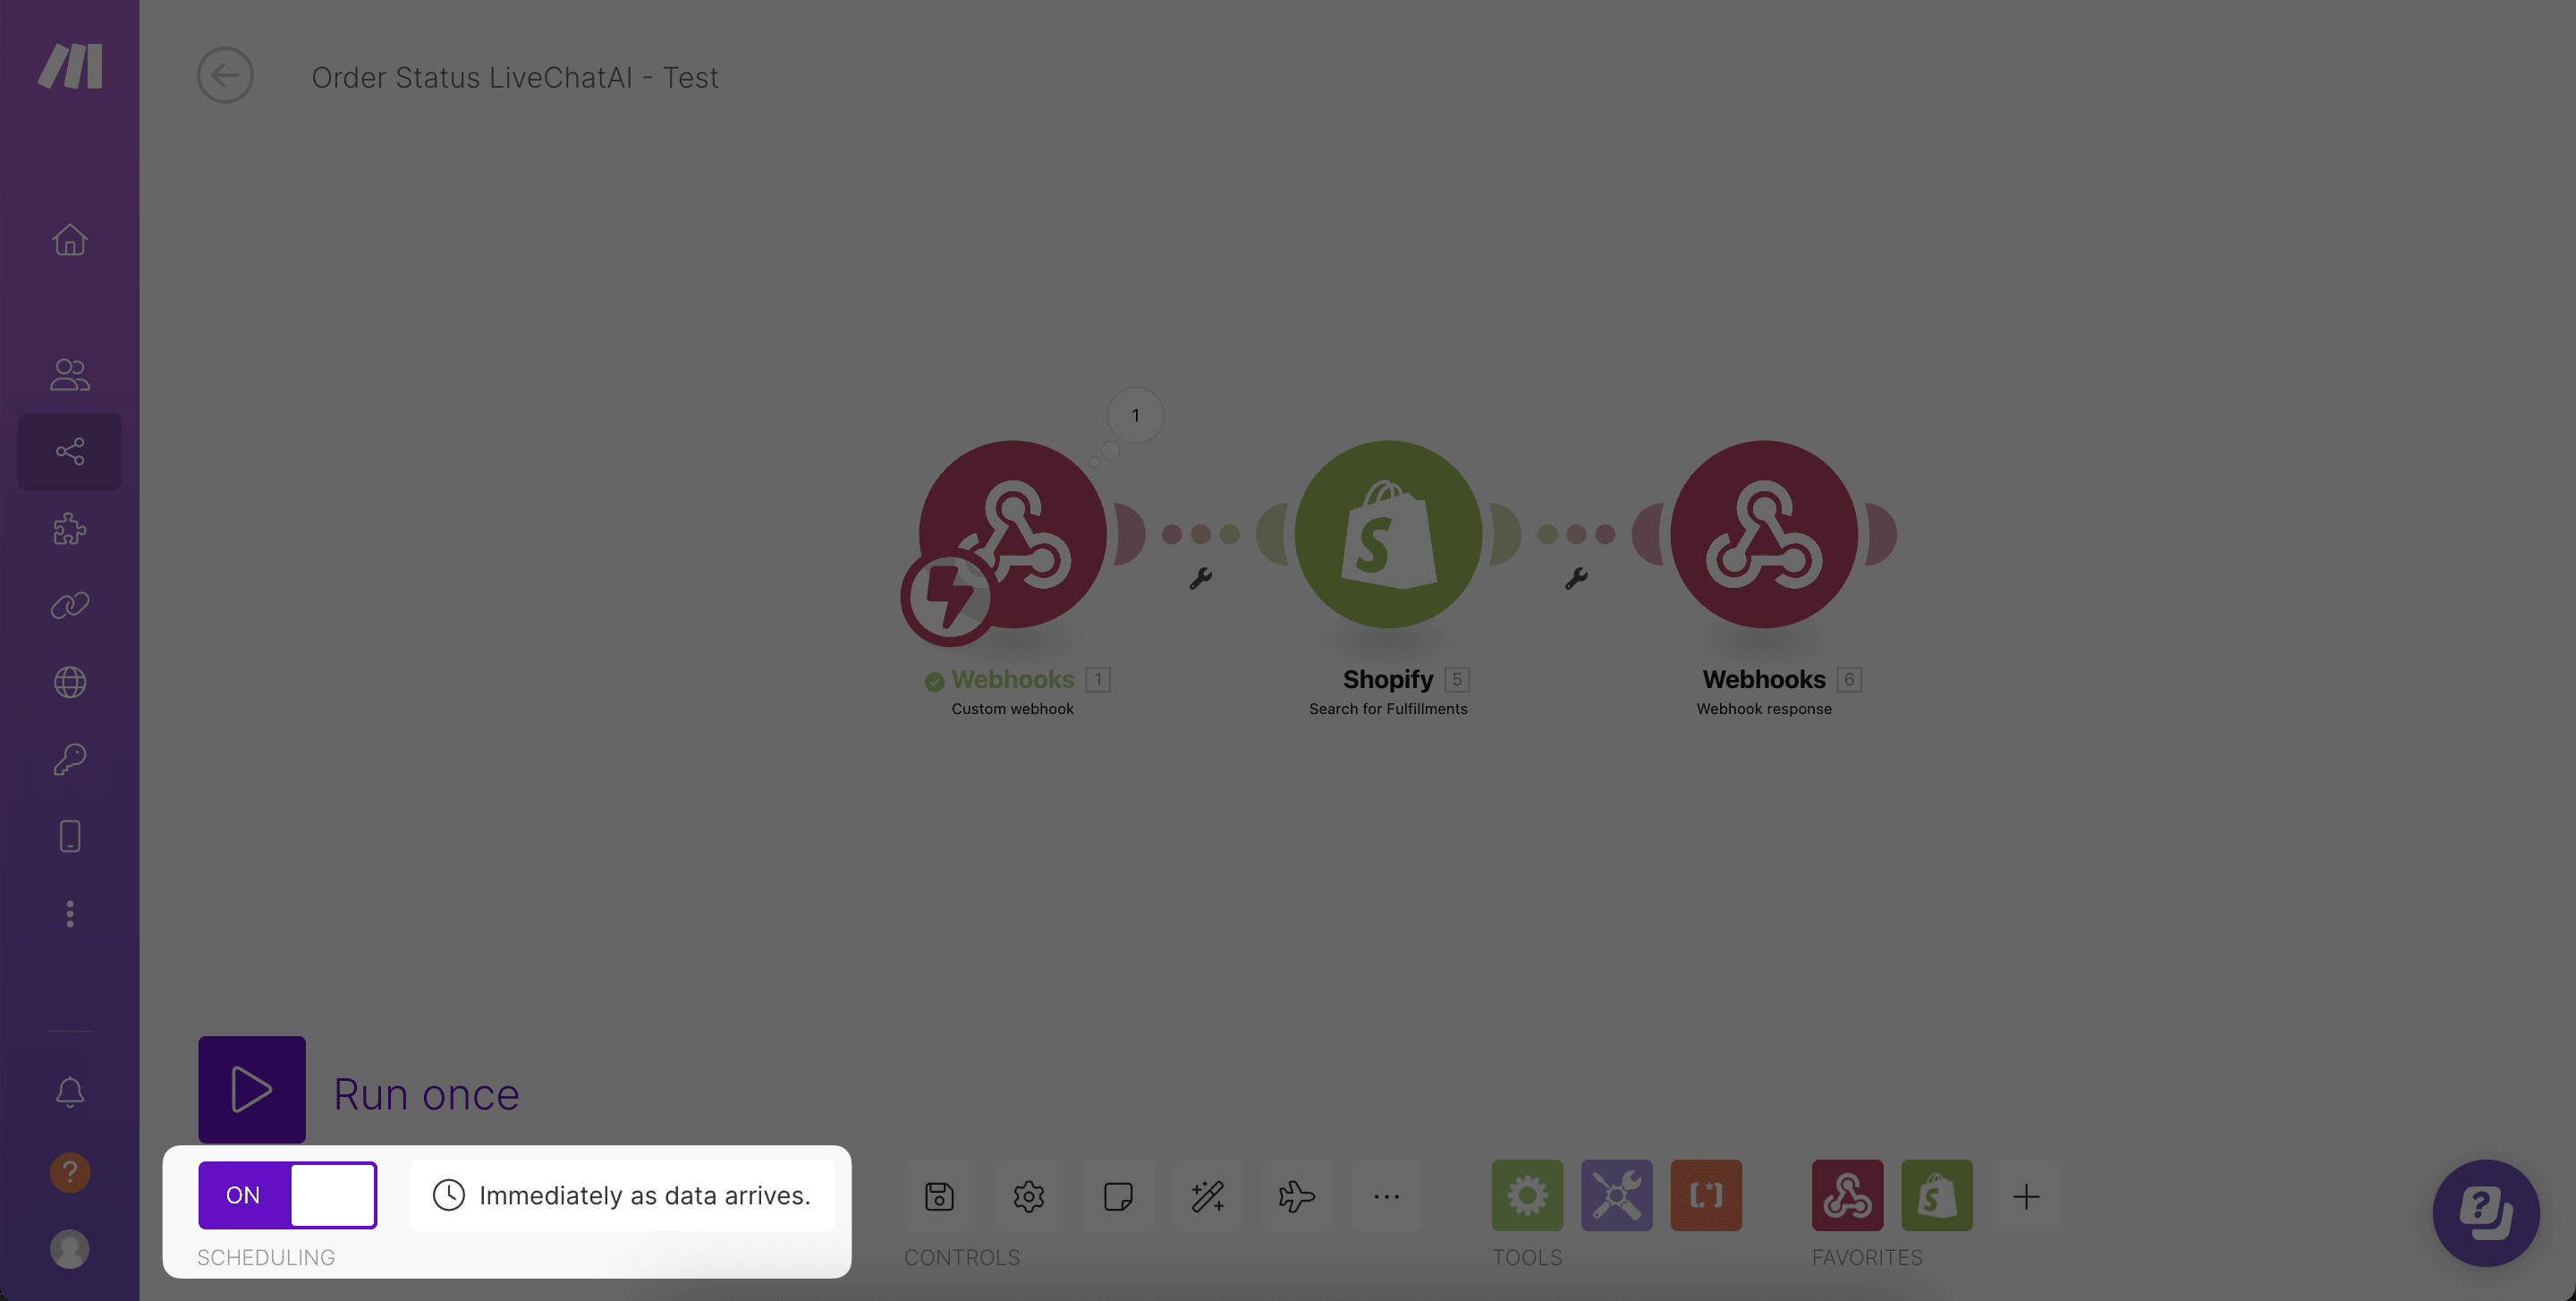
And congrats! You are done with editing your Make.com scenario. By the time, a visitor asks for the order status, the scenario will be triggered.
Do you have questions about AI Actions and a bit confused about how to setup? Contact us!