Segments
Segments let your chatbot give different answers to different groups of users, automatically.
You decide what defines each group (a contact attribute such as plan type, total spend, industry, etc.), then tell the bot which knowledge it should use for that group. From then on, matching users see the right answers without any extra work from you.
To activate it, contact [email protected].
What Are Segments?
Segments are predefined user groups built using Contact Attributes - fields such as:
| Attribute examples | Typical values |
|---|---|
plan_type |
free, pro, enterprise |
total_spent |
numeric (e.g., ≥ 1000) |
industry |
ecommerce, SaaS, education |
country |
US, DE, IN |
trial_days_left |
numeric (e.g., < 5) |
After you build the filter, you attach one or more Data Sources (FAQs, PDFs, web pages, etc.). Users who match the filter see answers only from those sources.
How to Use Segments in LiveChatAI
Segments let you show different chatbot responses to different users—here’s how to set them up step by step.
Step 1: Create Contact Attributes
By default, the Segment builder only shows these attributes:
contact.emailcontact.namecontact.phonecontact.distinctId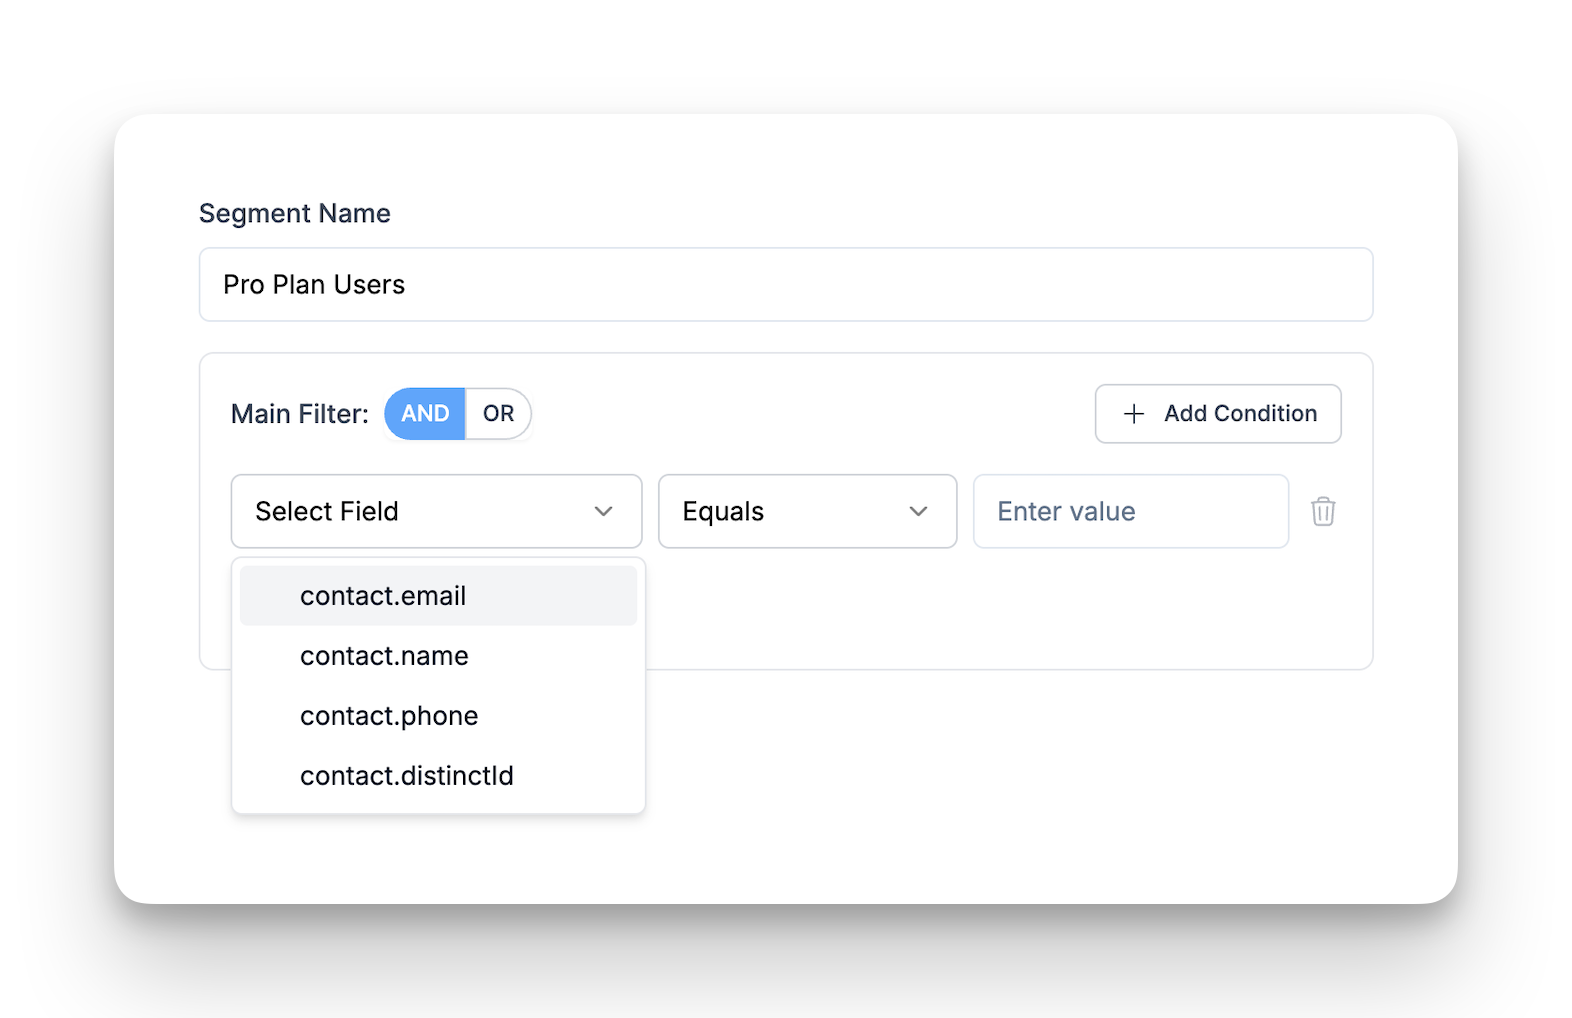
To build more useful filters (like by plan or purchase amount), you'll need to add custom attributes first:
- Go to Contacts → Contact Attributes.
- Click + New Attribute.
- Enter a name (e.g.,
plan_type,total_spent) and pick a data type (String, Number, Boolean, Timestamp).
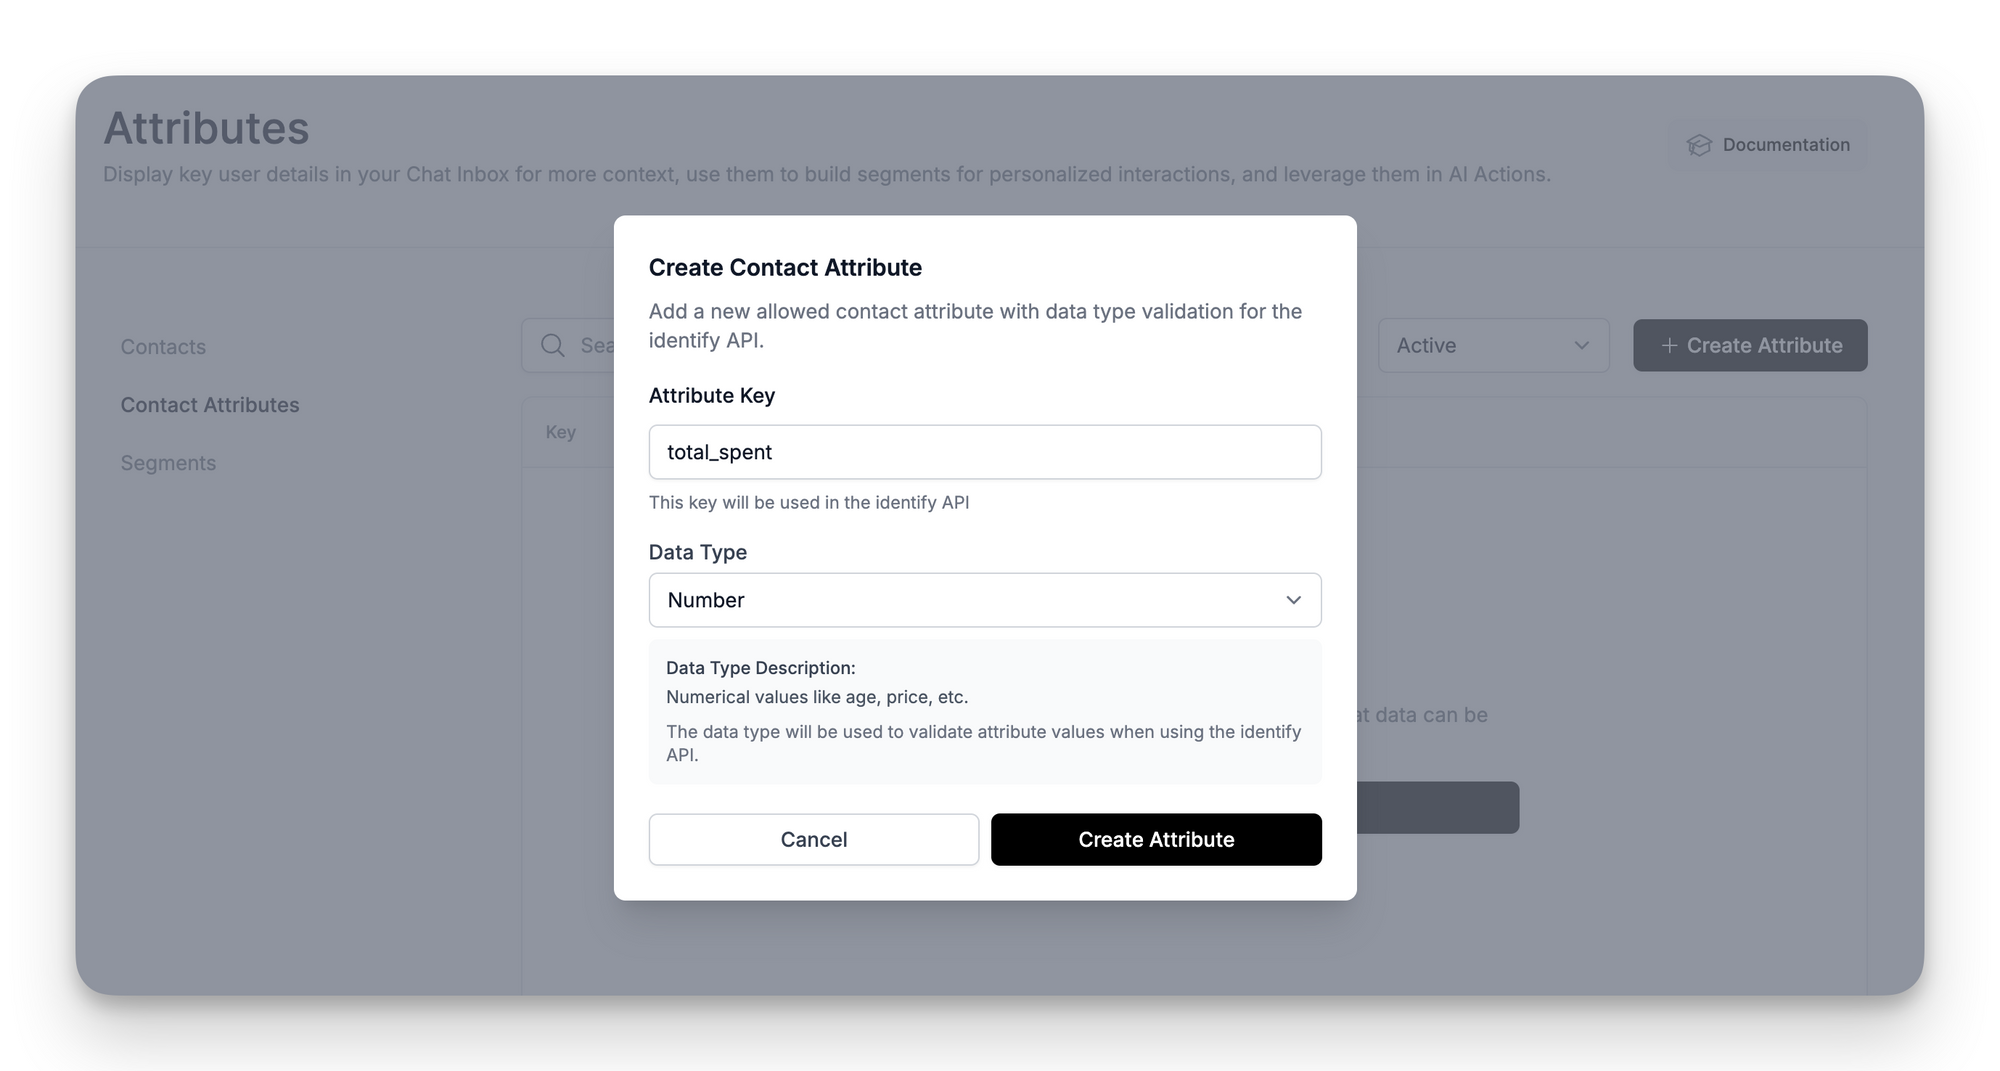
- Click Create Attribute.
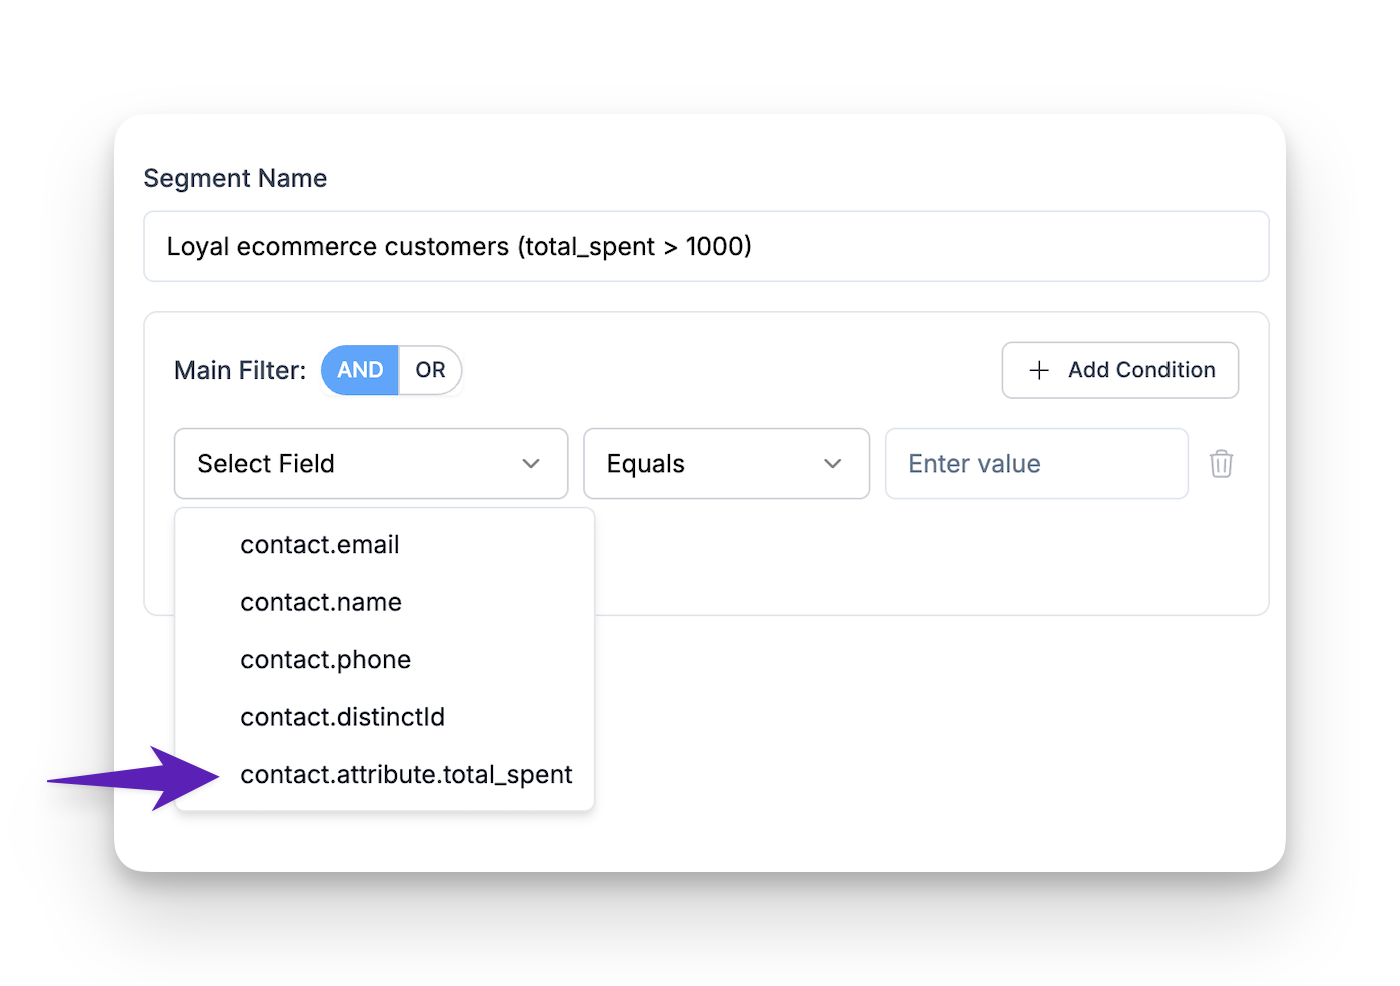
🚀 Your custom attributes will now appear in the Segment builder's field dropdown.
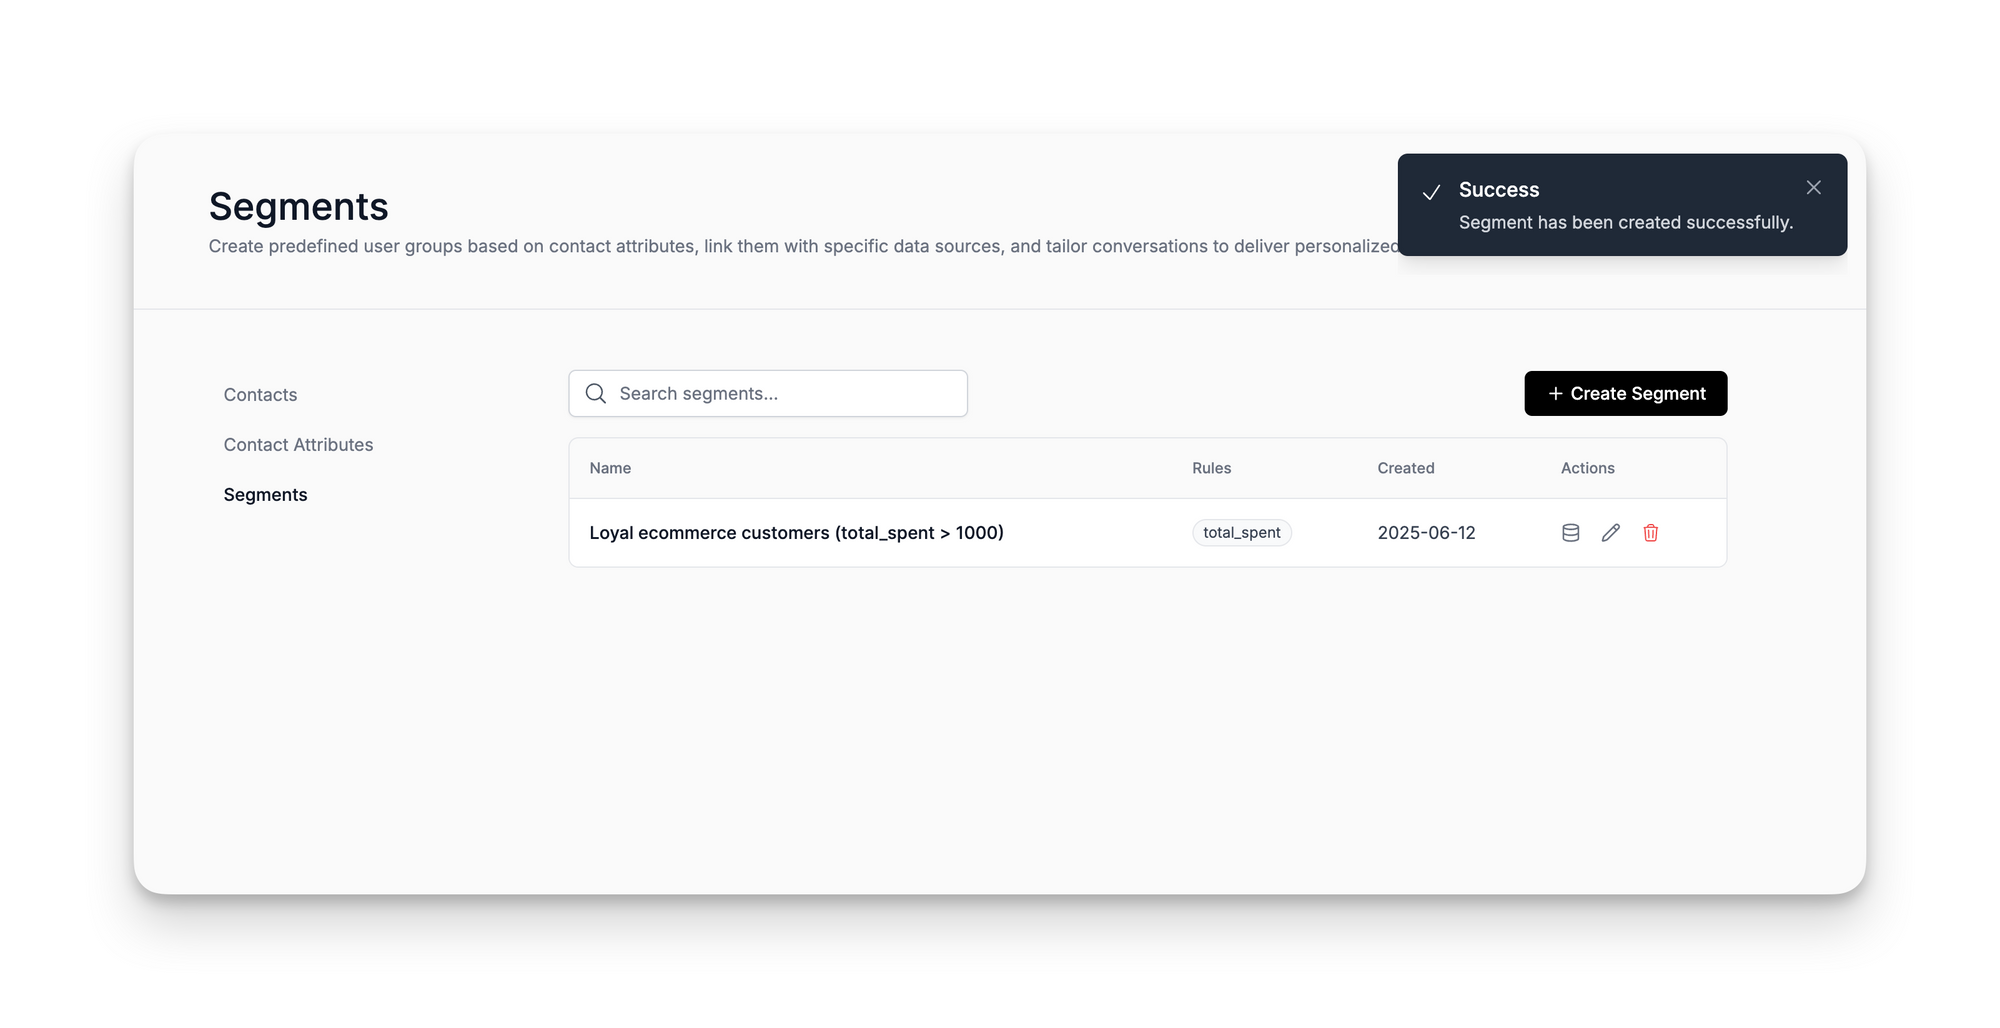
Step 2: Create a Segment (User Group)
Once your attributes are ready:
1. Navigate to Contacts → Segments and click + Create Segment.
2. Name the segment (e.g., Loyal Ecommerce Customers, Pro Plan Users).
3. Build your filter rules:
➤ Select Field → Pick an attribute (including the one you just added as a custom attribute).
➤ Choose an operator (Equals, Contains, Is Greater Than, etc.).
➤ Type the value.
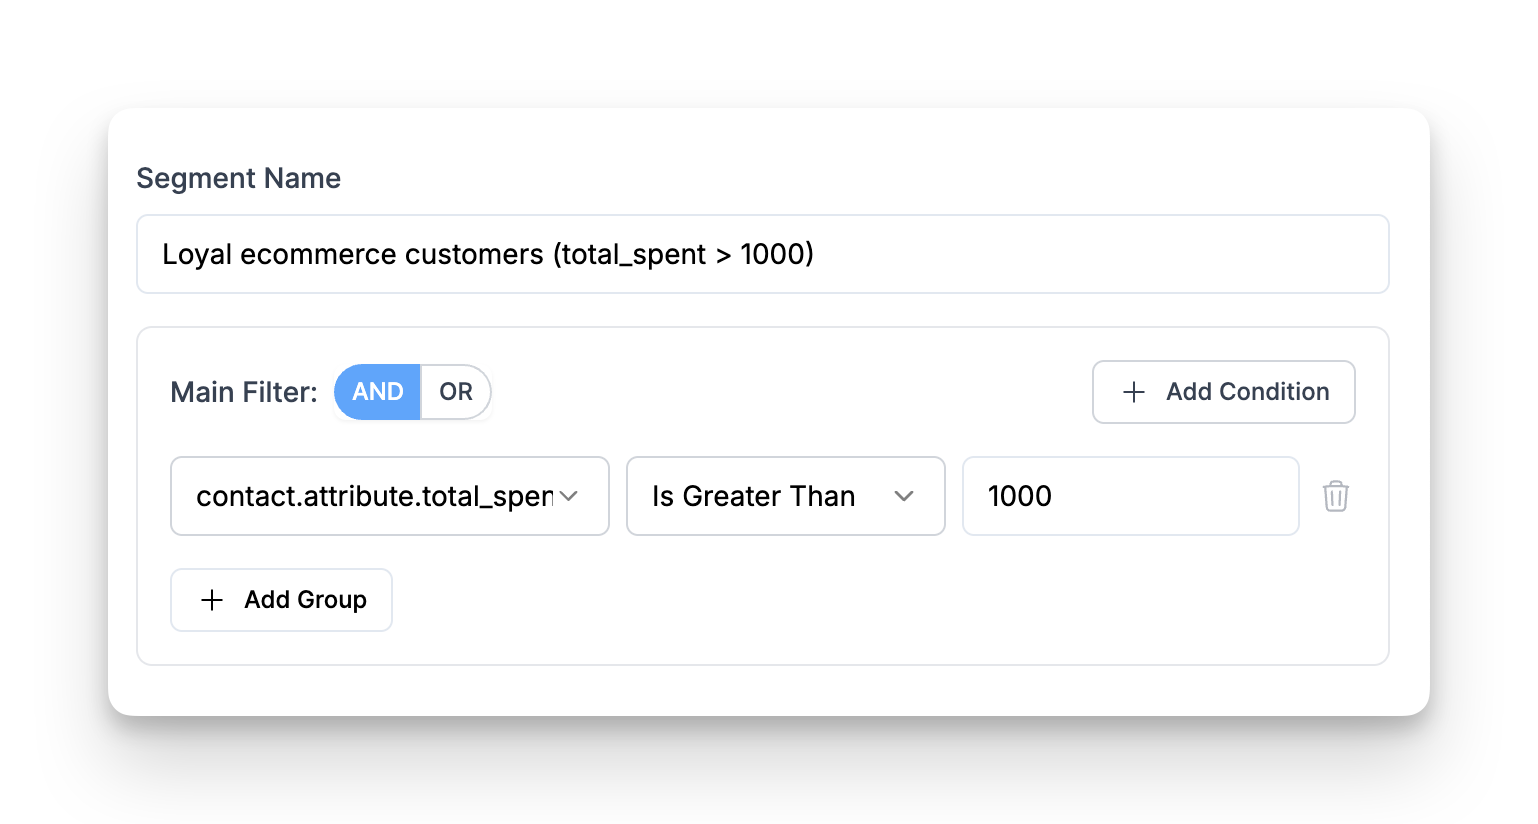
➤ Click + Add Condition to add more rules
➤ Use AND / OR logic at the top to combine rules
➤ Use + Add Group if you need nested logic
4. Click Create Segment. You’ll see it listed under Segments.
Step 3: Assign a Segment to a Data Source (from the Data Source view)
1. Go to Data Sources
2. Click the three-dot menu next to the data source
3. Select “Segments”
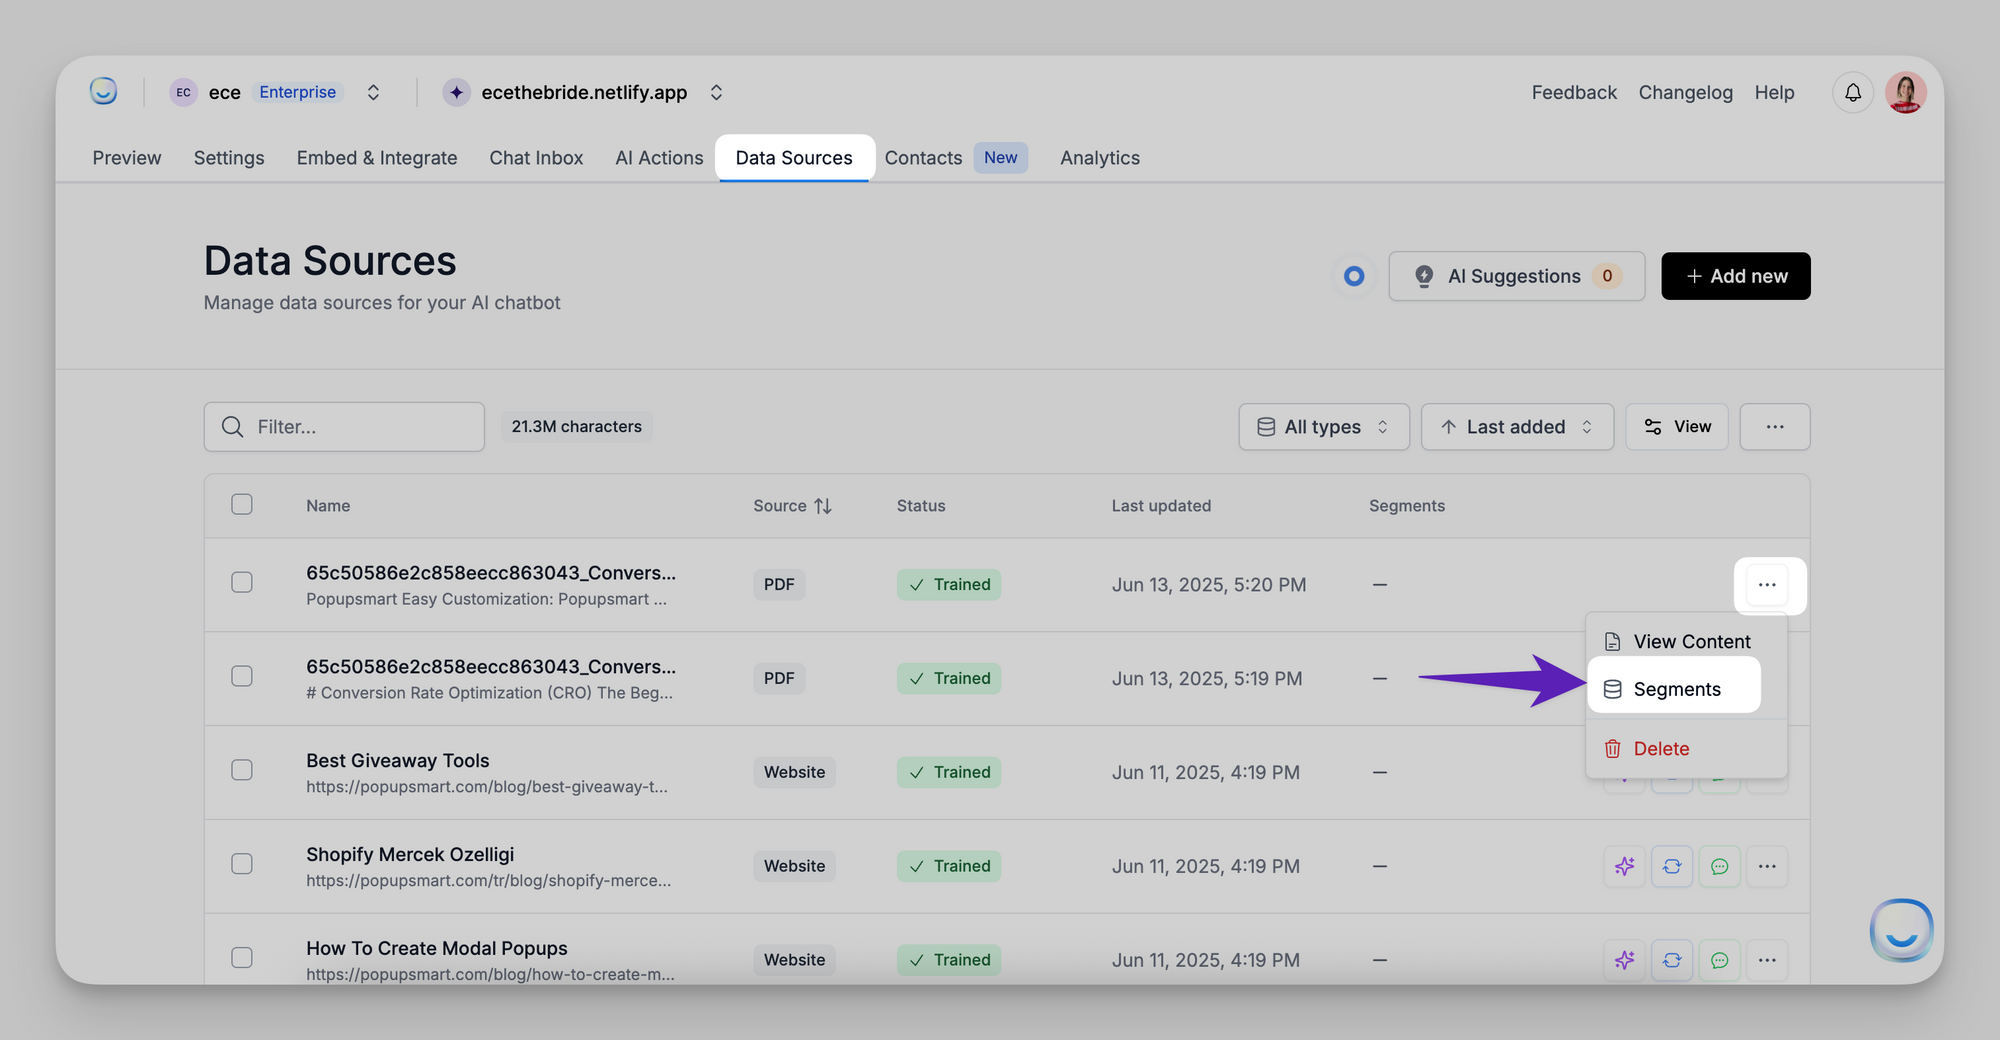
4. In the modal, choose one or more segments
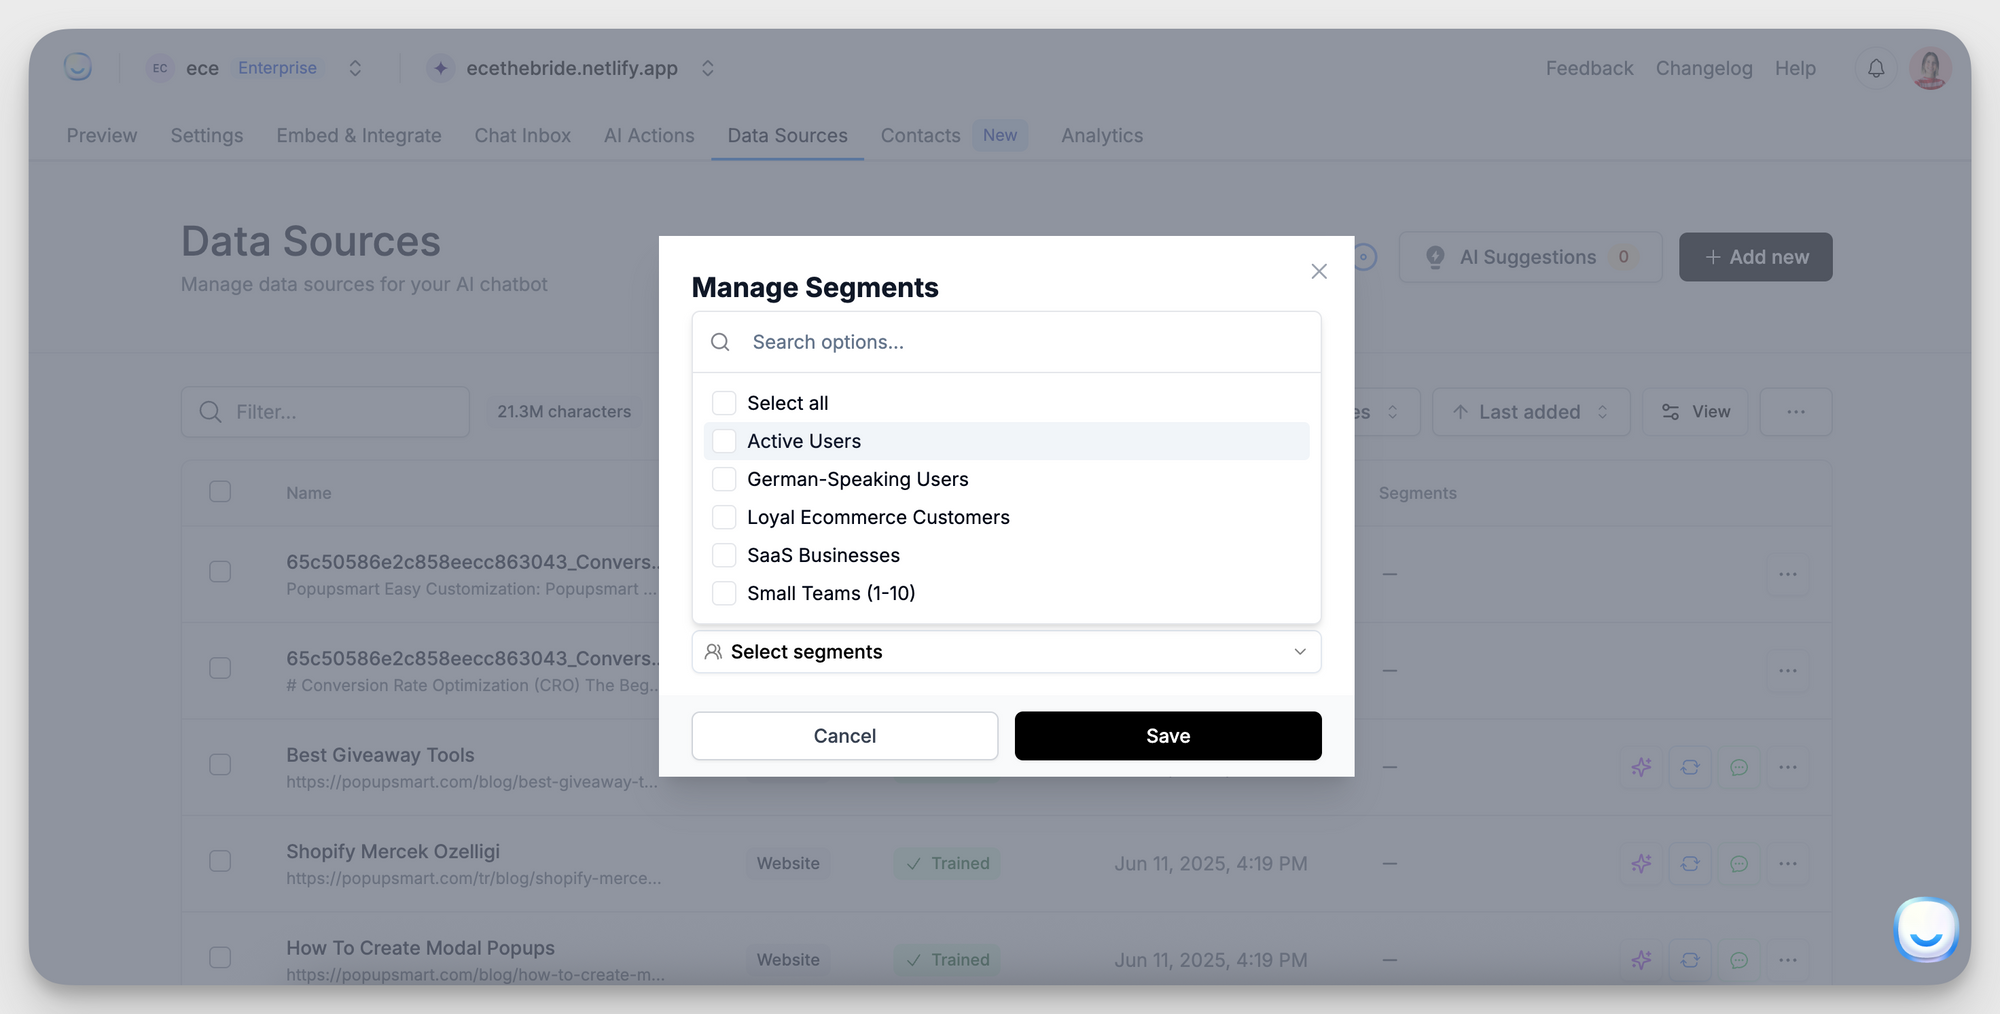
5. Click Save.
Step 4: Link Data Sources to a Segment (from the Segments view)
1. Go to Contacts → Segments
2. Click the database icon next to your segment
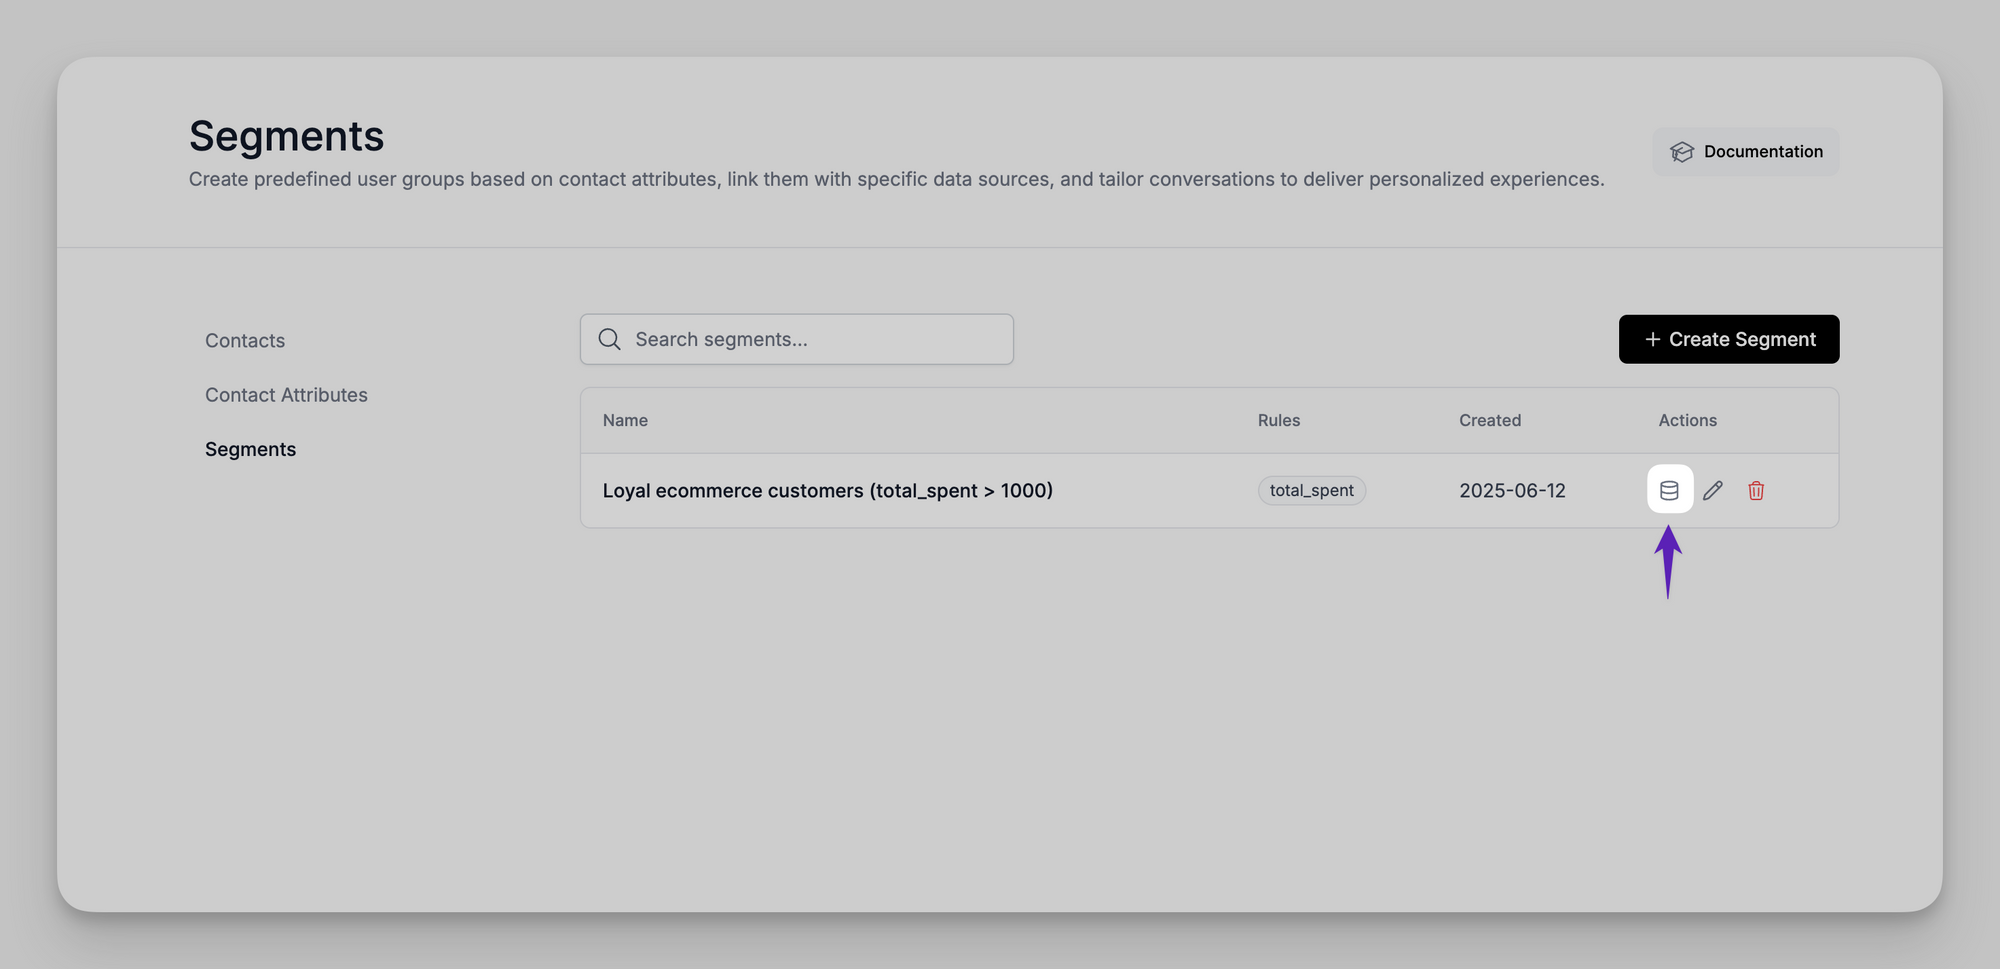
- In the popup, search for and select the sources this segment should use
- Once linked, users who match this segment will get answers only from these connected sources.
Example Segment Use Cases
| Scenario | Rule | Example Chatbot Response |
|---|---|---|
| VIP Ecommerce Customers | total_spent > 1000 |
Thanks for being a loyal customer—your shipping is free. |
| SaaS Pro Users | plan_type = pro |
You’re on the Pro Plan, which includes 250,000 pageviews/month. |
| Trial Ending Soon | plan_type = trial and days_left < 5 |
You have 4 days left in your trial. Upgrade to unlock advanced features like API access. |