Contact Attributes
Contact Attributes allow you to define and manage custom data fields for your users, such as company name, department, or subscription tier.
These attributes help you identify, segment, and personalize AI interactions for known users.
What Are Contact Attributes?
Contact Attributes are custom fields you define and use to enrich your Contacts in LiveChatAI. These attributes can be passed automatically via API, or manually created in the dashboard. They're useful for:
- Personalizing AI responses based on user metadata
- Segmenting users for targeted support
- Enhancing context in the Chat Inbox
- Powering AI Actions
How to Create a Contact Attribute
Contact Attributes let you store extra details about your users, like their company, role, or plan type.
Here’s how to create one:
1. Go to the Contacts tab
Open your LiveChatAI dashboard and click Contacts from the menu.
2. Click on “Contact Attributes”
This is where all your custom fields are listed.

3. Click the “Create Attribute” button
You’ll see this at the top right of the Contact Attributes page.
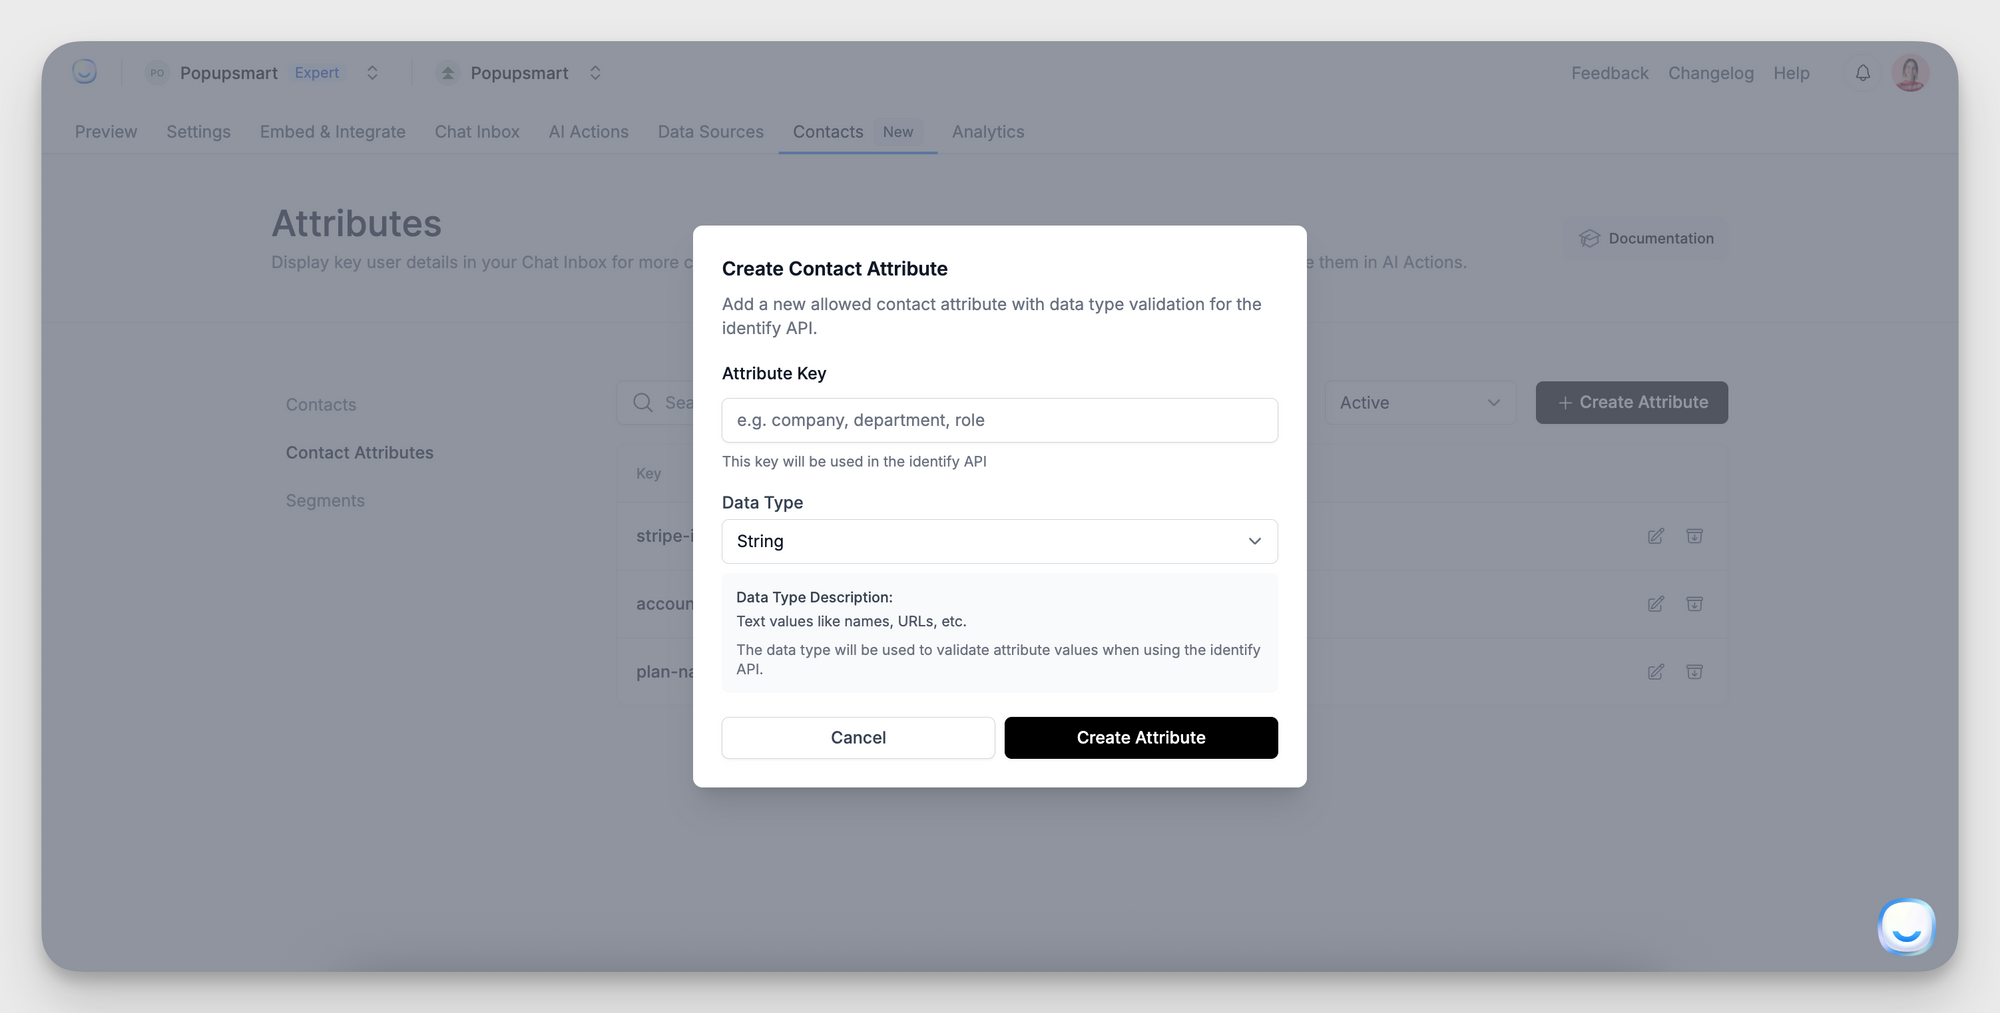
4. Fill out the form:
→ Attribute Key: This is the name of the field (example: company, plan_type, or team_size)
→ Data Type – Choose the type of data this field will store:
- String – for text (e.g., names, tiers)
- Number – for numeric values (e.g., user ID, amount spent)
- Boolean – for yes/no flags (e.g.,
is_active) - Timestamp – for date-time values (e.g., signup date)
5. Click “Create”
That’s it! You’ve added a new custom attribute.
Supported Data Types
When creating a Contact Attribute, choose one of the following data types:
Managing Attributes
- You can archive an attribute to deactivate it.
- You can edit the data type of an existing attribute.
- You cannot edit or delete the attribute key after it’s created.
Archived attributes are excluded from filtering, segmenting, and display. You can restore them anytime.
Next Steps
Once you’ve created your Contact Attributes:
- Use the Identify API to pass attribute values during user sessions.
- Apply filters to create Segments (available on Enterprise Plan).
For advanced setup or troubleshooting, feel free to reach out to [email protected].