🔌 WhatsApp Integration for LiveChatAI: Step-by-Step Guide
With LiveChatAI’s new WhatsApp Integration, you can run your AI chatbot directly on WhatsApp. Once connected, your bot will respond to customer messages via WhatsApp Business — automatically and in real-time.
This guide walks you through the complete integration process.
✅ Before You Start
Make sure you have:
- A Meta (Facebook) account
- Access to Meta Business Manager
- A valid phone number (can receive SMS or calls)
- An active LiveChatAI subscription
🧭 Step 1: Go to the “Embed & Integrate” Tab
From your LiveChatAI dashboard:
- Click on the top menu tab: Embed & Integrate
- Scroll to find WhatsApp Integration
- Click Add to WhatsApp
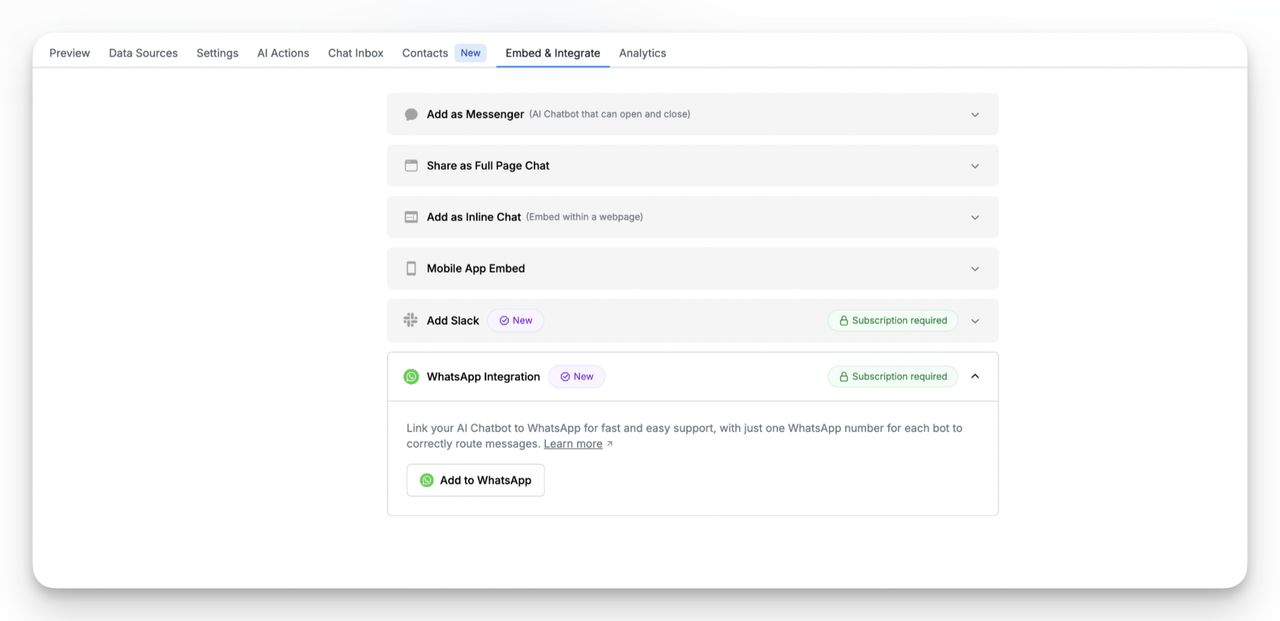
⚠️ Note: A paid plan is required to unlock this feature.
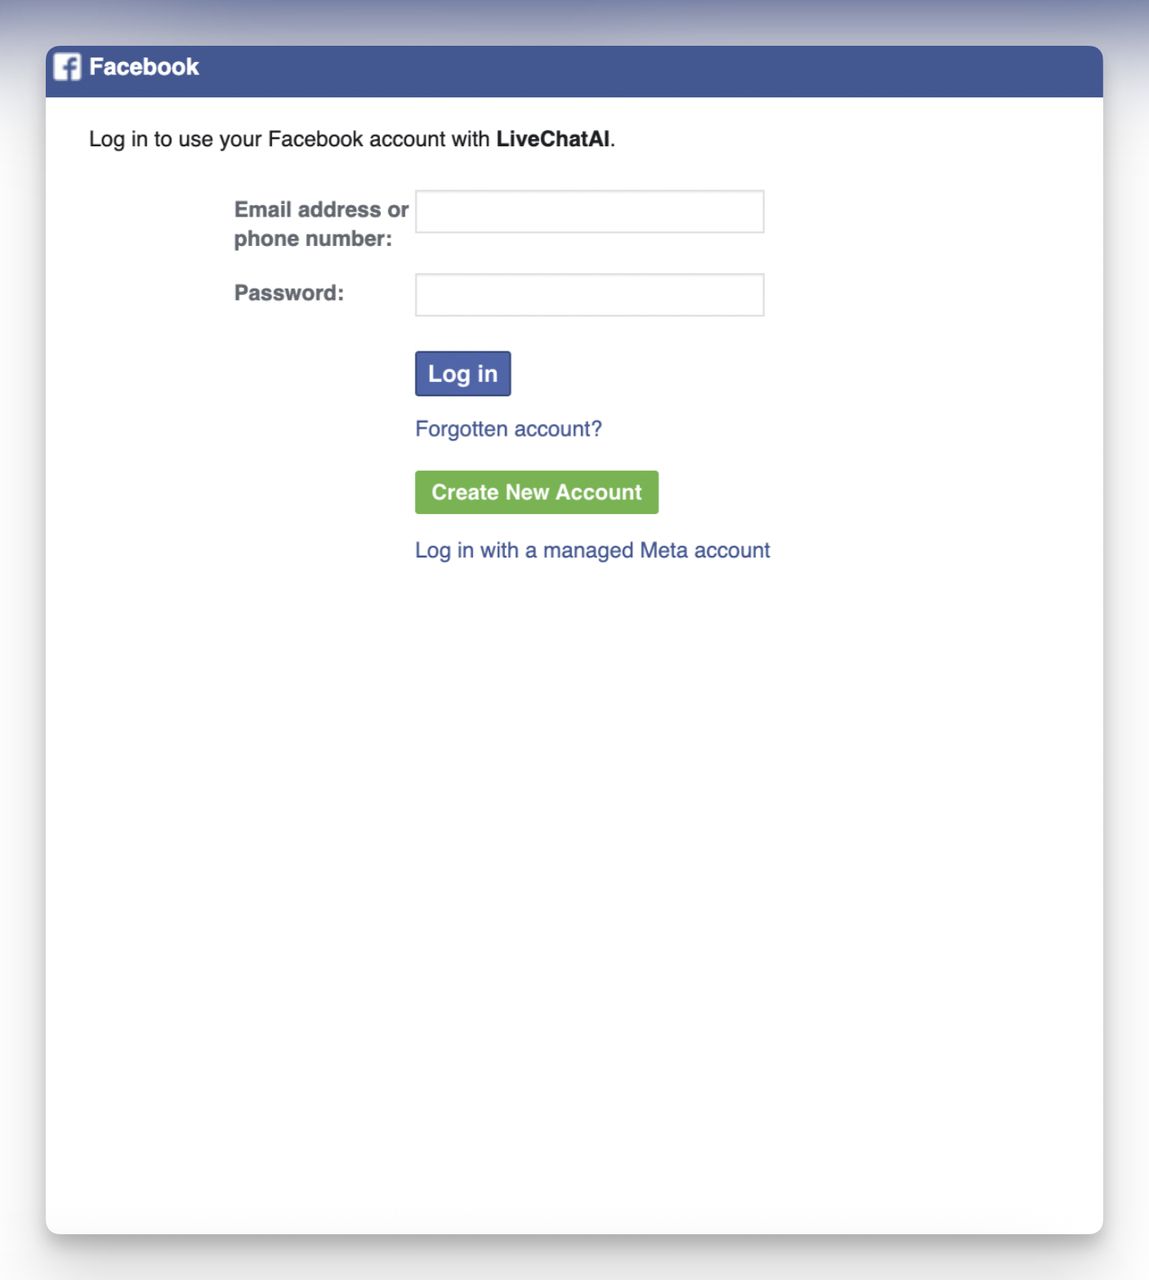
🔐 Step 2: Log In with Facebook (Meta)
You’ll be redirected to Meta’s login screen:
- Enter your Facebook (Meta) account credentials
- Click Log in
3. You’ll see a prompt:
"Continue as [Your Name]?”
Confirm to proceed
![Continue as [user name] to connect LiveChatAI; confirms profile access for WhatsApp setup.](https://help.livechatai.com/content/images/2025/09/contunie-as-name.jpg)
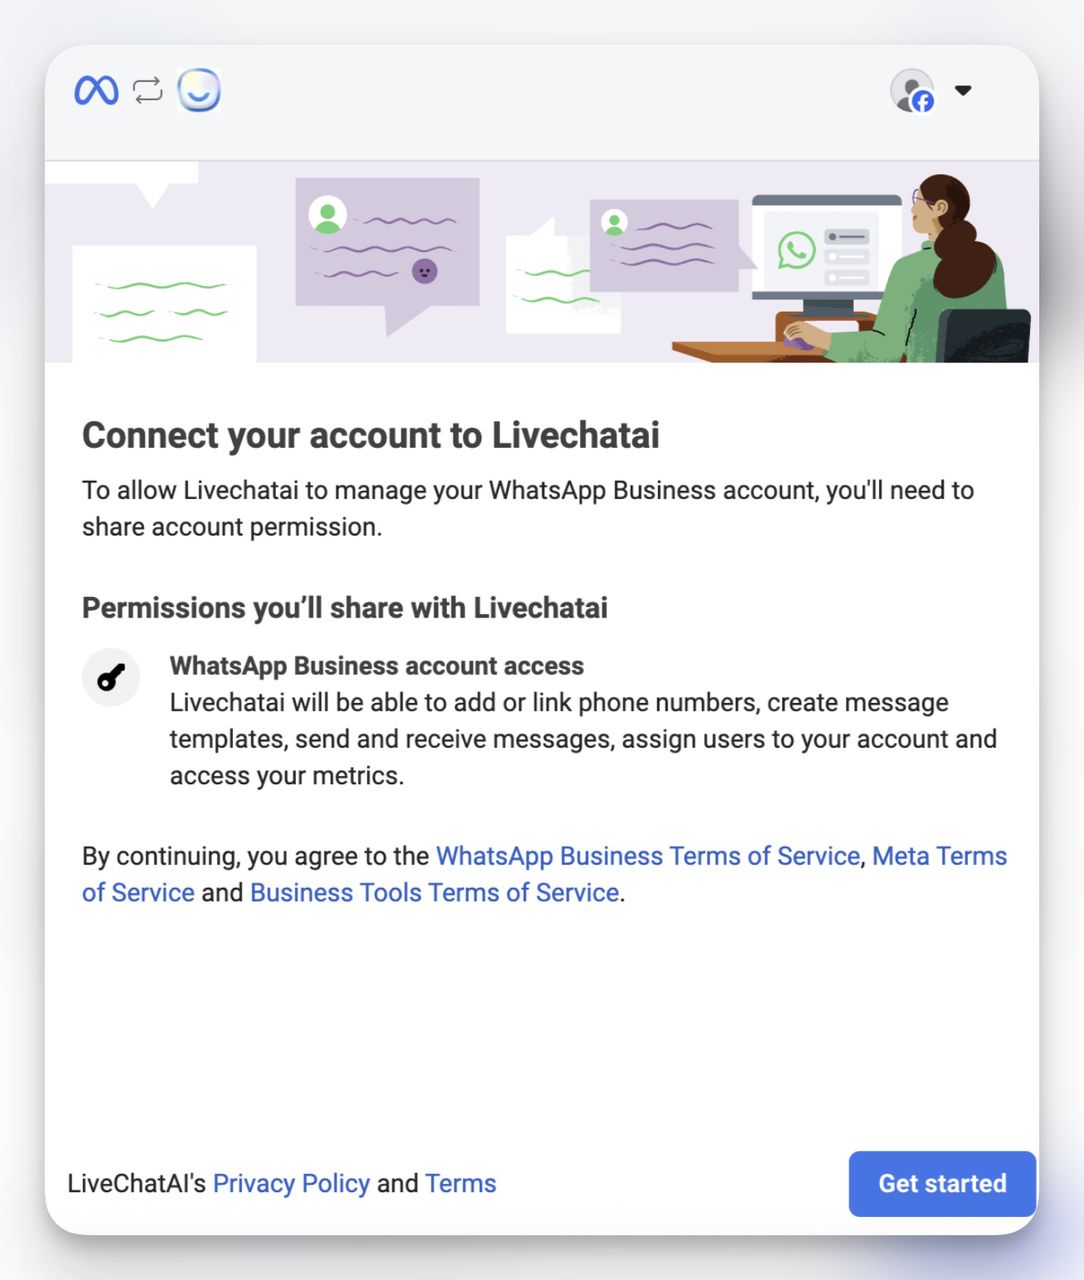
🔗 Step 3: Grant Permission to LiveChatAI
- Meta will ask to connect your WhatsApp Business account to LiveChatAI
- Review what LiveChatAI will be able to access:
- Add/link phone numbers
- Send/receive messages
- Access metrics and templates
3. Click Get Started to continue
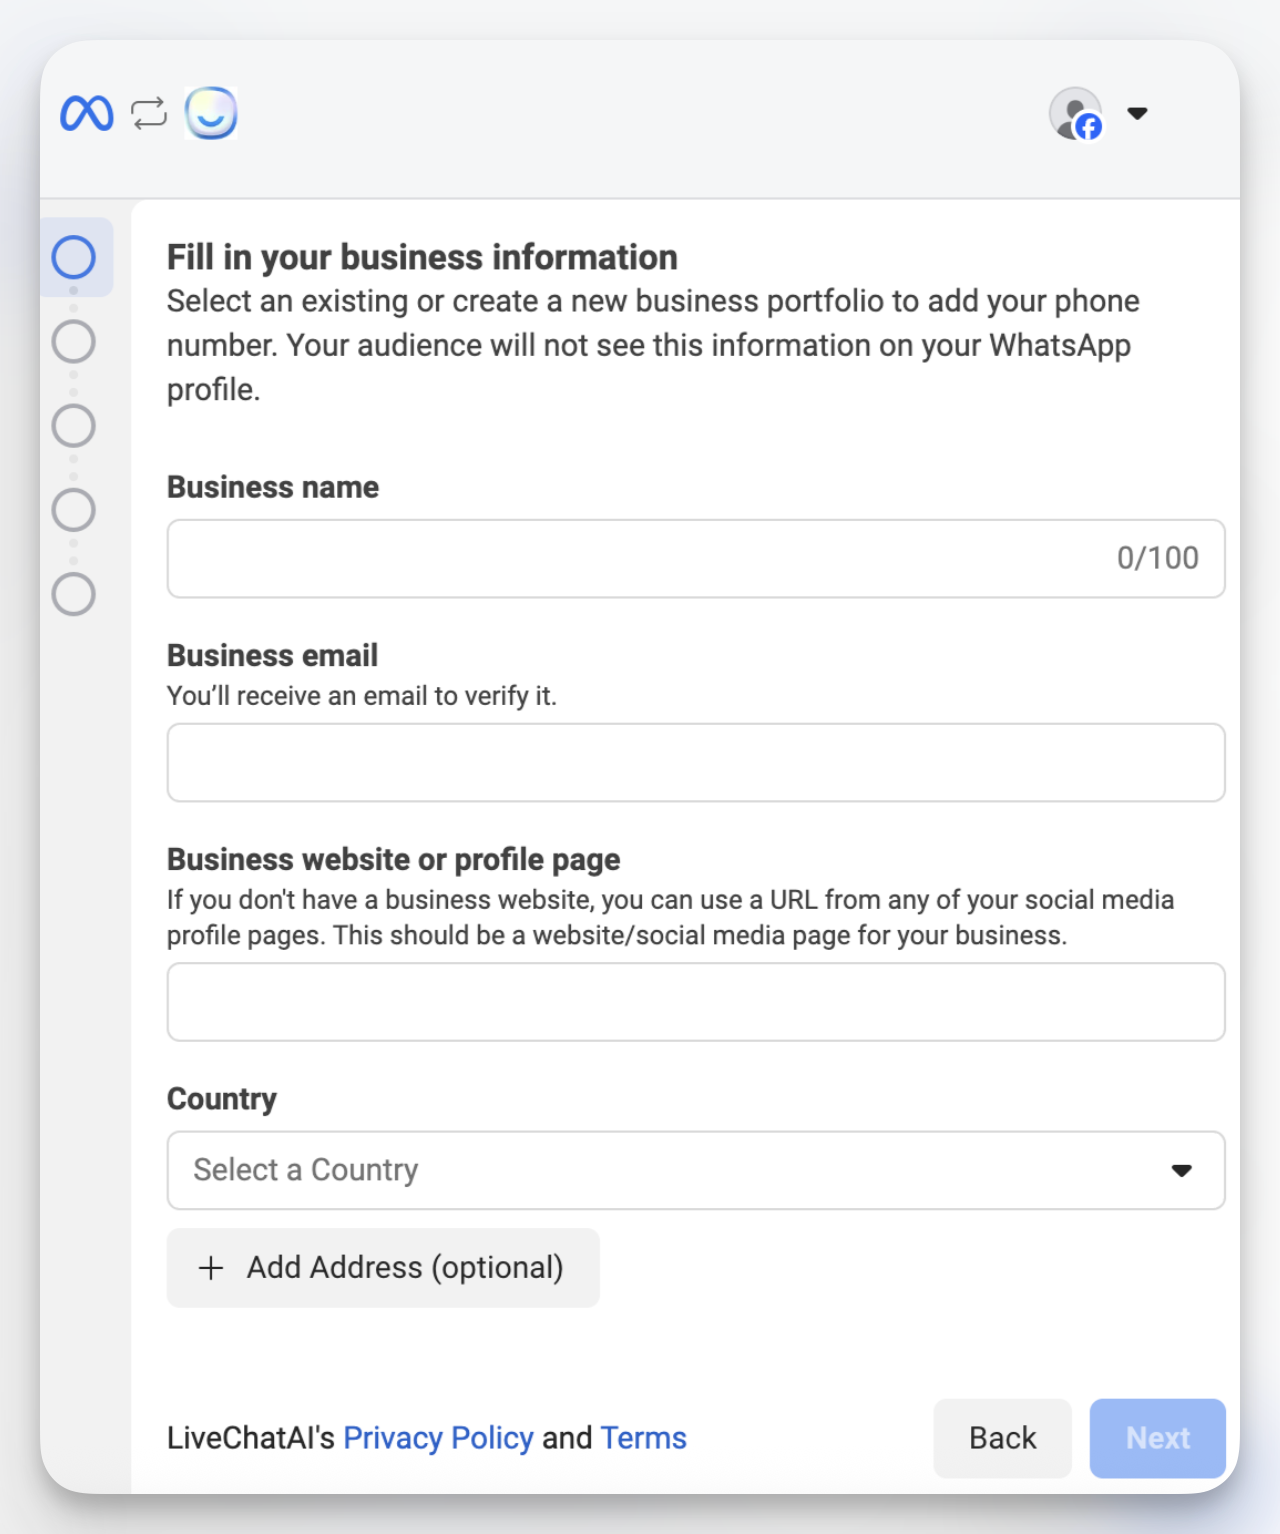
🏢 Step 4: Fill in Your Business Details
You’ll now set up your WhatsApp Business Profile:
- Business Name
- Business Email (will be used for verification)
- Business Website or Profile Page (Facebook, Instagram, etc.)
- Country
- (Optional) Business Address
Then, click Next.
🧾 Step 5: Create or Select a WhatsApp Business Account
You’ll be asked to:
- Choose or create a WhatsApp Business Account
- Create a new Business Profile (you can reuse this later)
Click Next.

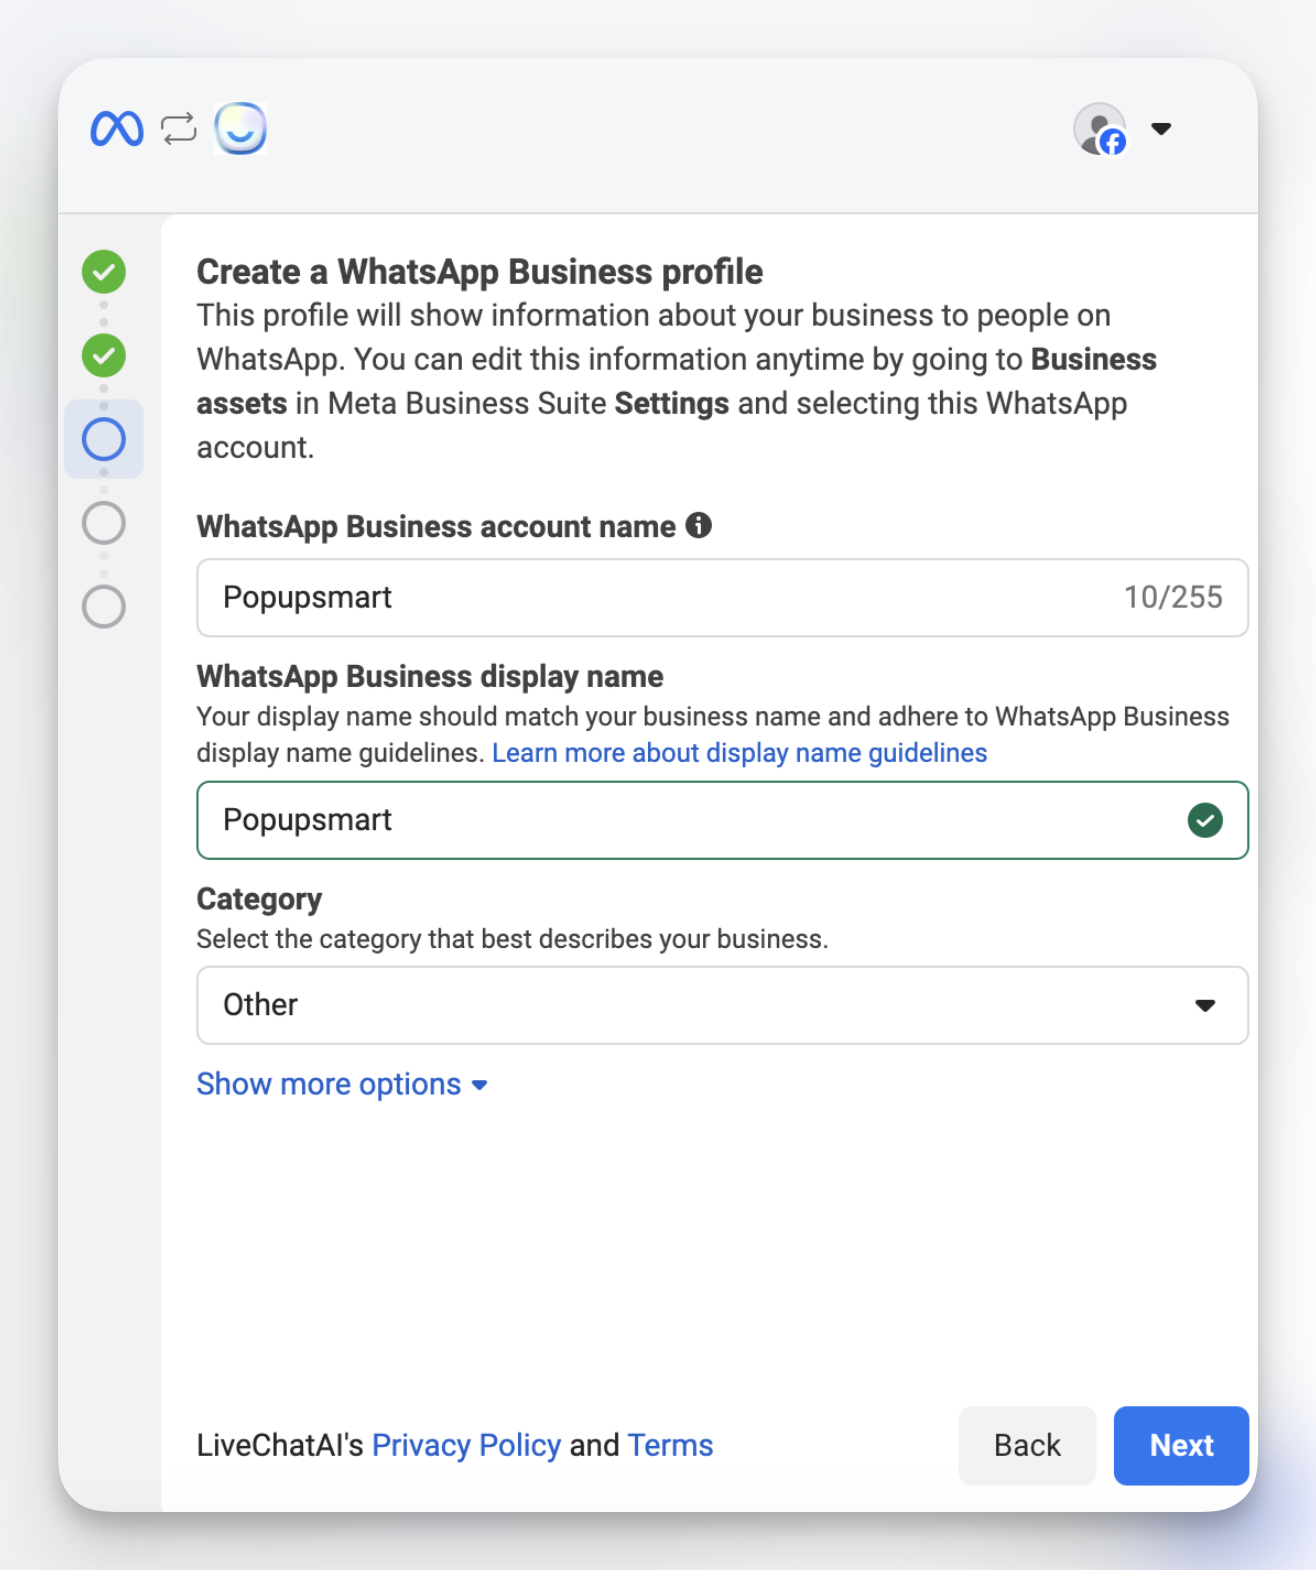
📝 Step 6: Configure Your WhatsApp Business Profile
Now define how your business will appear on WhatsApp:
- WhatsApp Business Account Name → e.g. ACME Company
- Display Name → must match your brand
- Category → Select your business type (e.g., Other, Retail, Education)
Click Next.
☎️ Step 7: Add Your WhatsApp Phone Number
Choose one:
- Use display name only (if you already have a number set up)
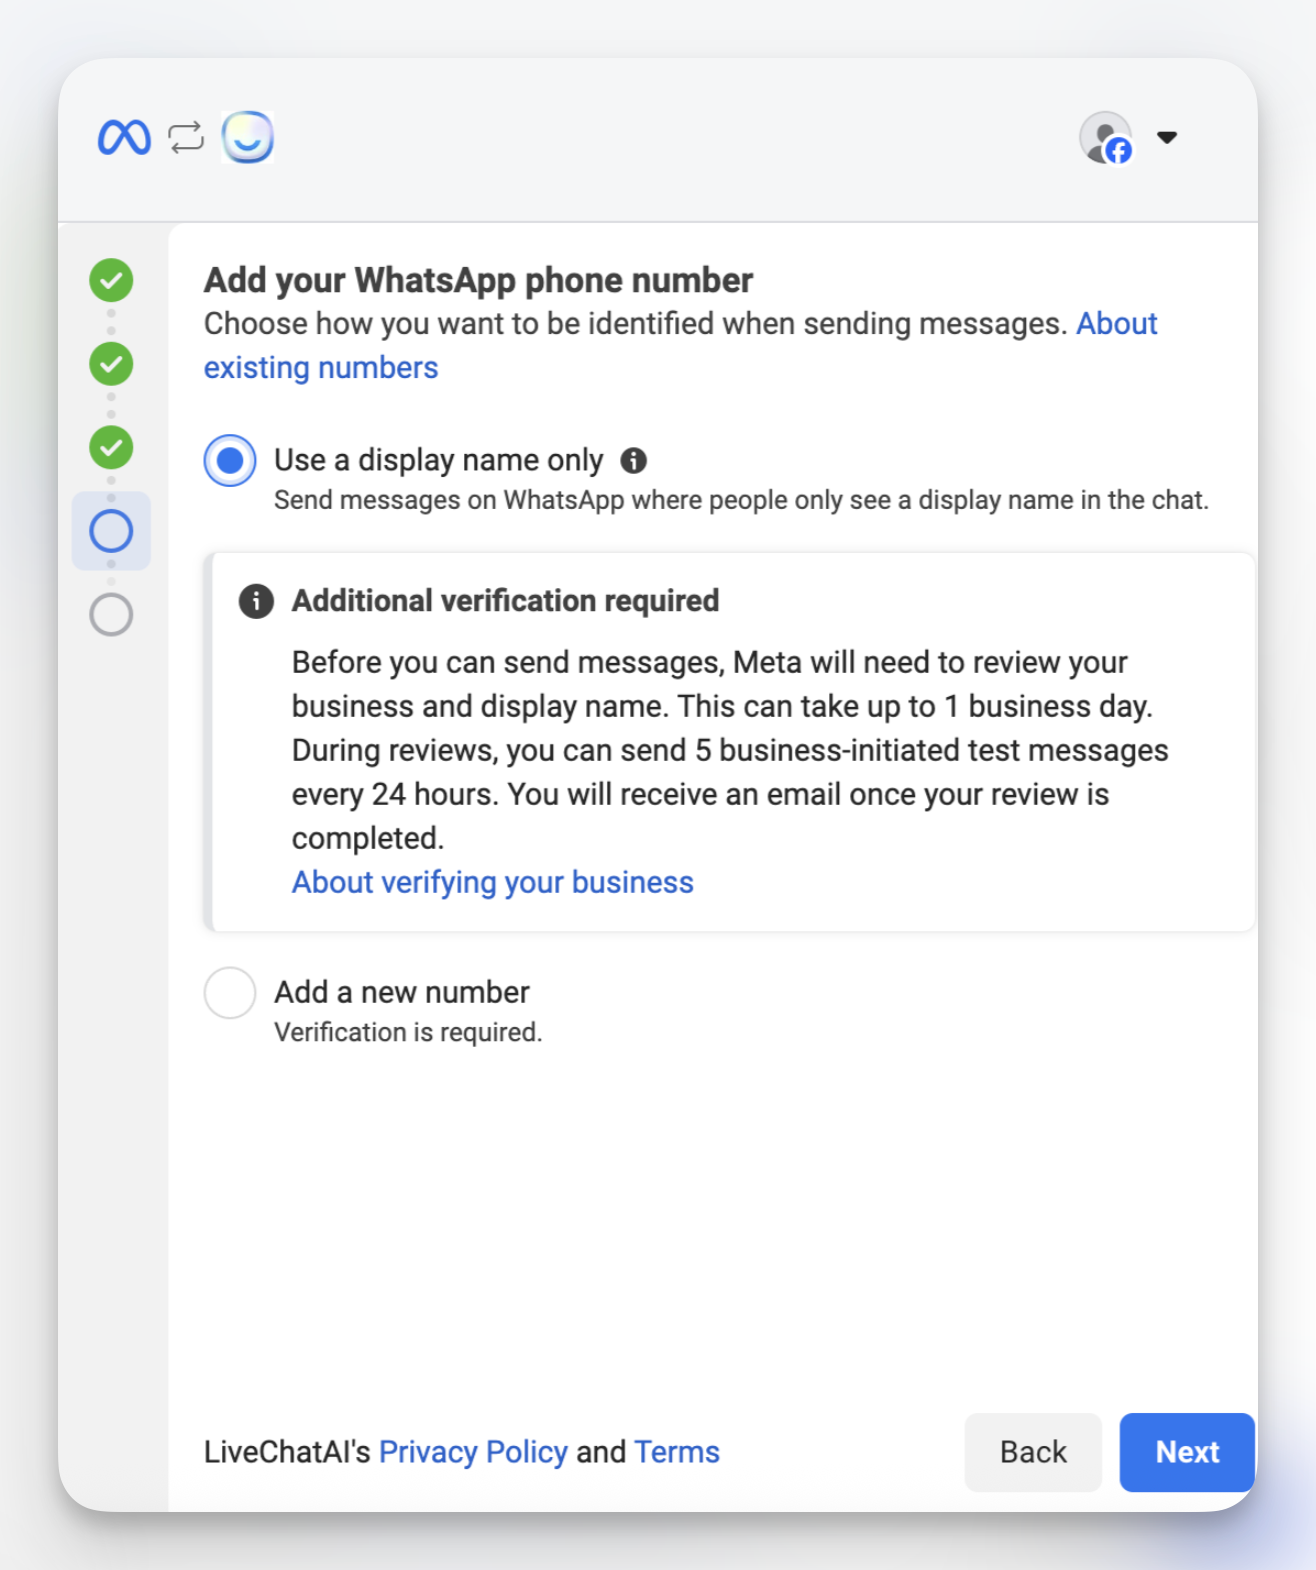
OR
- Add a new number (recommended)
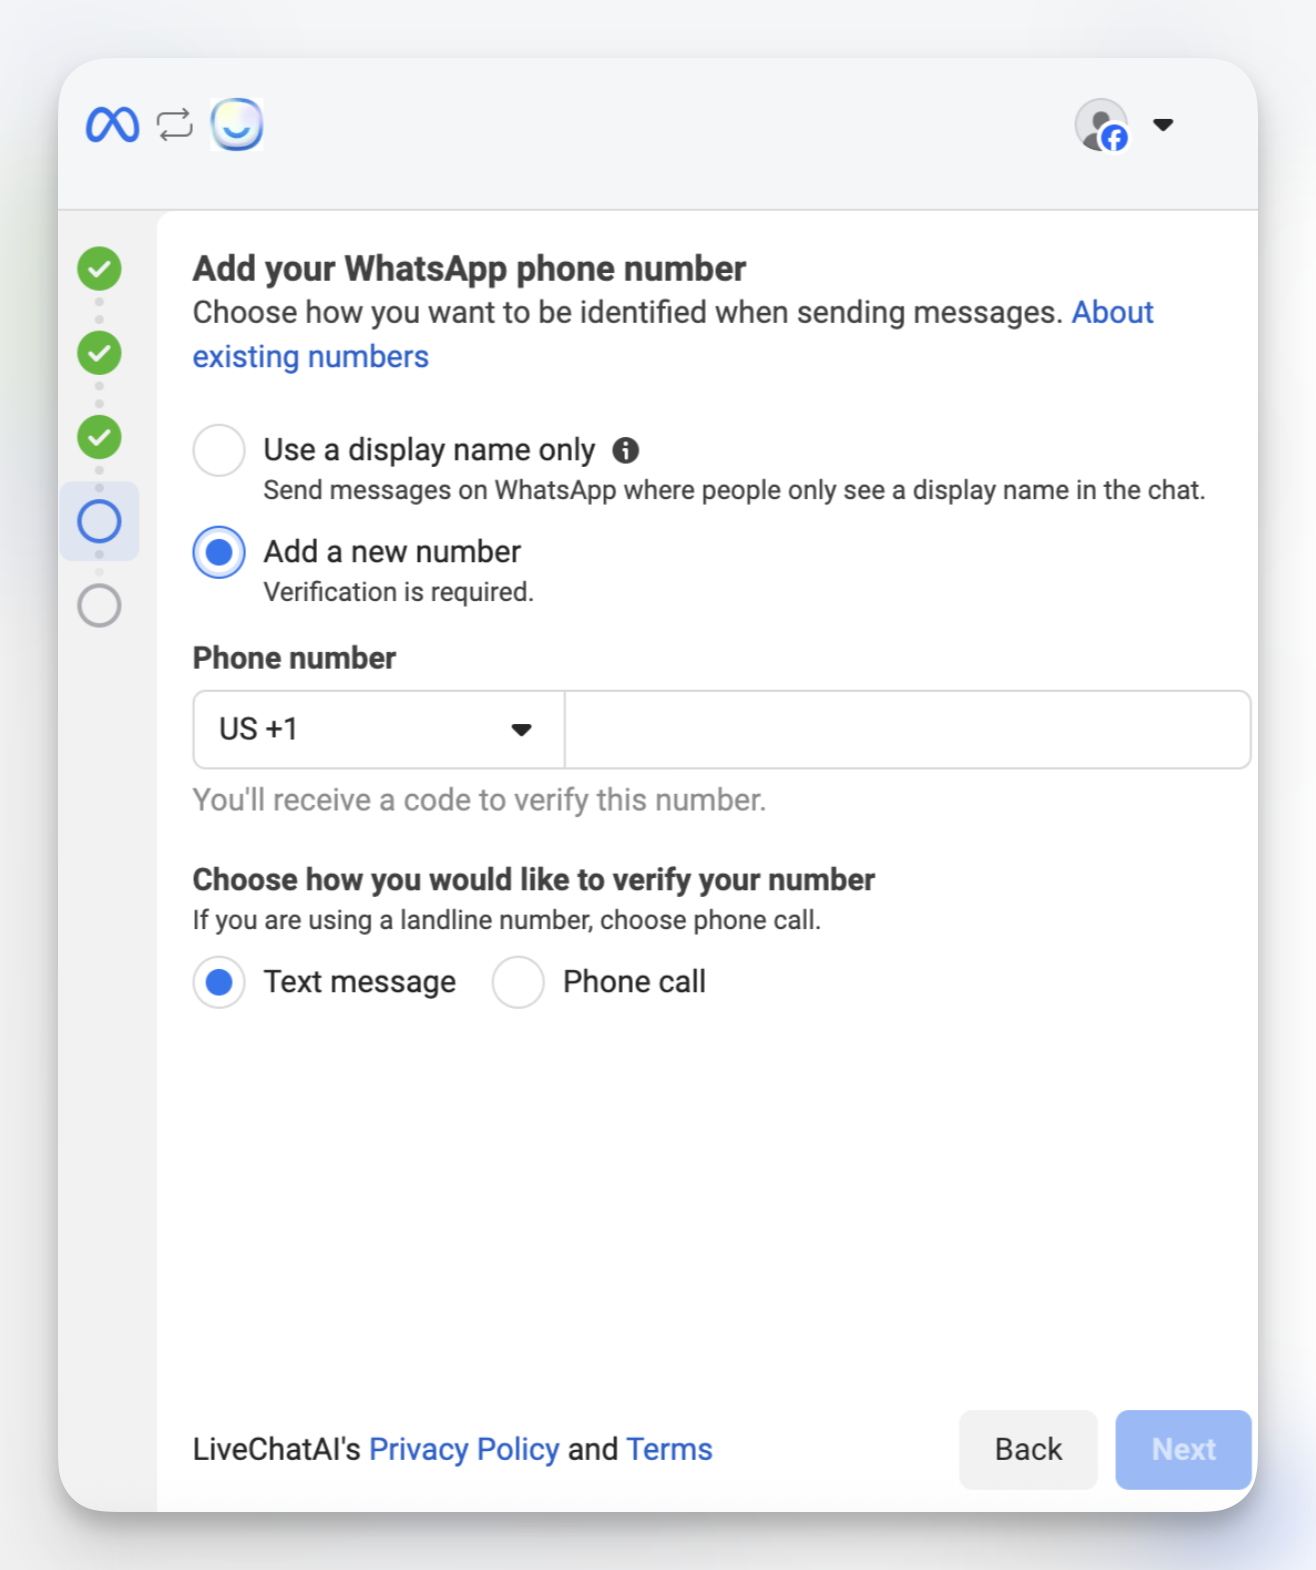
To add a new number:
- Select your country code
- Enter your phone number
- Choose Text message or Phone call for verification
✅ Step 8: Verify Your Phone Number
- You’ll receive a 6-digit code via SMS or call
- Enter the code to verify ownership
Once verified, click Next.
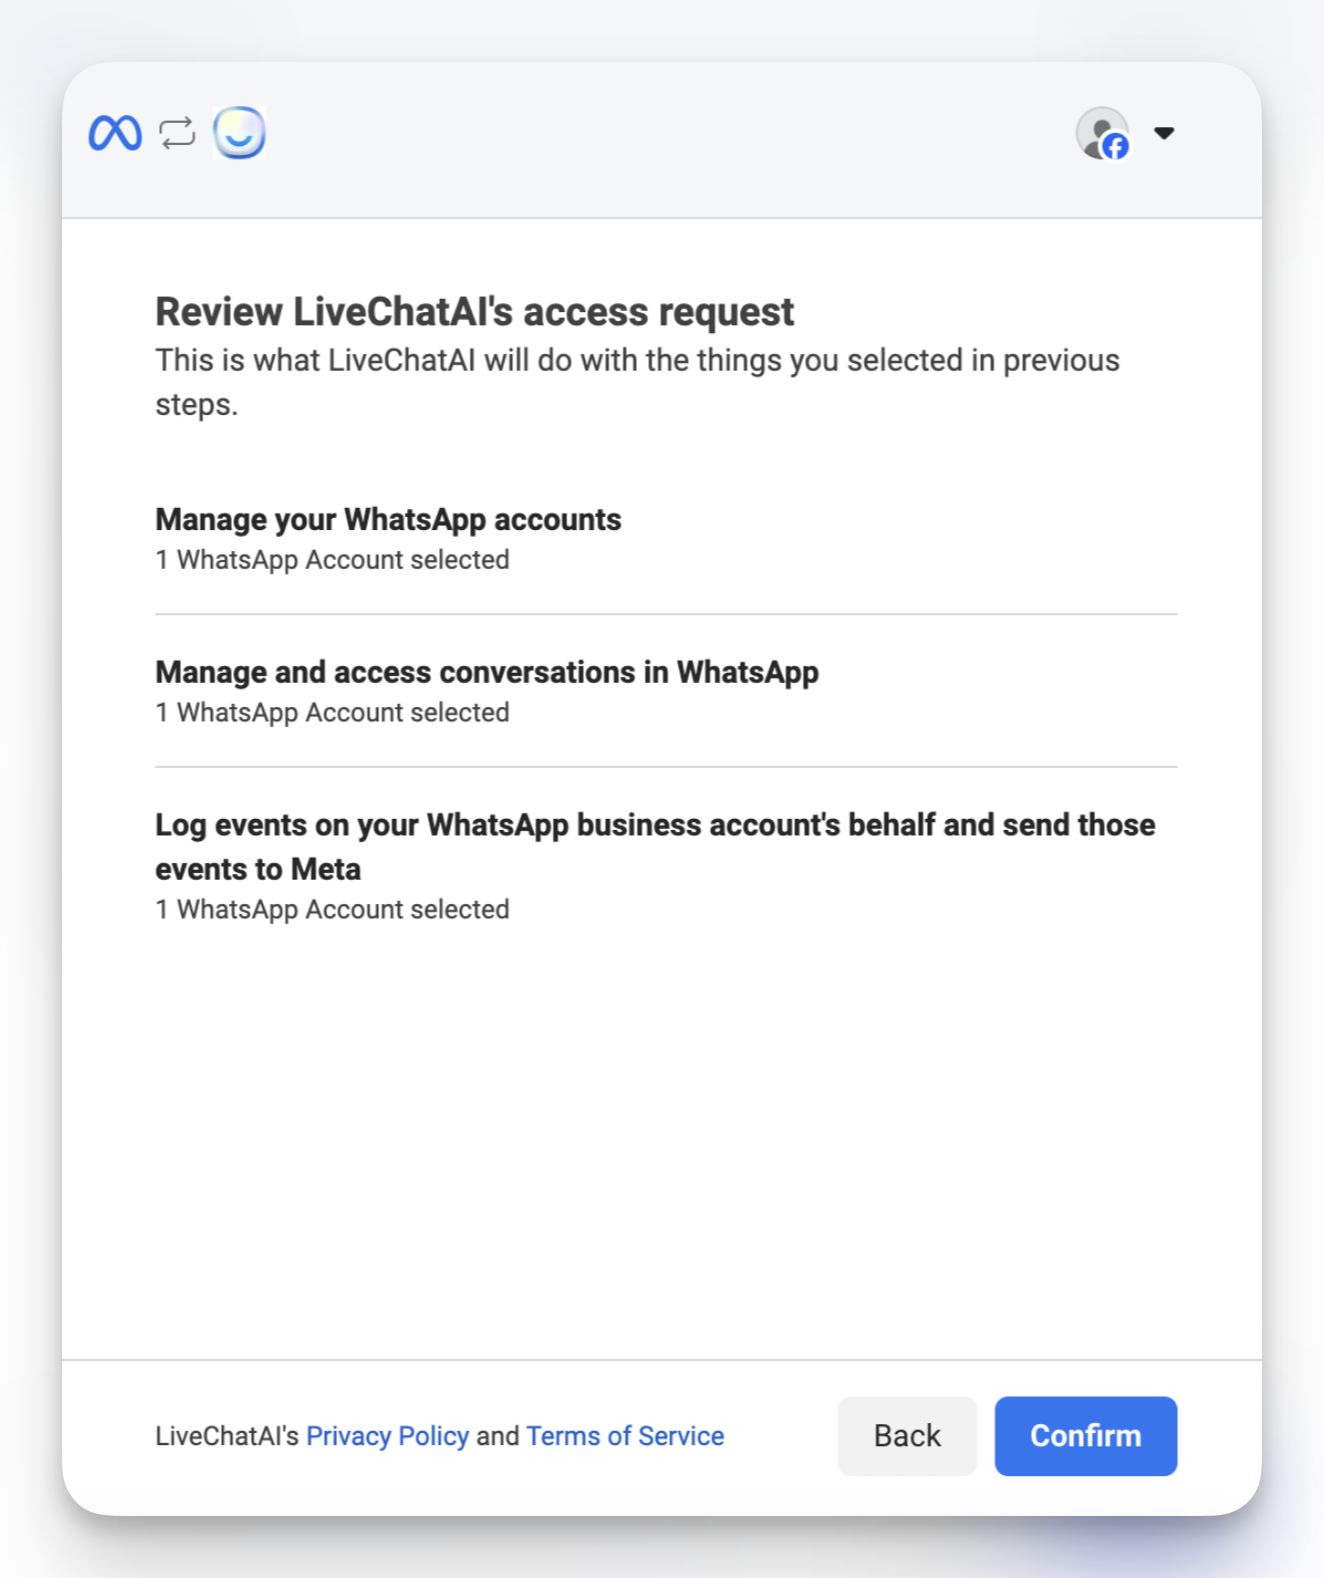
🔍 Step 9: Review & Confirm Permissions
Review what LiveChatAI will be allowed to do:
- Manage WhatsApp accounts
- Access and respond to conversations
- Log events on your behalf
📌 What Happens Next?
After setup, Meta performs three automatic reviews in the background:
You don’t need to take any further action at this point. Just finish the setup.
📳 Final Setup View
When everything is set up successfully, your WhatsApp integration in LiveChatAI will look like this:
- ✅ You’ll see your linked phone number
- 📱 You can test the chatbot by scanning the QR code or sending a message to the number
- 🔁 Option to delete integration or view details