Add Messenger Widget to Your Site
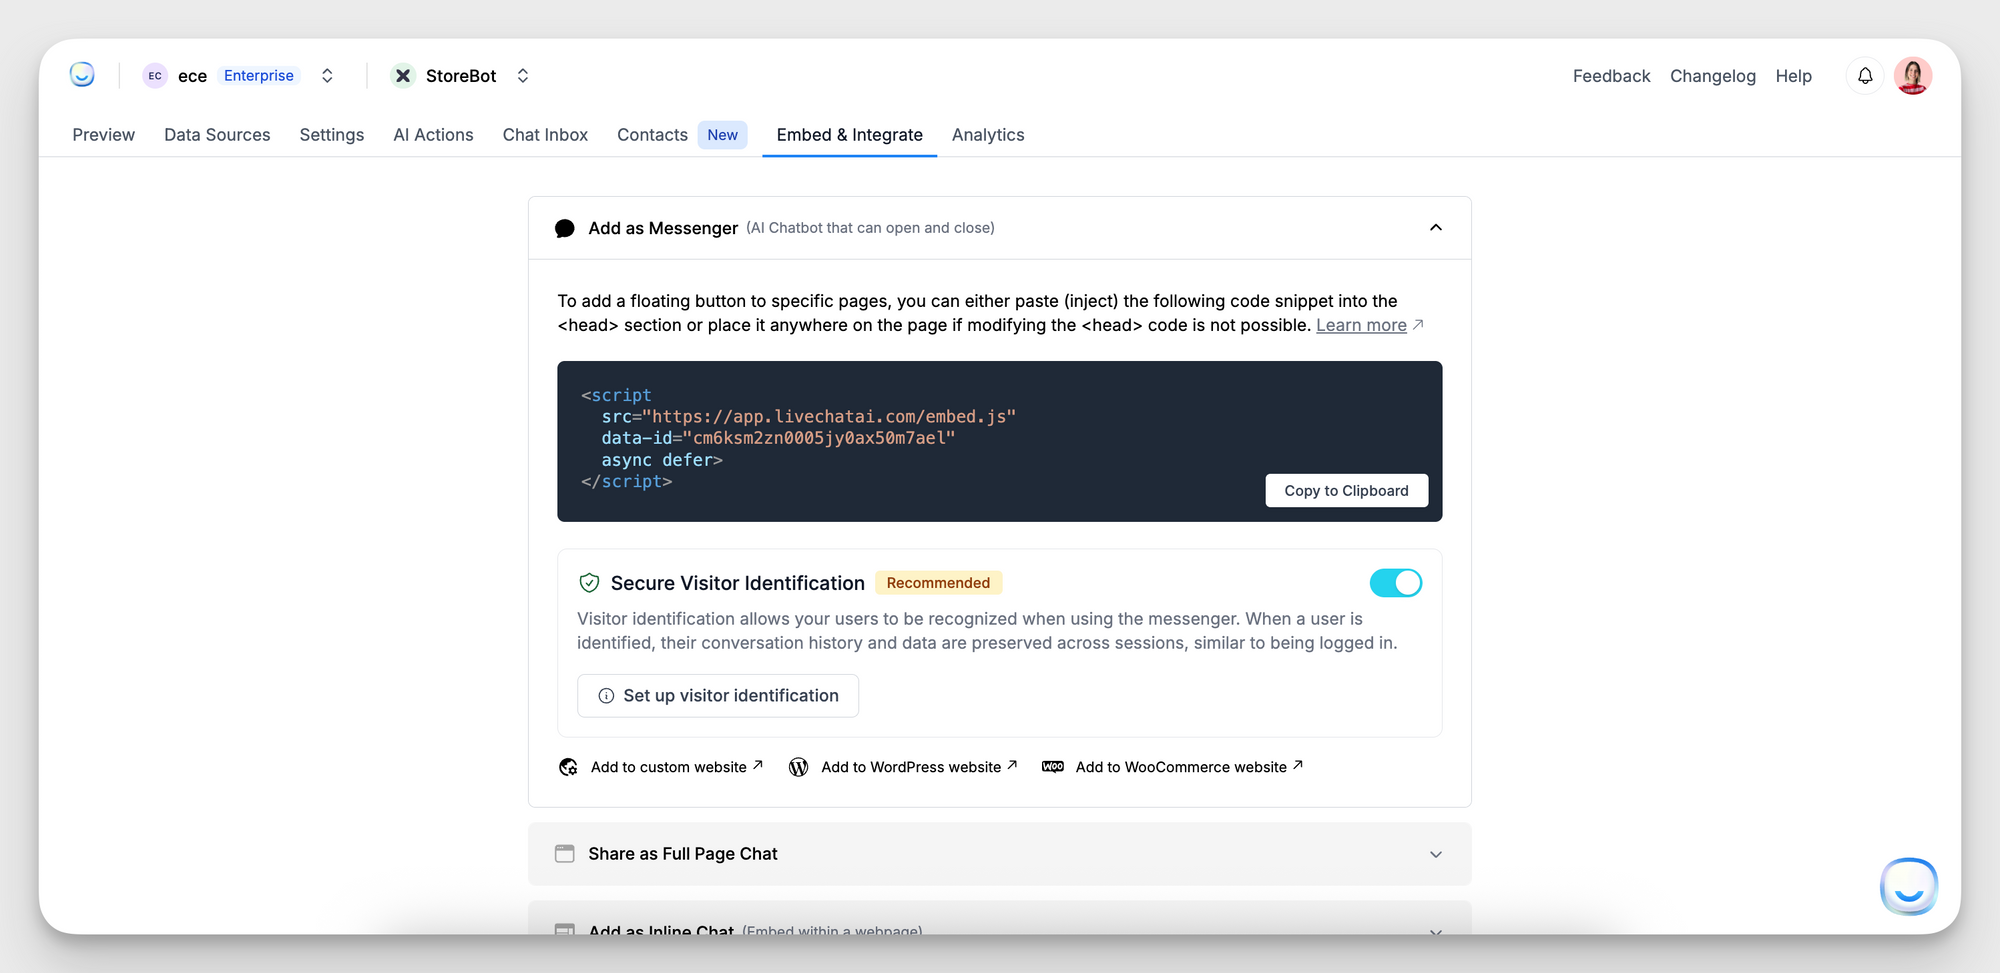
The Messenger Widget adds a floating chat button to any page, enabling visitors to open and close your AI chatbot at will. It’s the simplest way to bring LiveChatAI into your site without a full-page layout.
Prerequisites
- A LiveChatAI workspace with an active chatbot
- Access to modify your site’s HTML (you’ll need to paste a script)
Installation Steps
1. Open Embed & Integrate → Add as Messenger
In your LiveChatAI dashboard, click Embed & Integrate in the top menu, then expand Add as Messenger.

2. Copy the embed script
3. Paste into your site
- Ideally, insert the script into the <head> section of every page where you want the widget
- If you cannot edit <head>, you may place it just before the closing </body> tag.
4. Save and publish
Deploy your changes. The floating chat icon should appear once the page loads.
5. Verify in Preview
Return to Embed & Integrate and click Test on live site to confirm the widget opens your chatbot.
Platform-Specific Guides
- Custom Website: Paste the snippet into your HTML template.
- WordPress: Use the “Header and Footer” plugin or your theme’s header.php.
- WooCommerce: Add the snippet via a child theme or a code-snippet plugin.
Best Practices
- One snippet per site: Avoid duplicate installations.
- Load asynchronously: The async defer attributes ensure your page performance isn’t impacted.
- Exclude on restricted pages: Don’t display the widget on login or payment pages if not needed.
- Test on staging: Verify behavior before pushing to production.
FAQ
Do I need to regenerate the script for a new chatbot?
Yes. Each chatbot has a unique data-id. Copy the new snippet after creating or cloning a chatbot.
Can I customize the widget’s appearance?
Visit Embed & Integrate → Customize Messenger Widget to adjust colors, position, and welcome text.
What if the widget doesn’t appear?
- Confirm the script is on every page’s HTML.
- Check browser console for errors.
- Ensure your site isn’t blocking third-party scripts.
For further assistance, email [email protected] with a link to your page and any error messages.