Cal.com AI Action
Let your chatbot handle scheduling. With the Cal.com AI Action, your AI assistant can display your Cal.com booking widget whenever a visitor requests a meeting, all without manual intervention.
What It Does
Once connected, your chatbot can respond to scheduling-related queries by surfacing your Cal.com booking page. This allows users to book time directly through the conversation interface.
How to Set Up Cal.com AI Action
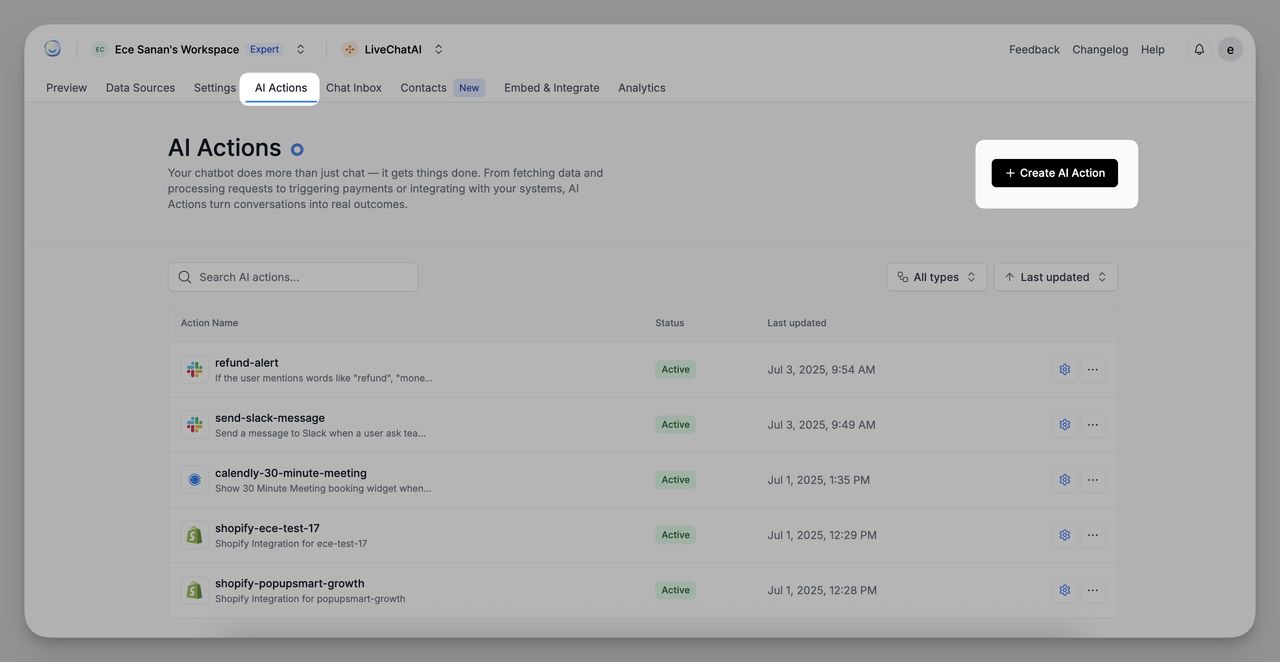
1. Go to AI Actions
Navigate to the AI Actions tab in your workspace and click on + Create AI Action.
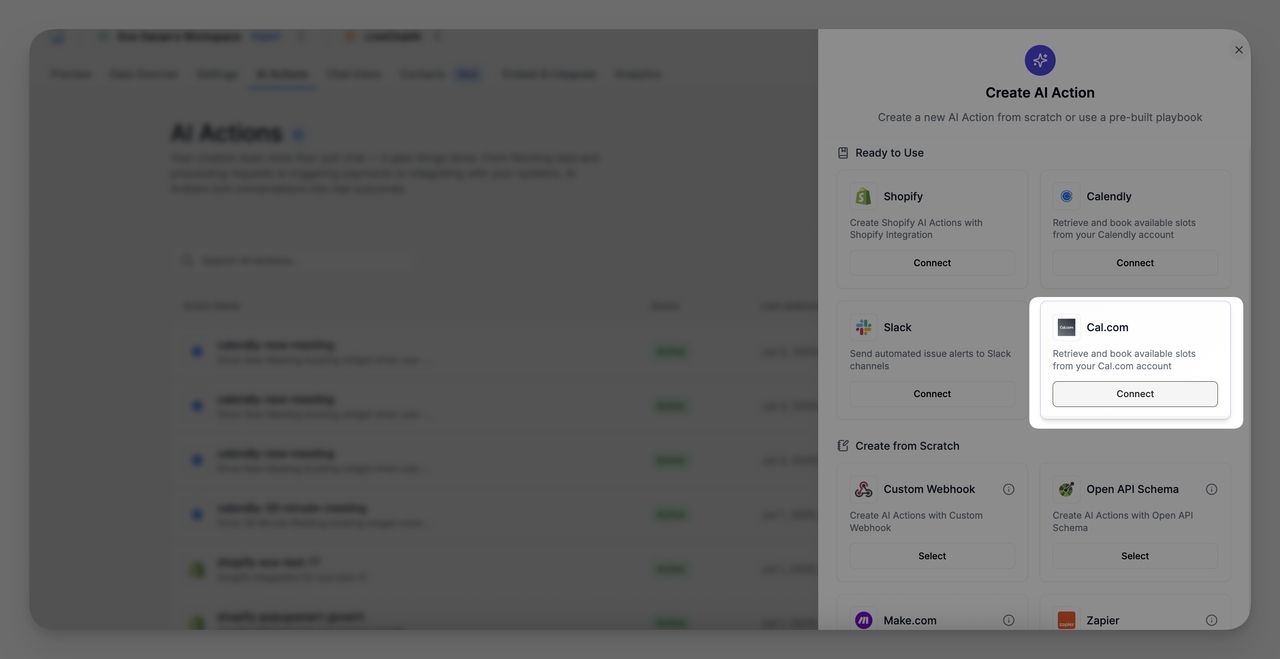
2. Choose Cal.com
Under the Ready to Use section, click Connect on the Cal.com tile.
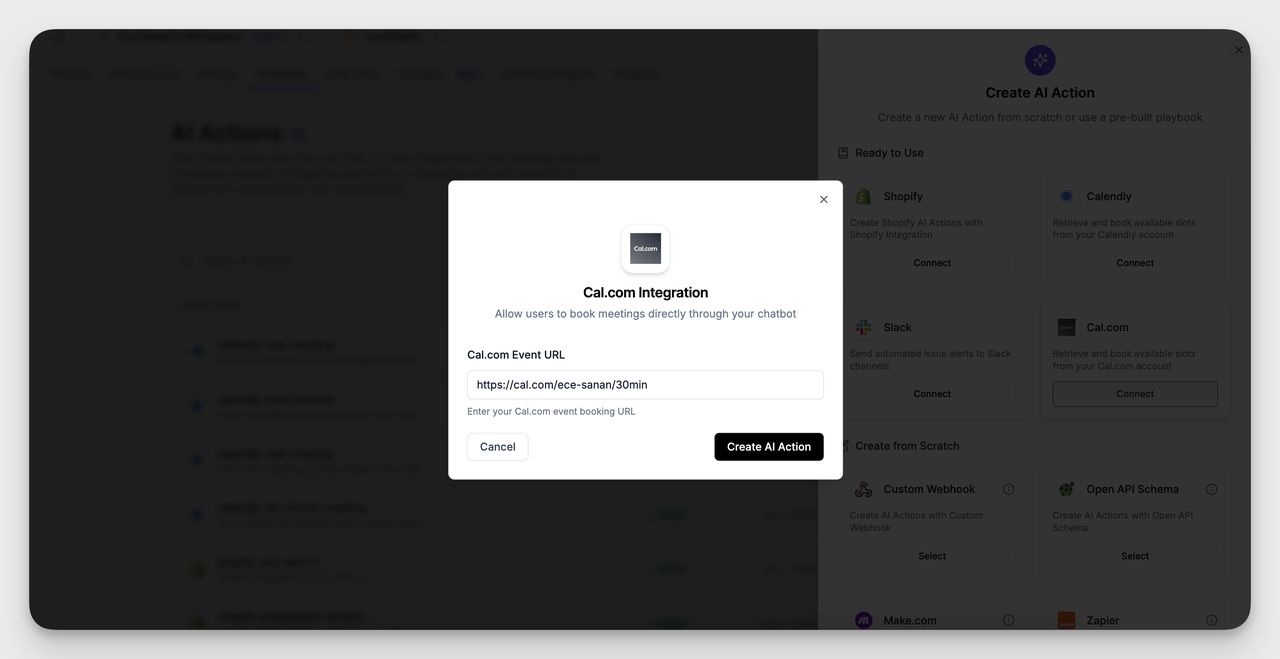
3. Enter Your Cal.com Event URL
Paste your Cal.com event booking link (e.g., https://cal.com/your-name/30min) in the field.
Click Create AI Action to continue.
4. Define Action Details
In the “Edit AI Action” modal:
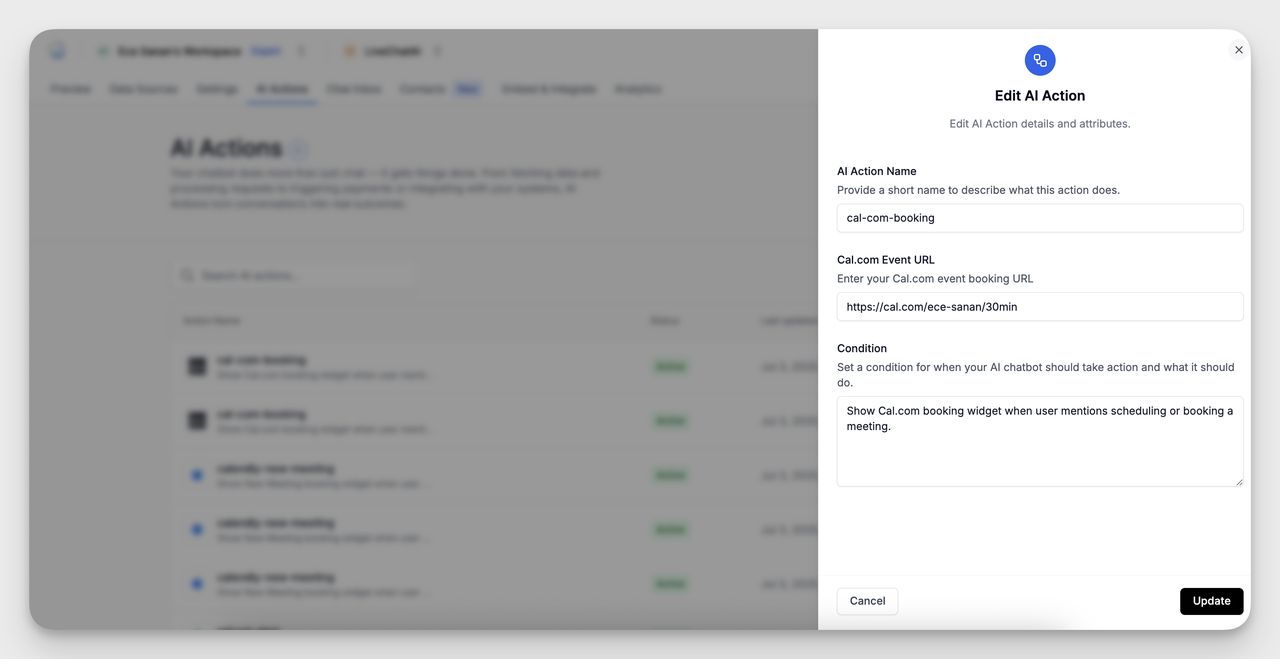
- AI Action Name: Name the action for internal use (e.g., cal-com-booking)
- Event URL: Confirm or edit your Cal.com booking link
- Condition: Define the trigger for the action (e.g., “Show Cal.com booking widget when user mentions scheduling or booking a meeting.”)
Click Update to save the action.
Example Use Case
Chatbot Response: "Your meeting is successfully scheduled! Please check your email for the confirmation and further details. Looking forward to our conversation!"
- The chatbot detects the scheduling intent and displays your Cal.com booking interface, letting the user reserve a slot immediately.
If you need help connecting your Cal.com account or setting trigger conditions, feel free to reach out to our support team.